Ansible Service Catalog
Ansible Service Catalog
This part of the lab will guide you through the process of setting up an Service Catalog Item which runs an Ansible Playbook.
Power on target VM
The following lab will use UI customization to illustrate how easy it is to add additional functionality to CloudForms. The example will use an Ansible Playbook which will be executed on a Virtual Machine. Ansible uses SSH to access the remote machine and therefore the VM has to be powered on. The following steps will power on a Virtual Machine which we later use as the target for the Ansible Playbook.
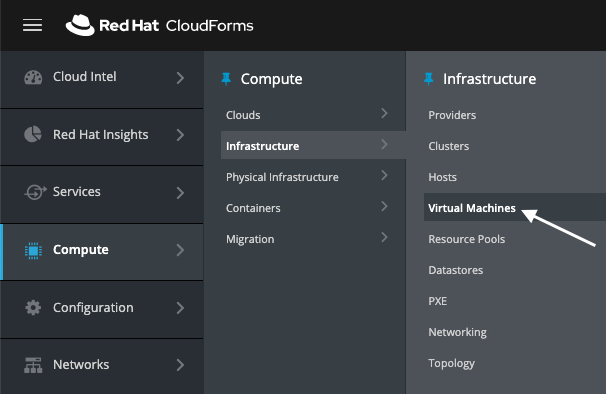
Navigate to Compute -> Infrastructure -> Virtual Machines
Tiles represent the Virtual Machines. Note that the VM “cfme008” is powered off.
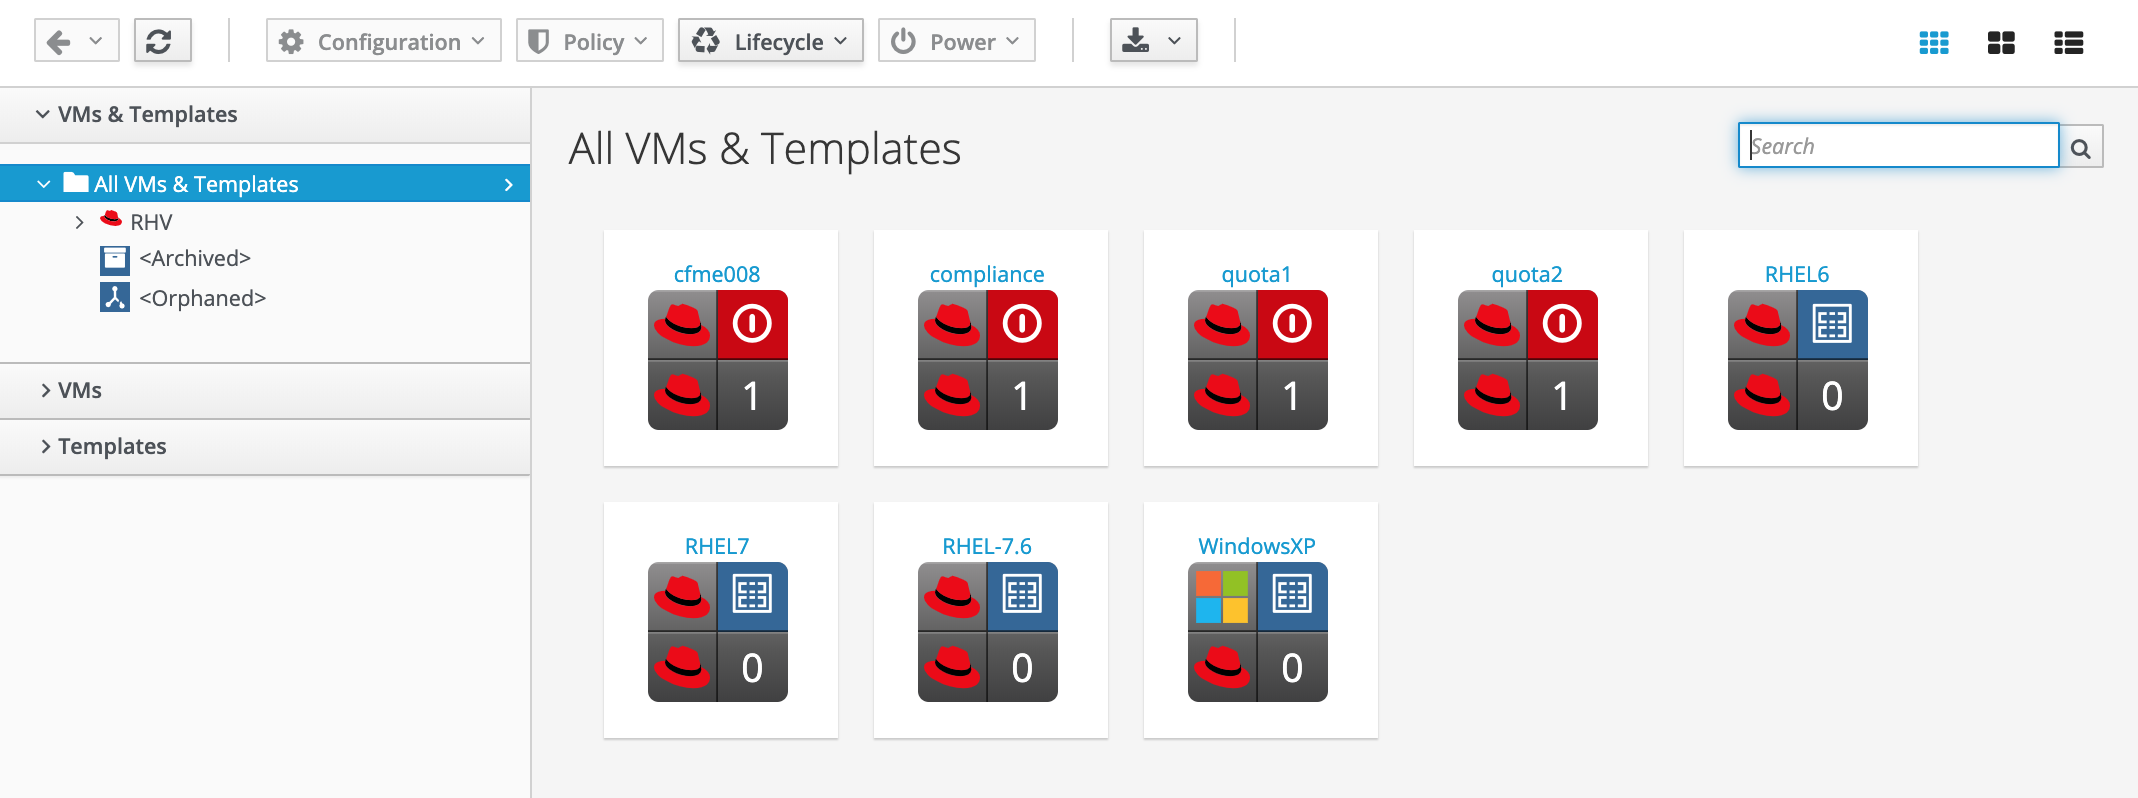
Click on the tile icon “cfme008” to see the VM details.
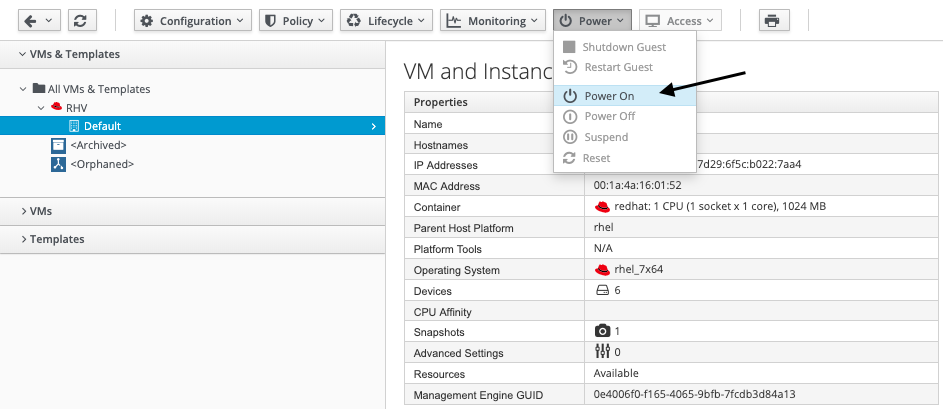
Click Power -> Power On to power on the Virtual Machine
CloudForms will perform this action in the background and it will take a few minutes to complete. Click on the reload icon in the menu bar to reload the screen.
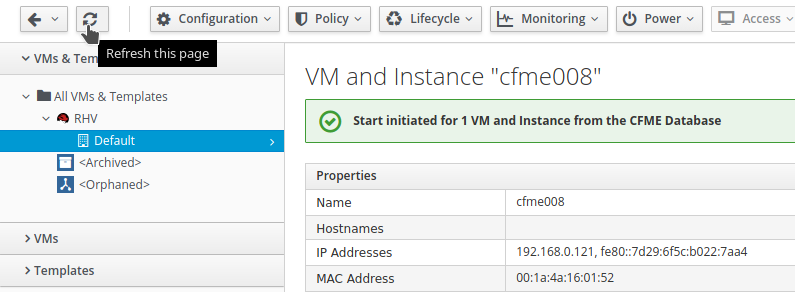
Verify the “Power State” of the Virtual Machine has changed to “on” before you proceed with the next steps of the lab.
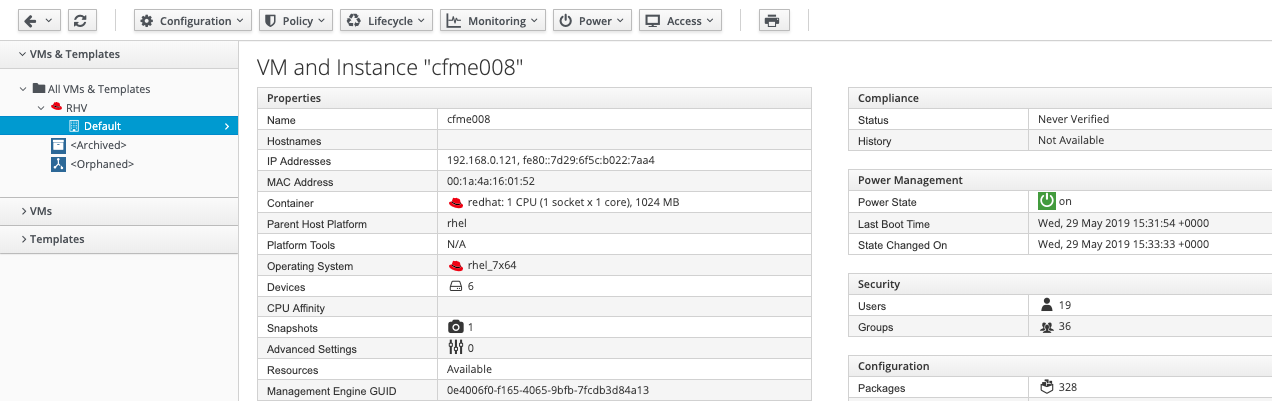
The VM should also report an IP address in the 192.168.0.0/24 network.
Now our test VM is up and running and we can proceed with the next steps.
Make sure Embedded Ansible role is enabled and running
Before we continue, we want to make sure the Embedded Ansible role is enabled and running.
Click on your user name on the top right and click on Configuration

Make sure the “Embedded Ansible” and the “Git Repositories Owner” Roles are enabled
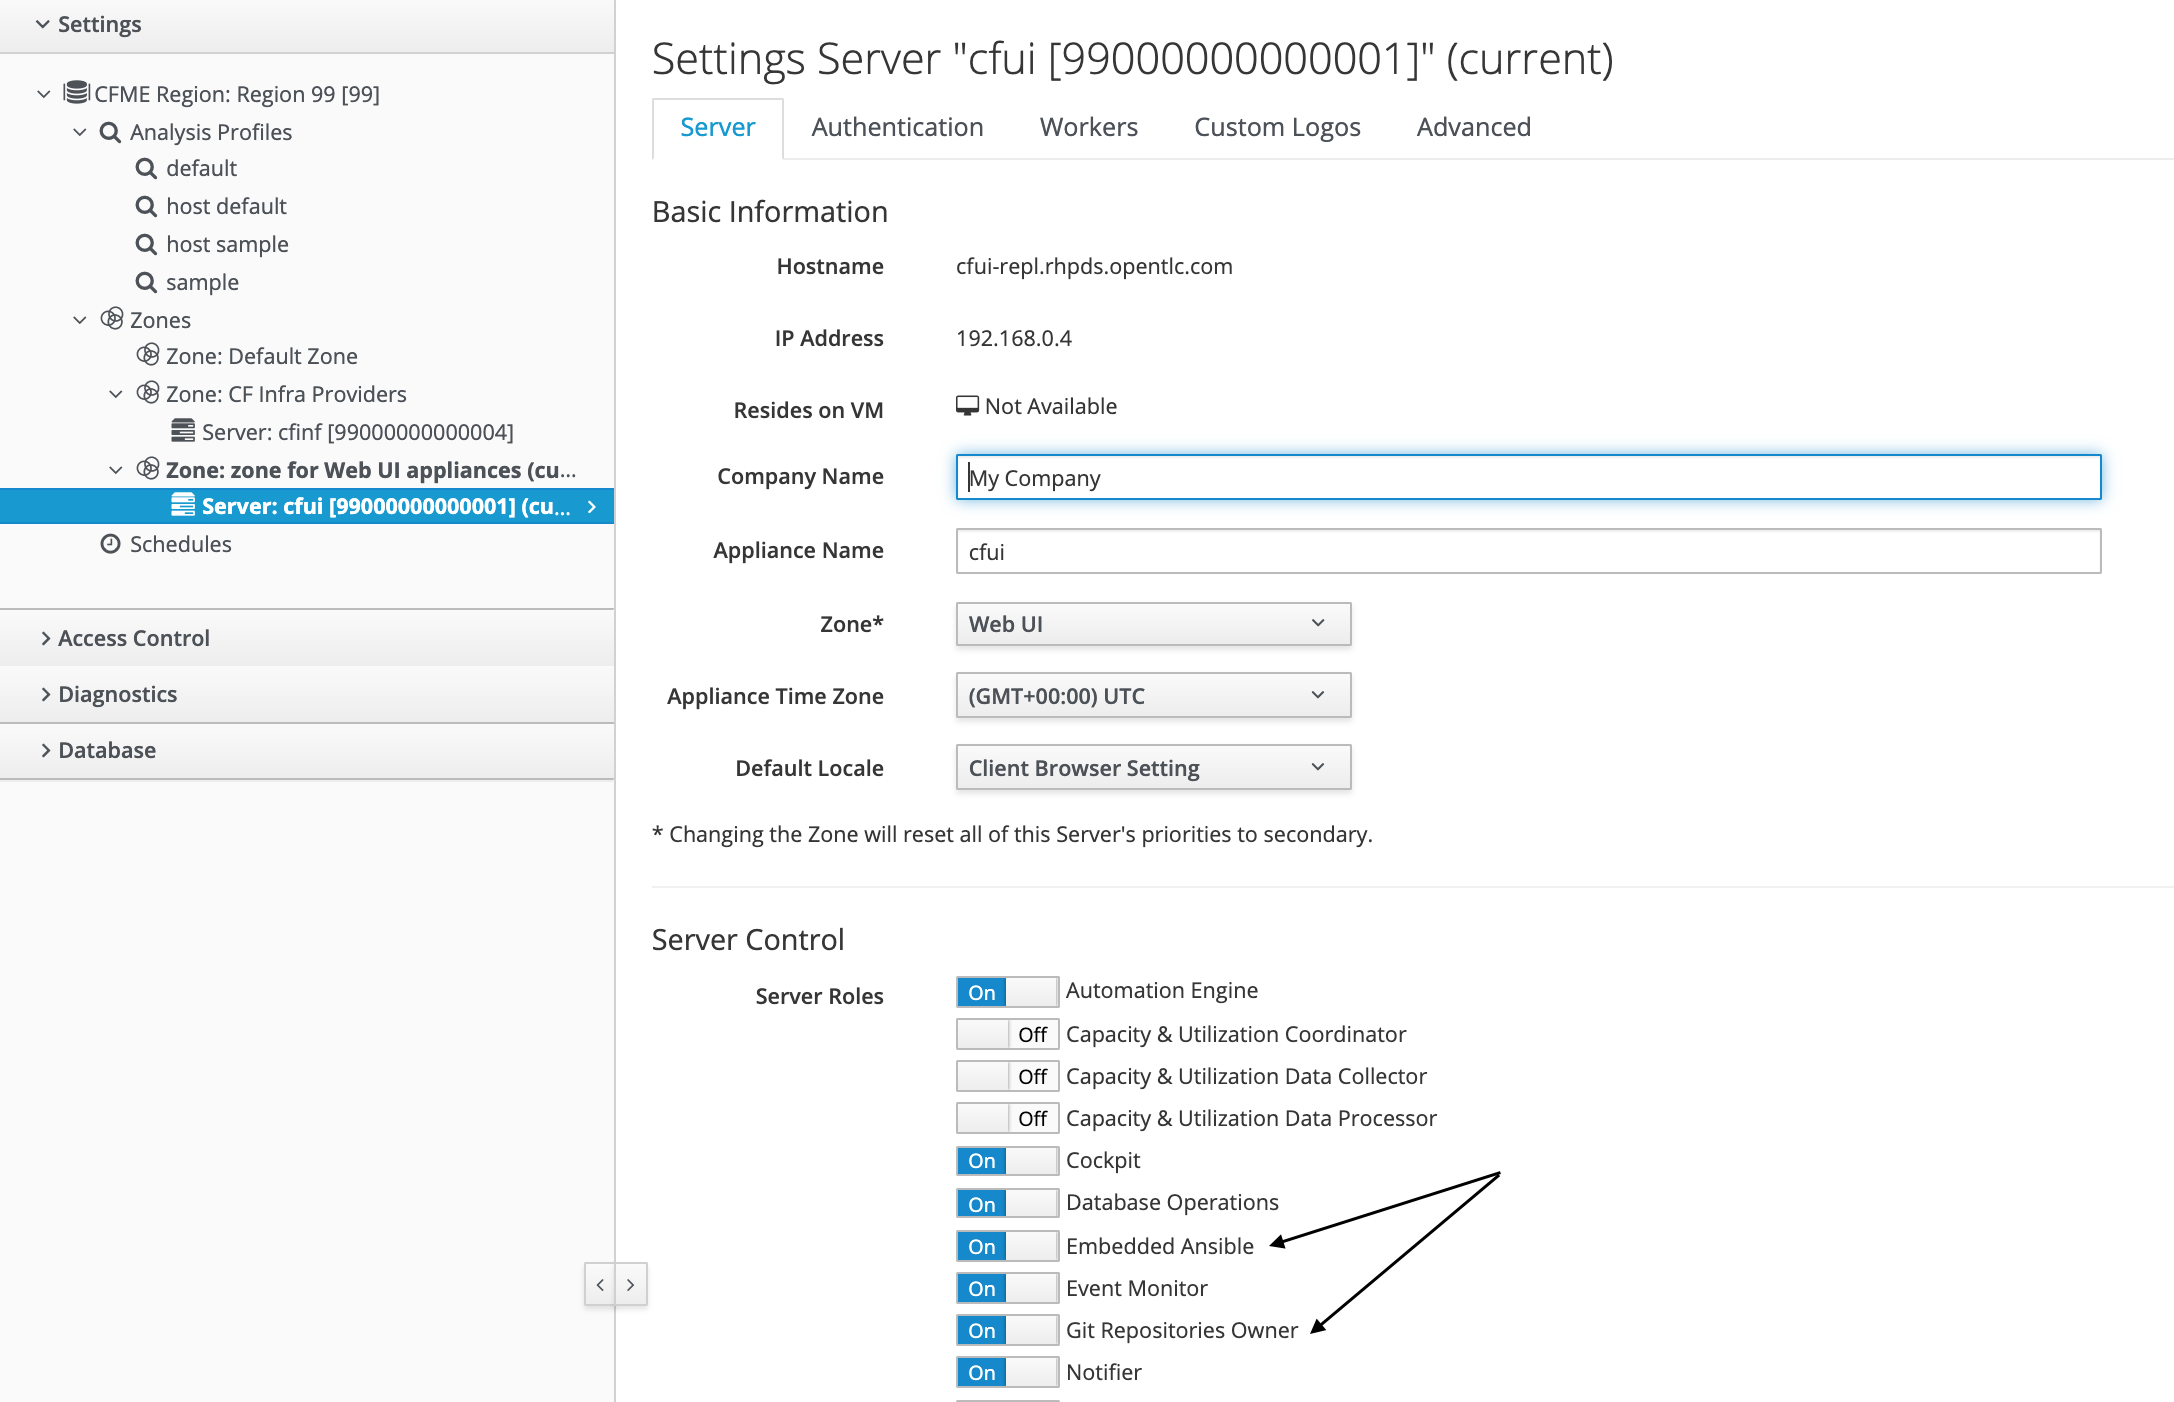
We use DHCP to assign IP addresses in this lab, the IP address in the screenshot might be different from your appliance.
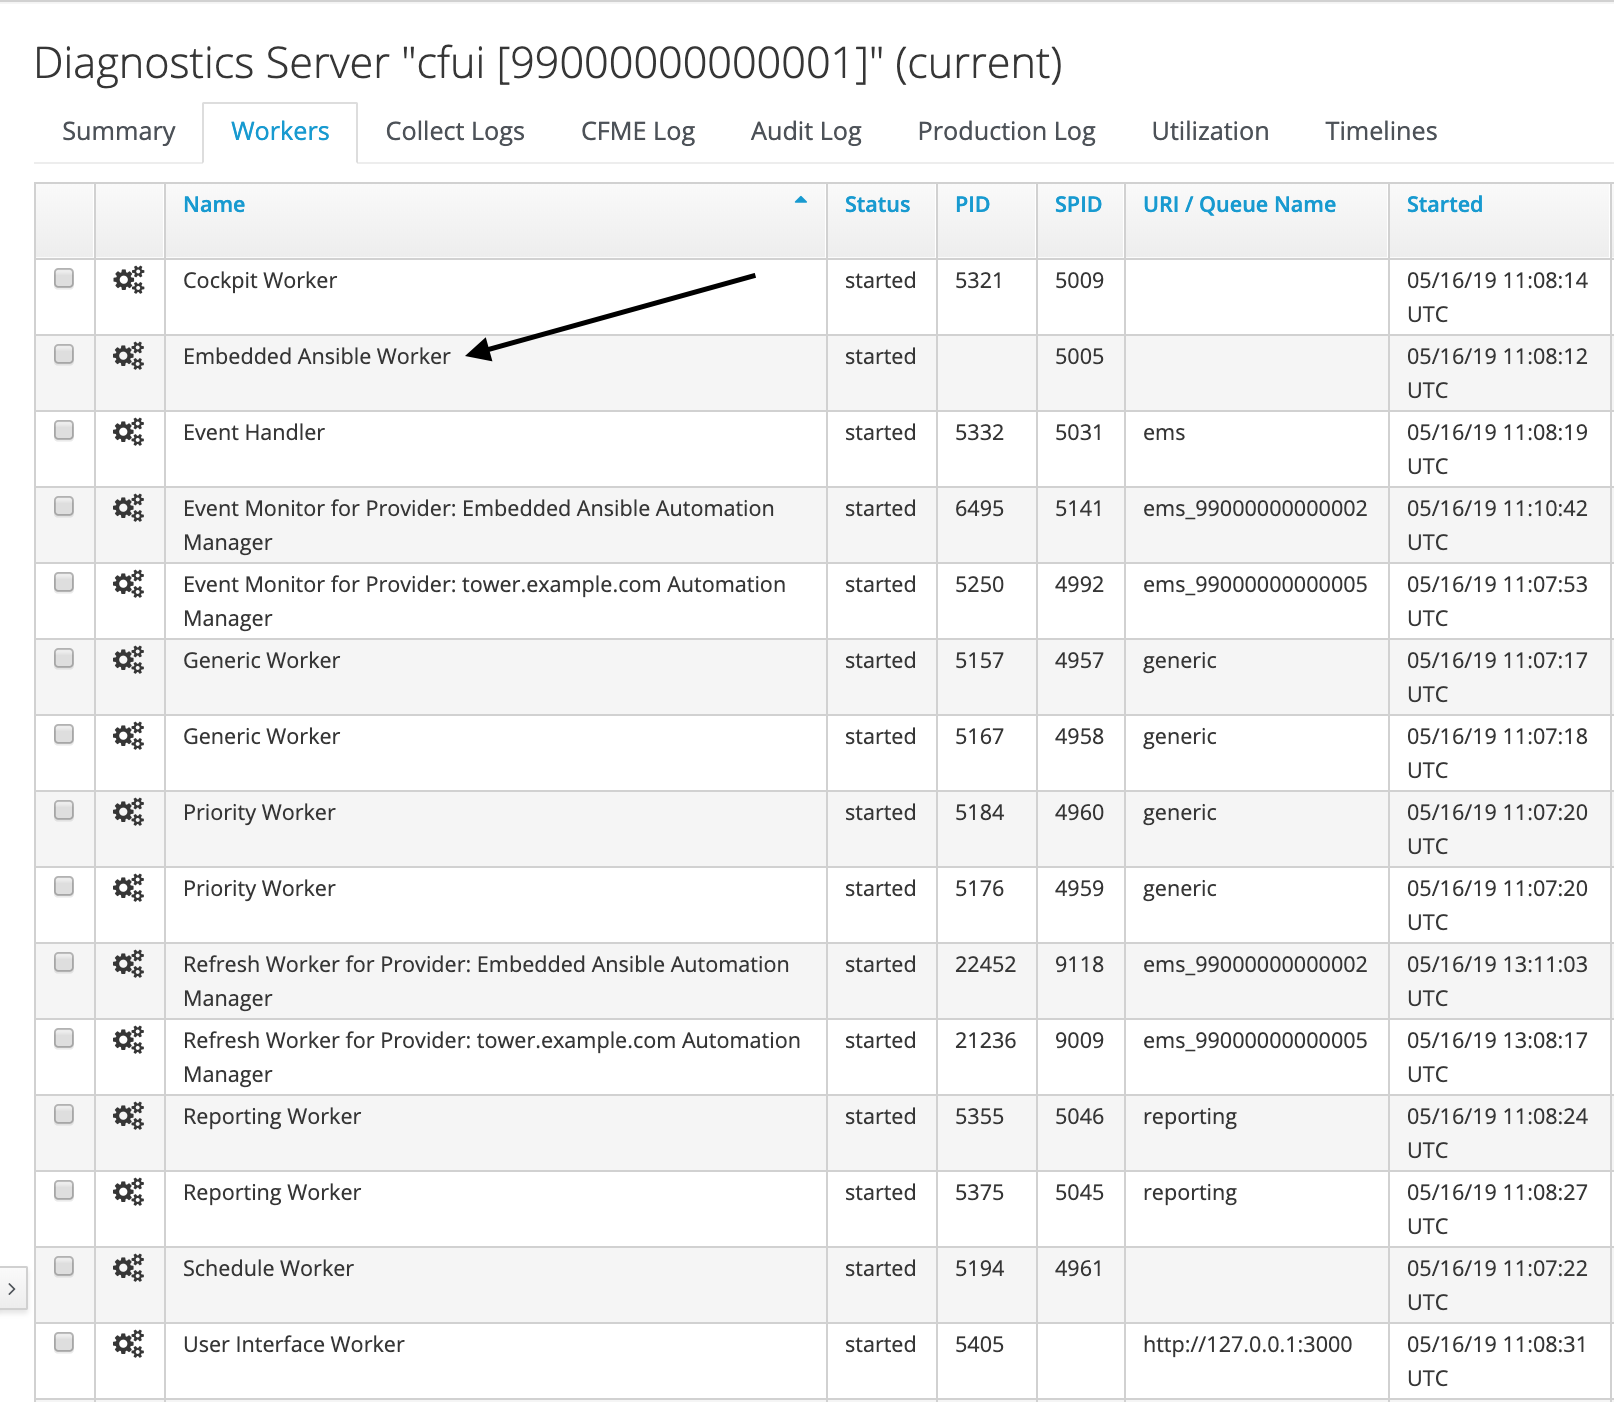
Click on Diagnostics in the accordion on the left and click on the Workers tab
Make sure you can see a line indicating the “Embedded Ansible Worker” is in state “started”
The git role is not represented by a specific worker process.
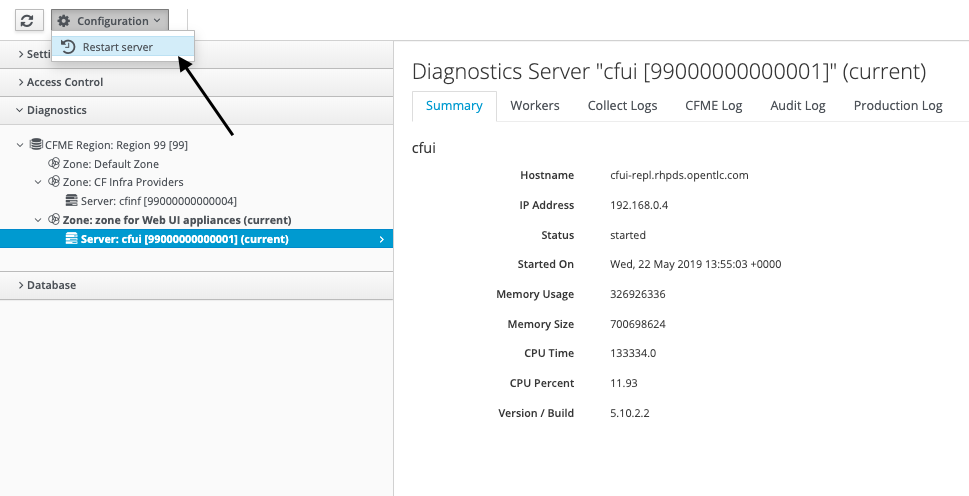
We’ve noticed that sometimes the role does not start automatically. You can trigger a restart by clicking on Diagnostics -> Server and then Configuration -> Restart Server. This will trigger a restart of all services and can take a few minutes to complete. Only do this, if your Embedded Ansible role was not in state “started”. You will see a “Service is temporarily not available” error while the services are restarting.
We don’t really need the “Git Repositories Owner” Role for this lab, but you might need it for optional tasks or advanced labs later.
Add a Git repository of Ansible Playbooks
To be able to run Ansible Playbooks, they have to become available in CloudForms. Custom git repositories can be used as well as GitHub, GitLab or others. Other Source Control Management Systems like Subversion or Mercurial are planned for later versions.
Navigate to Automation -> Ansible -> Repositories.

Click on Configuration -> Add New Repository
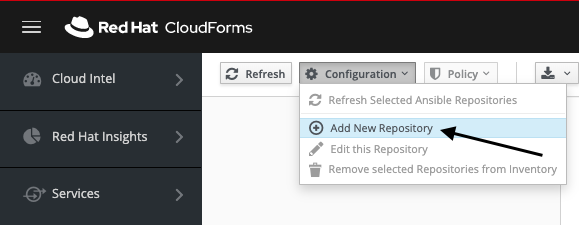
If the menu item “Add New Repository” is disabled, the Embedded Ansible Role is not active.
Fill in the form.
Name: GitLab
This is used as an internal name for the git repository.
Description: Example Playbooks
A description for the git repository.
URL: https://gitlab.com/cjung/partner-conference-2019.git
How to access the git repository.
SCM Update Options: check “Update on Launch”
Update on Launch causes CloudForms to check for new Playbooks or updated Playbooks before a Playbook is launched.
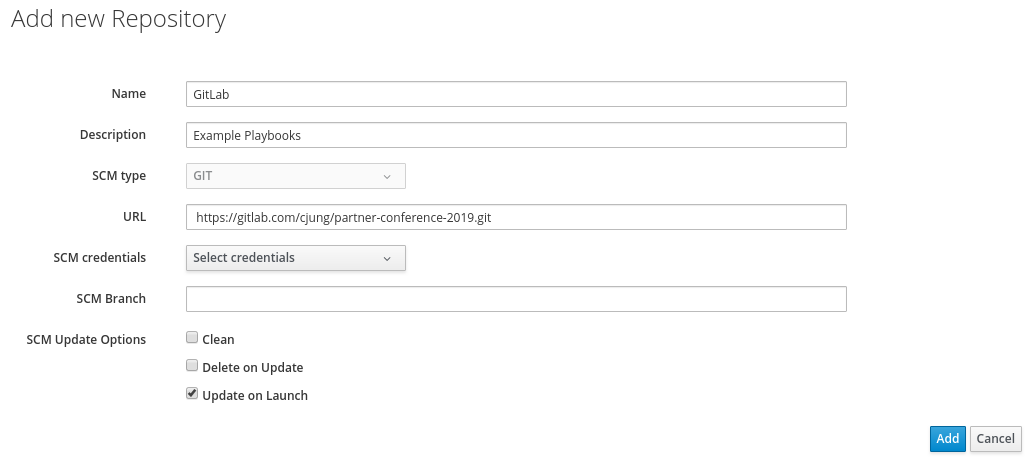
Click on Add to save the settings
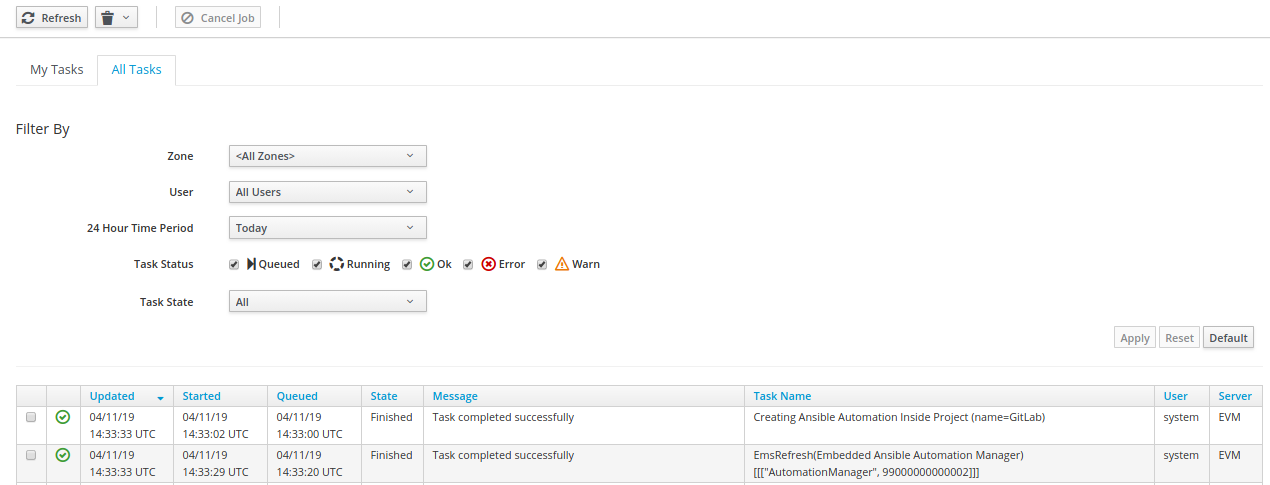
It takes a few seconds for the action to complete. A pop up notification will inform you after the task was completed.
You can click on your username in the top right corner and then on Tasks to see all currently running tasks. Switch to All Tasks to see the progress of your Repository import.
Verify the task completed successfully
Navigate back to Automation -> Ansible -> Repositories.
Click on the Reload icon to refresh the screen. After the initial import completed, you will see the list of available repositories.

Click on the repository to see the details.
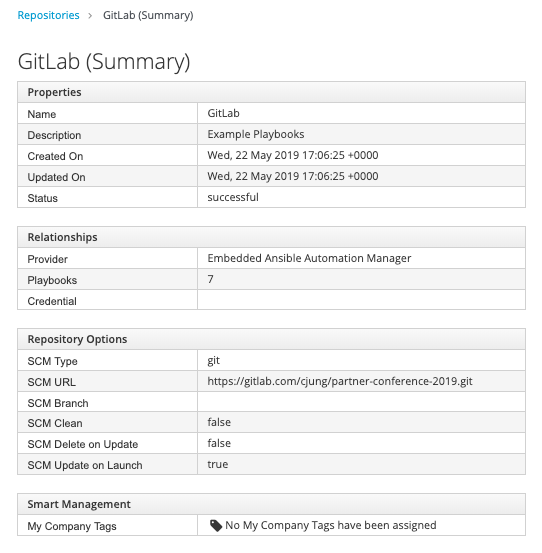
Click on Playbooks to see the list of automatically imported playbooks.
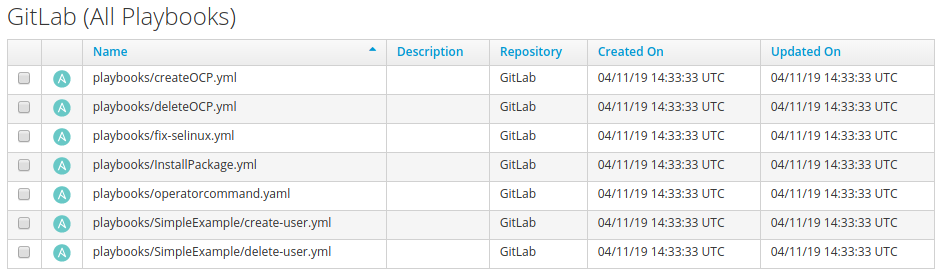
This confirms that all playbooks have been imported successfully.
Store Virtual Machine Credentials
Ansible is using SSH by default to perform actions on the target machine. To be able to login, it has to know the login credentials.
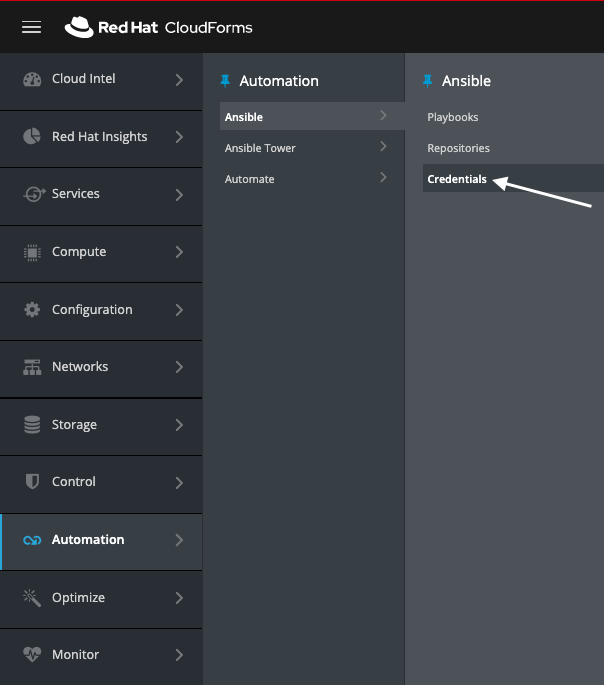
Navigate to Automation -> Ansible -> Credentials
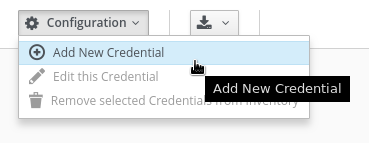
Click on Configuration -> Add a new Credential
Use the following settings:
A user descriptive name for the Credentials you want to store:
Name: Virtual Machine credentials
CloudForms supports several credential types to connect to other systems. For this lab we chose “Machine”:
Credential type: Machine
The username used to login to the target system:
Username: root
The password used to login to the target system:
Password: r3dh4t1!
Passwords are stored encrypted in the CloudForms database.
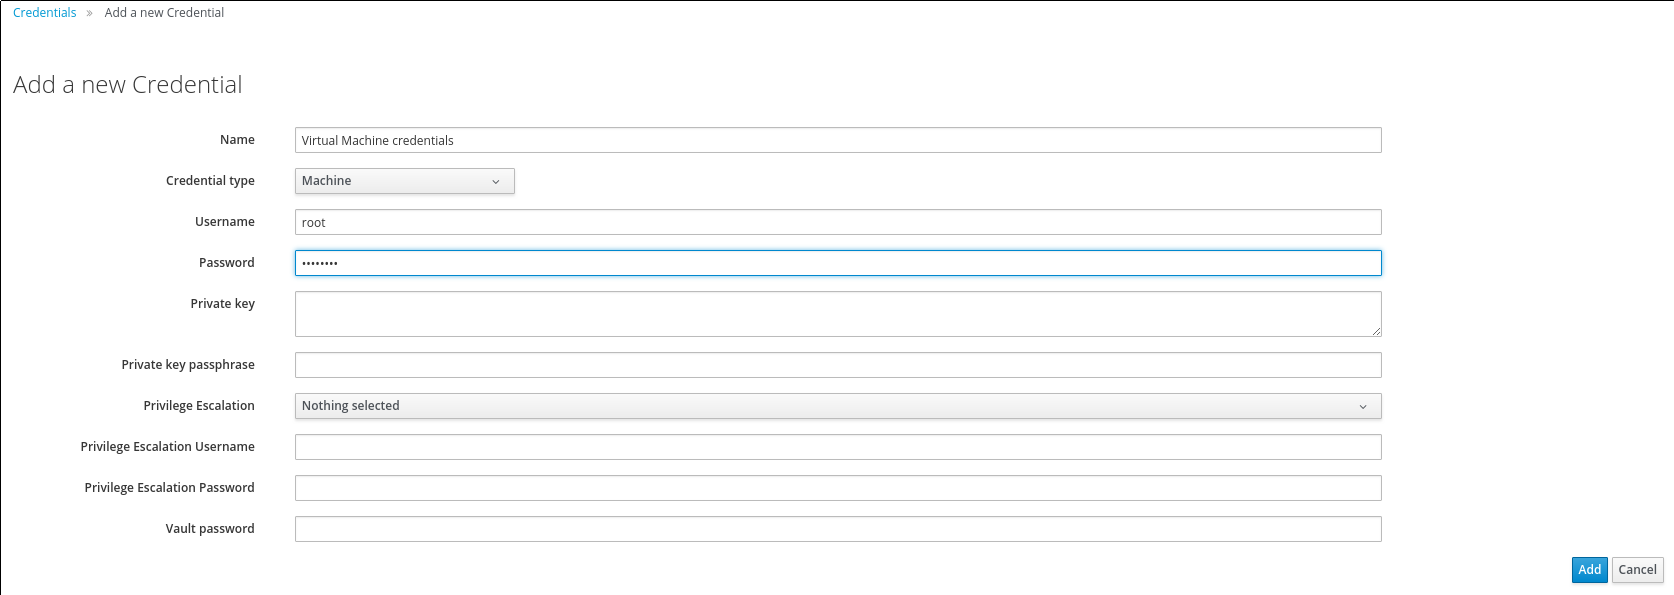
Click Add to save the credentials
This is also an action which is preformed in the background and it can take a few seconds until you can see the new credentials in the Web UI.
Create an Ansible Service Catalog
To offer a Service Catalog Item to users, they have to be organized in Service Catalogs. Create one by following these steps:
The next step is to create a Service Catalog. First we have to navigate to Services -> Catalogs.
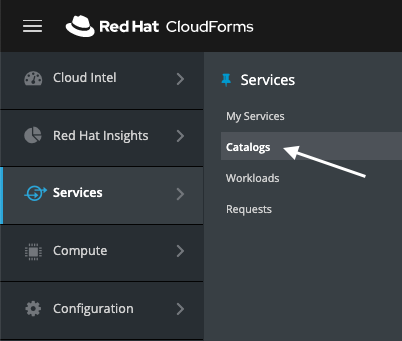
On this screen click on Catalogs on the left
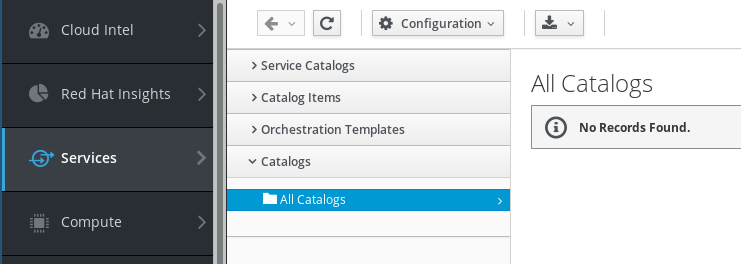
Click on Configuration and Add a New Catalog
Fill out name and description:
Name: Ansible
A user friendly name of the Service Catalog. End users will see the different Service Catalogs by name.
Description: Order Ansible Playbooks from a Service Catalog
Additional description about the Service Catalog. End users will see the description and it will help them to find the Service Catalog Items they are looking for.
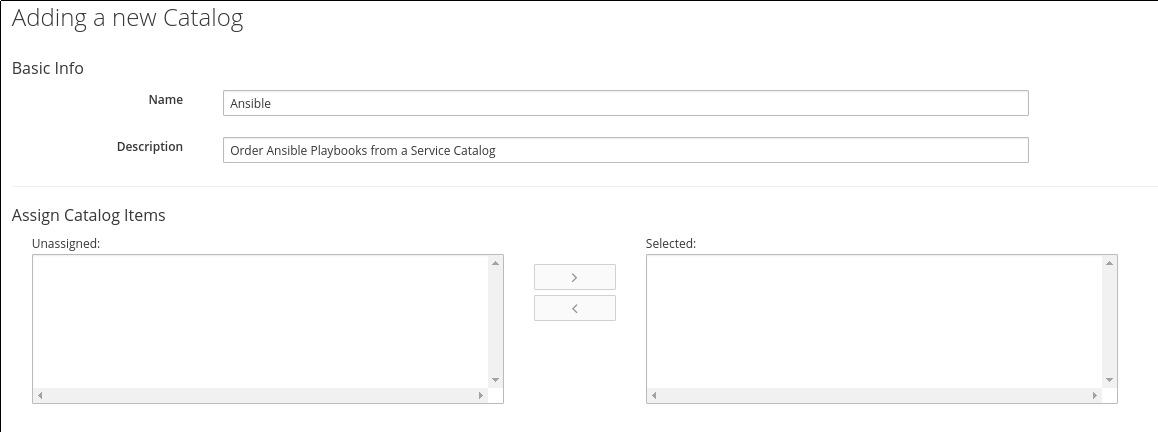
Click on Add to save the new Catalog
Create a Service Catalog Item
In the following step we create a Service Catalog Item which will execute an Ansible Playbook.
Navigate to Services -> Catalogs
If you followed the instructions by the letter, you’re already in this part of the UI.
Navigate to Catalog Items in the accordion on the left
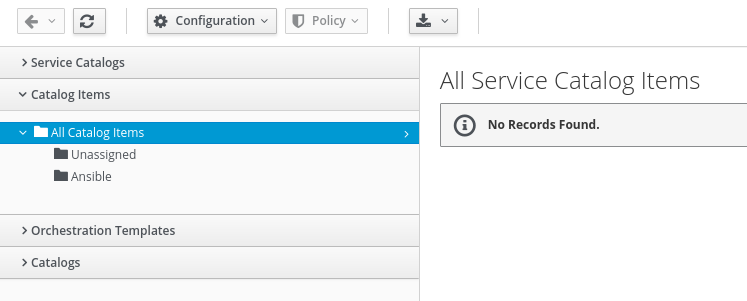
Click on Configuration -> Add a New Catalog Item
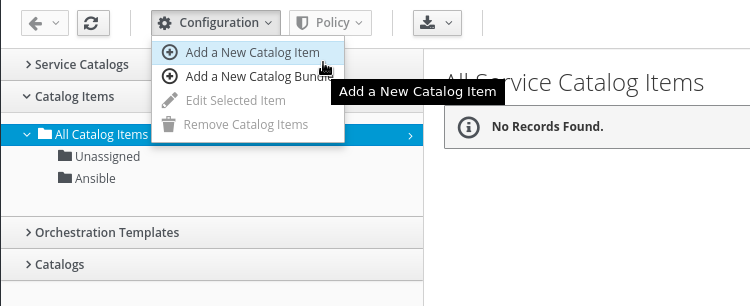
Select Ansible Playbook as Catalog Item Type
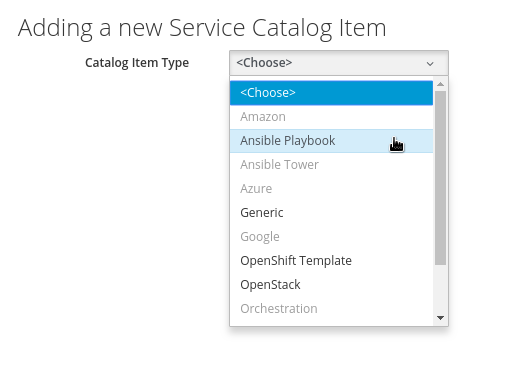
Use the following parameters when defining the Service Catalog Item:
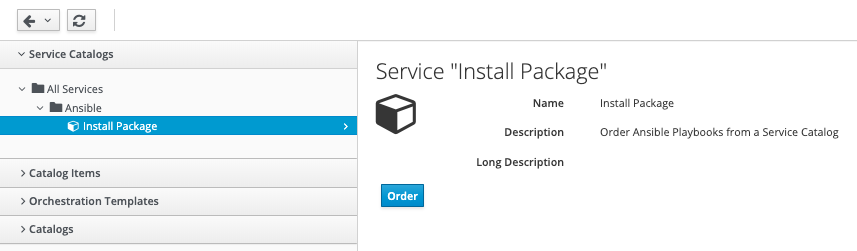
Name: Install Package
The user friendly name of the Service Catalog Item. It will be presented to the end user.
Description: Install Package via Ansible Playbook
Additional description about the Service Catalog Item to make it easier for the end user to find what they are looking for.
Display in Catalog: Yes
You can hide Service Catalog Items from users by setting this to “No”. For this lab we want to allow users to order the Service Catalog Item, so we set this to “Yes”.
Long Description: <empty>
This is an optional field to provide a more detailed description. If you want, you can be creative here. CloudForms even supports HTML formatting which is often used to embed links to Documentation or additional resources on the selected Service Catalog Item.
Catalog: My Company/Ansible
In which Service Catalog do you want the Service Catalog Item to show up?
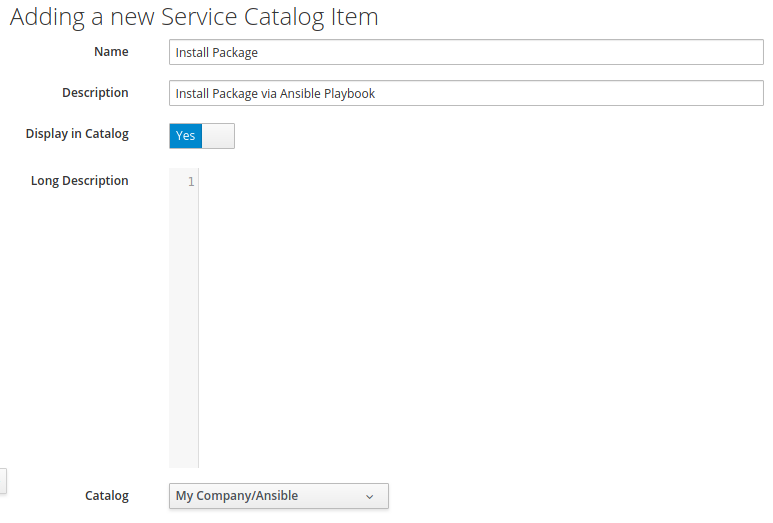
Repository: GitLab
You might have many git repositories, to better identify the correct Ansible Playbook, you first select the Repository. We only have one Repository so far, so this is simple.
Playbook: playbooks/InstallPackage.yml
The actual Playbook which will be executed when the Service Catalog Item is ordered.
Machine Credentials: Virtual Machine credentials
The credentials used to login to the target machine to run the Ansible Playbook.
All other fields can remain set to their respective defaults.
Ansible Playbooks can use variables which gives us more flexibility. In this example the package name is not hard coded, but can be set and changed from a variable:
Variables & Default Values: add one new entry with the following details.
Since a Playbook can have multiple variables, you can add multiple lines.
Variable: package_name
Default Value: httpd
Click the little plus ("+") icon to save the row. We only use one variable in this playbook, but your Playbooks might use more.
Dialog: Create New
Use “InstallPackage” as the name of the Dialog. CloudForms will automatically create the Service Dialog for us, to save some time. The automatically created Service Dialog is still fully customizable, which we will do in a later part of the lab.
Click Add to save all changes
Test the Service Catalog Item
We want to make sure the resulting Service Catalog Item actually works.
Navigate to Services -> Catalogs
Click on Service Catalogs in the accordion on the left, if not already selected

Select the “Install Package” Service Catalog Item
Click Order
Select the following options:
Machine Credentials: Virtual Machine Credentials
These are the credentials stored in CloudForms earlier, to log into the target machine.
Hosts: localhost (should already be the default)
On which machine the Playbook should be executed.
package_name: httpd (should already be the default)
The variable specified when creating the Service Catalog Item, which can be overriden by the end user during order.
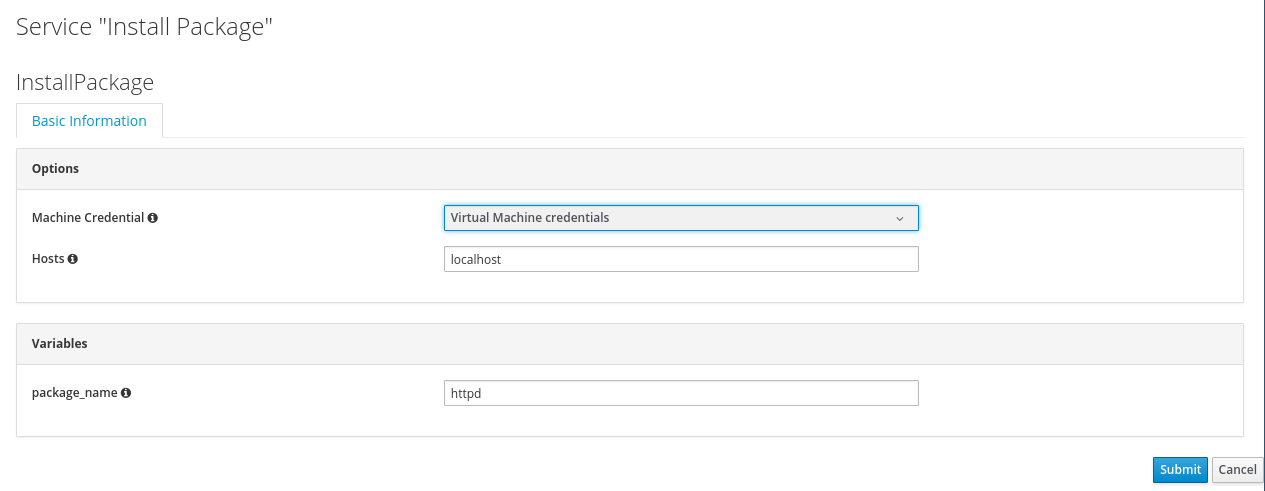
Click on Submit
After submitting your order, you will be redirected to the Requests Queue. You should also see pop up notifications on the top right informing you about the progress of your order.
Click on Refresh to monitor the progress of your order
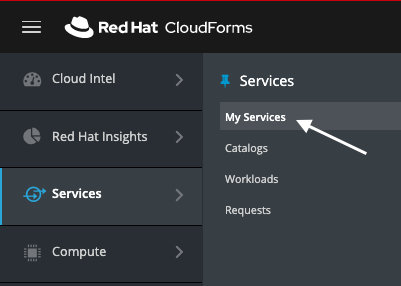
Navigate to Services -> My Services
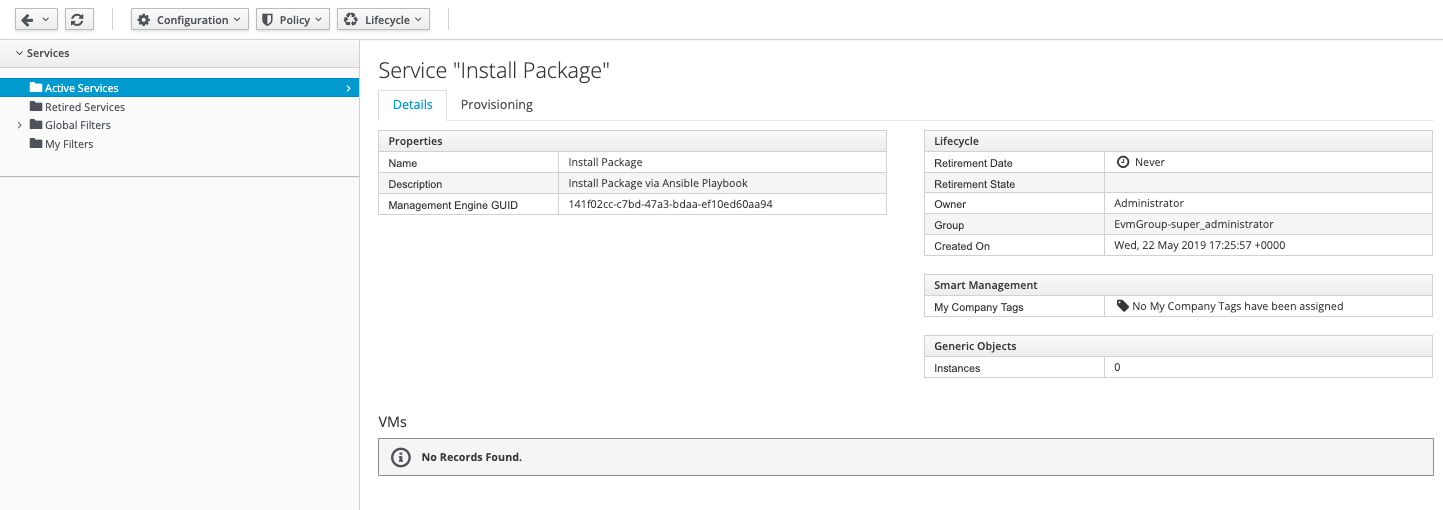
Every time a user places an order a object under “My Services” is created. You should see one tile labeled “Install Package”
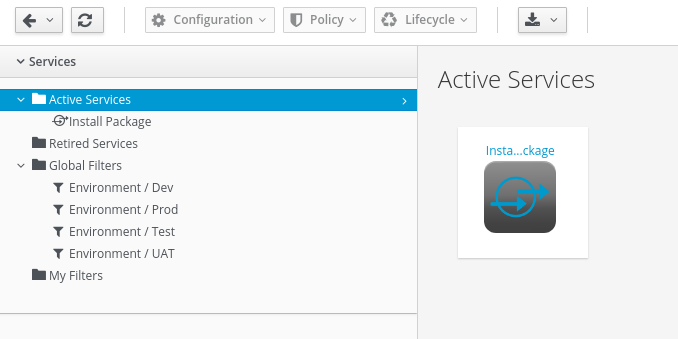
Click on the tile icon to get more details
Click on the tab Provisioning to see details of the Ansible Playbook run

In this example the Playbook completed successfully. In your case it might be still running and not be complete. Click the little reload icon on the page to reload the information while the Playbook is executed in the background.
This concludes this part of the lab.