Advanced Labs
Advanced labs
If you were able to complete all the steps and still have some time left, here are a couple of things you can do to get more familiar with CloudForms.
Use the Self Service user Interface
The user interface we used so far is often referenced as the “Operations UI” or the “Classic UI”. A new, more modern, Self Service user Interface is also available and receives improvements with every release.
The Self Service user Interface can be accessed by appending the string “self_service” to the Appliance URL.
https://cf46-<GUID>.labs.rhepds.com/ui/service/
You can login with the same credentials as before.
Use role Based Access Control to publish Service Catalog
So far we have created Catalog Items which are visible to any logged in user. In most Enterprise environments, specific Service Catalog items should only be accessible for certain user groups.
CloudForms offers a very granular system for role Based Access Control (RBAC). This allows system administrator to grant or deny specific privileges to reduce visibility, reduce risk of human errors or provide better cost control.
In this advanced lab we want only specific Catalog Items to be available for certain user groups. CloudForms is using tags to identify objects. For example, if a Service Catalog Item is tagged as “Department Engineering” only users which are in a group which is also tagged as “Department Engineering” will see and be able to order this Catalog Item.
The following parts of the lab are using the “Operations UI” or “Classic UI”. Make sure to switch back to it by using the original URL:
https://cf46-<GUID>.rhpds.opentlc.com
User Groups
A user is always member of at least one user group. The group defines the visibility granted to all member users. For example, members of the group “Department Engineering” can see all objects tagged with this tag.
Roles
The role defines which actions are allowed to groups associated to this role. For example the role can grant the privilege to start or stop Virtual Machines, manage Service Catalog items, or define and use reports.
Since roles can be associated to multiple groups, they can be reused. A user in Department Engineering might have the same privileges as a user in Department Sales, but they will see different objects which they can interact with.
More details
If you want to learn more about CloudForms’ Role Based Access Control, you can read the official product documentation. The chapter access control in the General Configuration Guide also provides more background information. Last but not least, there is a good summary about Using Tags for Access Control on the official CloudForms Blog.
Create a Role
For this lab, we first want to create a role which we want to use for testing.
Navigate to Configuration on the top right menu
Click on Access Control in the accordion on the left
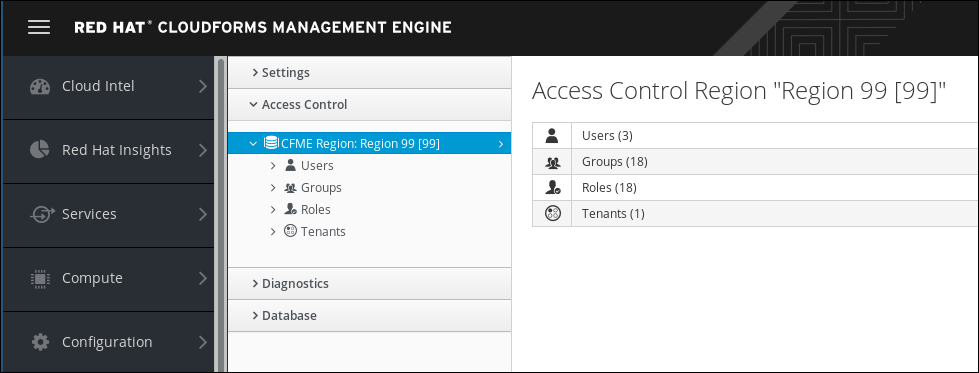
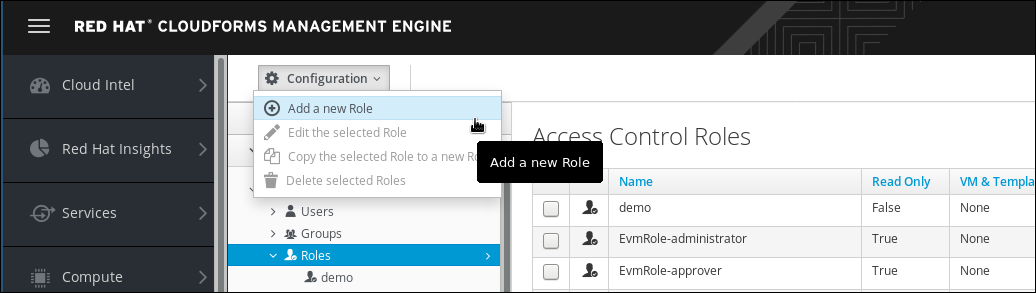
Click on Roles and Configuration -> Add a new role
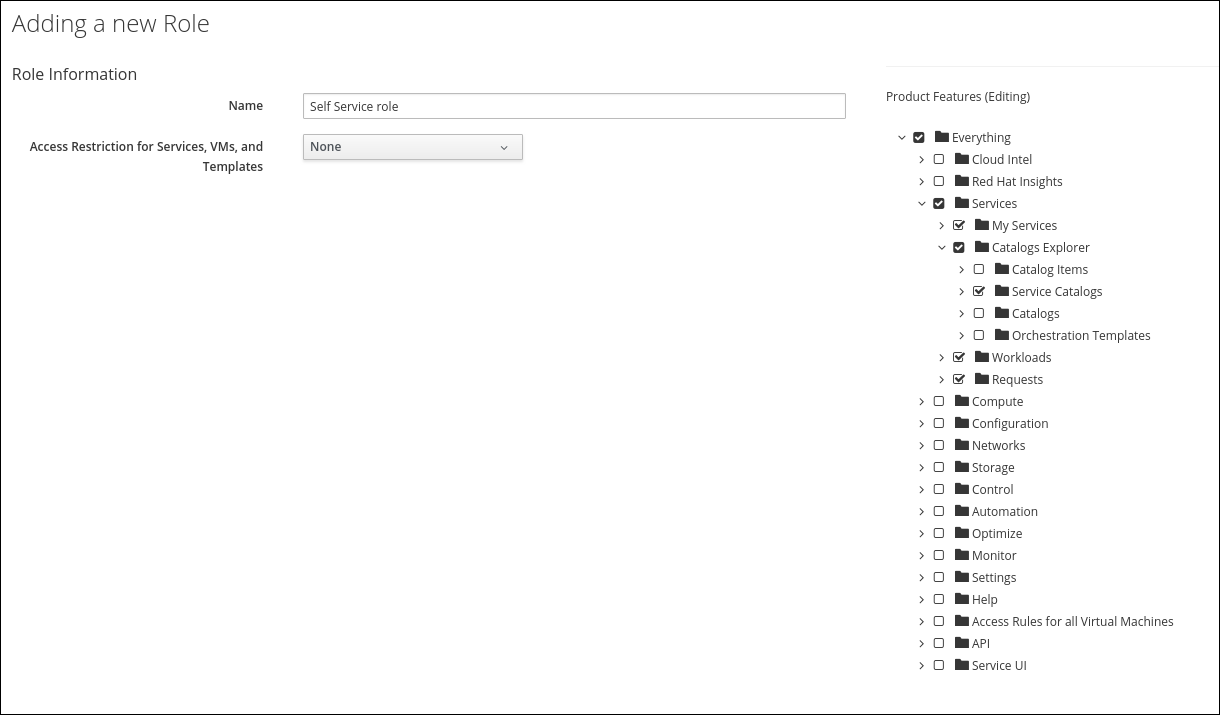
We want to define a new role, which has enough privileges to order and interact with Service Catalog Items.
Name: Self Service role
Access Restriction for Services, VMs, and Templates: None
Defining the privileges is actually very simple. The tree view allows us to simply select or unselect the privileges we want to grant to users associated to this role.
-
Let’s unselect all items on the first level, except for “Services”.
-
Click on the little triangular icon next to “Services” to open the sub folder. Make sure “My Services”, “Workloads” and “Request” are selected.
-
Click on the little triangular icon next to “Catalogs Explorer” and make sure only “Service Catalogs” is selected.
The resulting dialog should look like this:
Click Add to save the new role
Create a new Group
Next we want to create a group and assign it to the role we just created.
Now we want to create a group associated to this role. Click on Groups and Configuration -> Add a new group
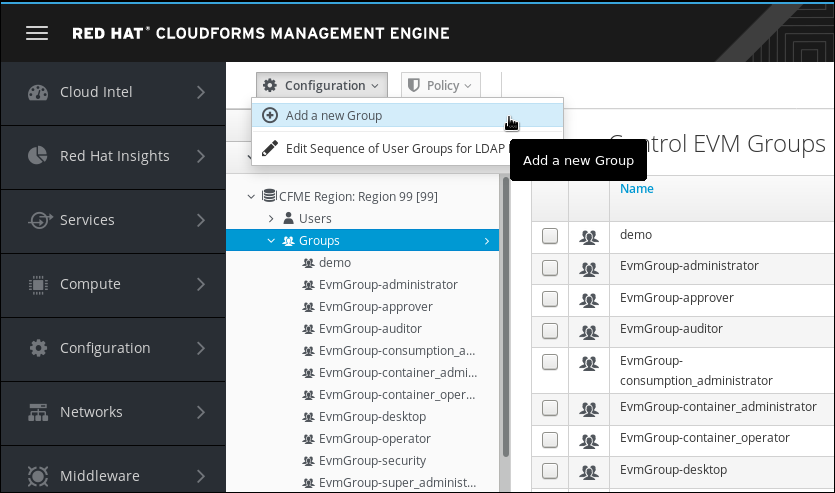
Create the new group
Name: Self Service Engineering
Select the role “Self Service role” you just created:
role: Self Service role
CloudForms also supports multiple tenants. Since we have not defined any tenants, choose the parent “My Company” tenant:
Project/Tenant: My Company
In “My Company Tags” click on the little triangular icon next to “Department” and click on “Engineering”
It is important to only select this particular tag and do not click on any other additional tags!
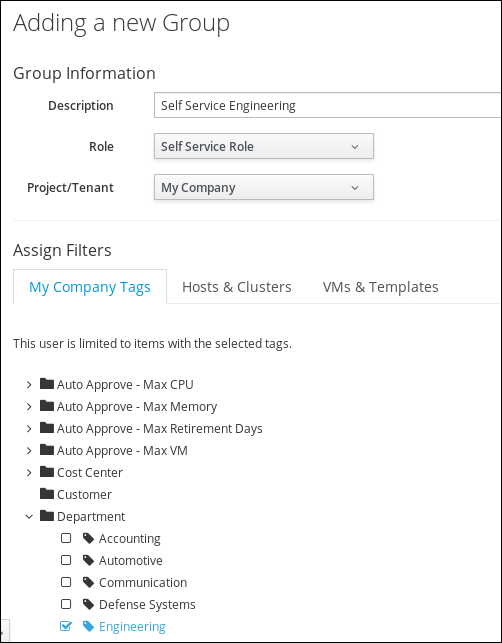
Click on Add to create this new group
Create a new User
Finally we want to create a user which is a member of the group we just created.
Click on users and Configuration -> Add a new user
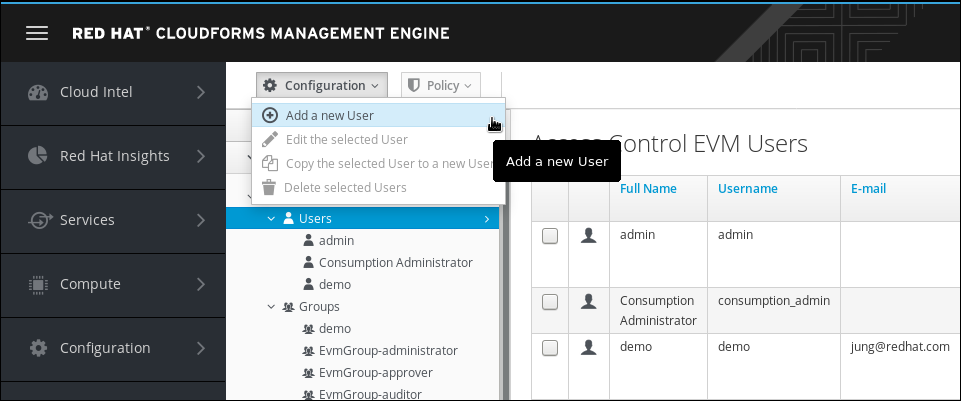
Create a new user with these parameters:
Full Name: Joe Doe
Username: joe
Password: <to_be_provided>
Confirm Password: <to_be_provided>
E-mail Address: joe@example.com
CloudForms is not configured to send out emails, but the email address is a mandatory field
Available Groups: Self Service Engineering
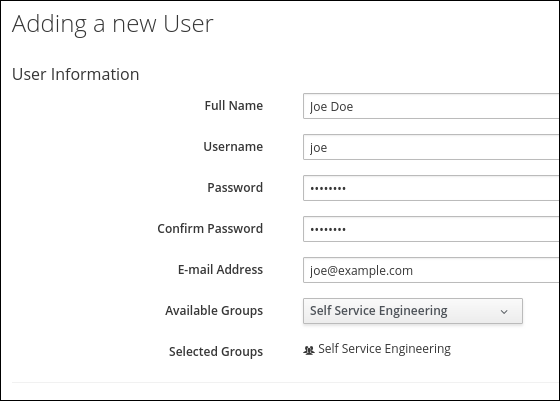
Click on Add to create the user
Test user Joe Doe
So far we have not assigned any objects to the new group, but we have granted very specific rights to members of that group.
Let’s see what happens if we log into CloudForms as “Joe Doe”.
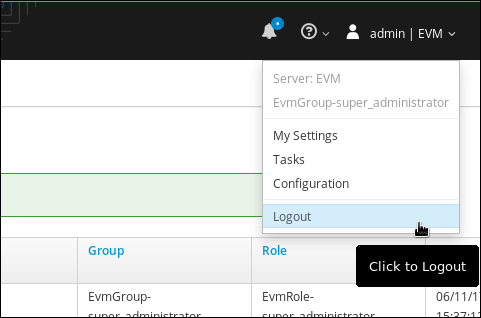
You can not log into CloudForms with different users while you’re in the same browser session. You have to log out and log in again. As an alternative, you can use a different browser, if available, or you can open an additional window in “private” mode.
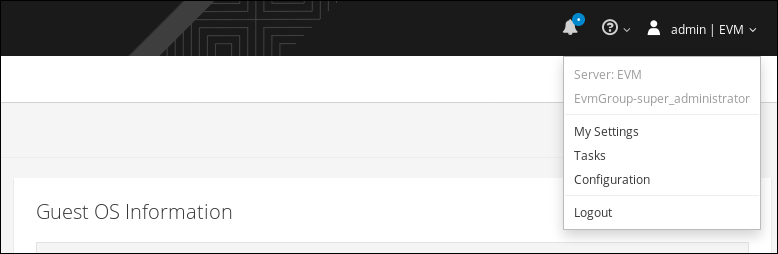
Log out of CloudForms by clicking on the user name on the top right and click on Logout
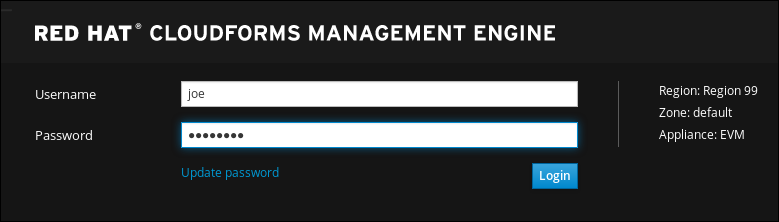
Log in as user Joe Doe:
username: joe
Password: <to_be_provided>
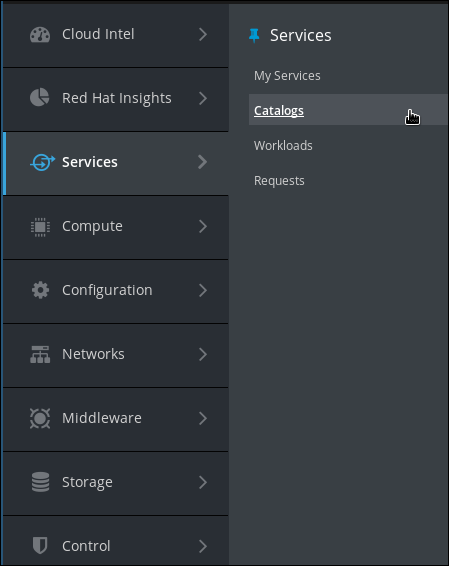
You should notice that most of the menus are gone now. On the top level menu on the left, we can only click on Services and have only four sub menus available.
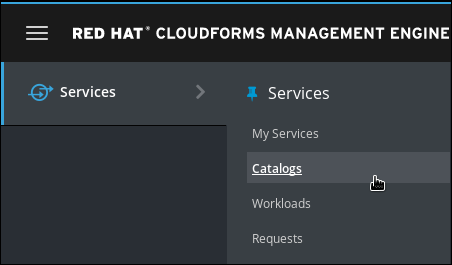
Navigate to the service catalog
You should notice that there are no Catalog Items available! Although we have defined some Catalog Items earlier in this lab, none of them are available to the “Self Service Engineering” group.
Let’s logout again
Grant access to certain Catalog Items
We want to make one Catalog Item available to all users which are members of the “Self Service Engineering” group.
Log into CloudForms as admin
Navigate to Services -> Catalogs
Click on Catalog Items in the accordion on the left

Click on Virtual Machines and Simple VM

Click on Policy -> Edit Tags
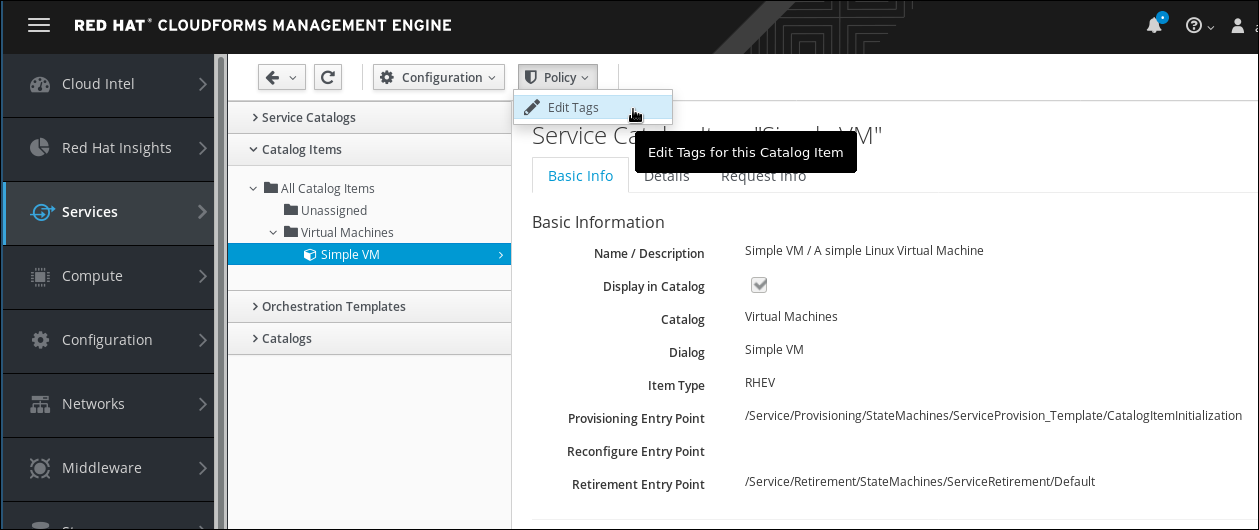
Assign the Tag “Department” / “Engineering” to the Catalog Item
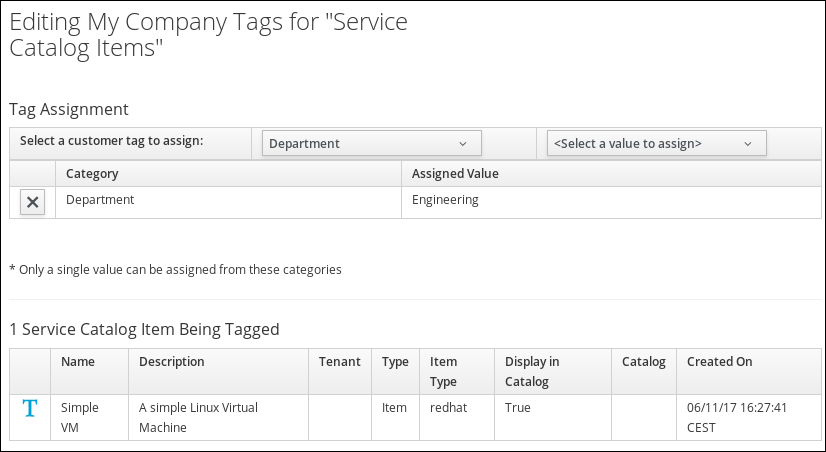
Click Save to commit the changes
Test once more as Joe Doe
We want to do another test and see if the user Joe Doe can now see and other the Catalog Item.
Log out
Log in as Joe Doe
Navigate to Services -> Catalogs
Now you should see one Service Catalog Item: “Simple VM” - but no other Service Catalog Items.
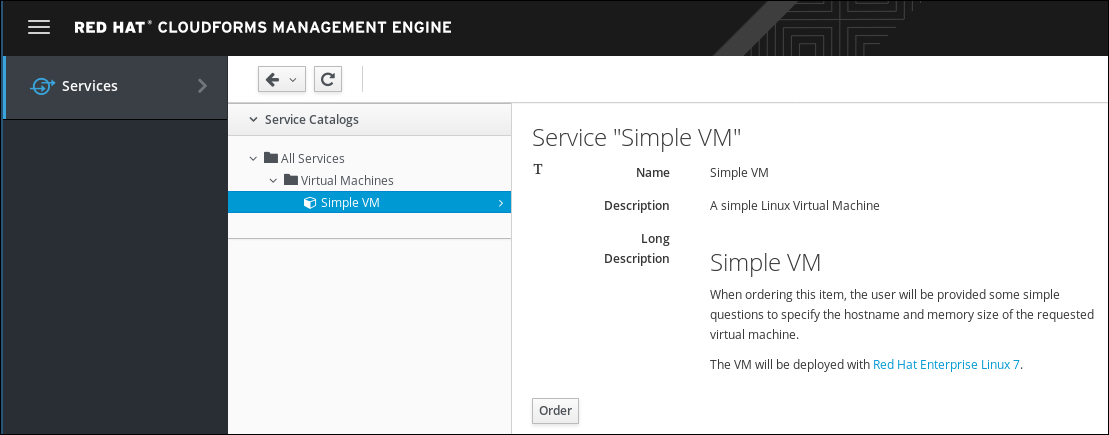
If you want, you can order the Service Catalog Item and should see that it will be deployed perfectly.