Service Catalogs
Build a Service Catalog with CloudForms
This lab will guide you through the process of creating a service catalog in CloudForms.
Value provided by a Service Catalog
One of the features a Cloud Management Platform provides, is a Self Service User Interface. From the Service Catalog users can order, manage and retire Services. Services are categorized in Catalogs, where they can be organized and easily consumed.
By providing a Service Catalog, users can deploy the Services they need quickly and easily. This helps to improve agility, reduce provisioning time and free up resources in internal IT.
Service Basics
But first some basics. Four items are required to make a service available to users from the CloudForms self service Catalog:
-
Provisioning Dialog
The Provisioning Dialog specifies the list of customizable parameters. For example, when ordering a Virtual Machine, users can specify the number of virtual CPUs, how much memory the VM should have and other parameters. The list of possible parameters is defined in the Provisioning Dialog
-
A Service Dialog
When the user orders a Service Catalog Item from the Service Catalog, you might want to allow them to override certain default values. For example, you might allow users to choose from a range of values of how much memory the new Virtual Machine can have. You might want them to only choose from a list of predefined values like 2, 4, or 8 GB of RAM - but not more or less. This is specified in the Service Dialog.
-
A Service Catalog Item
The Service Catalog Item is what users will see in the Service Catalog and are able to order. It usually consists of a Service Dialog allowing users to change specific parameters, it can have a nice icon and an (optional) HTML description. Service Catalog Items are organized in Service Catalogs for easier navigation.
-
A Service Catalog
The Service Catalog allows administrator to organize the Catalog Items. You might want to have a Catalog for different Virtual Machine types, or one offering certain applications like Wordpress, MariaDB etc. Or you might want to categorize by Operating System. This is done by creating Service Catalogs and adding Items to them.
We can also use Role Based Access Control to make certain Service Catalog Items available only to specific groups of users.
Virtual Machine Provisioning example
The first example will guide you through the process of offering a Service Catalog Item to provision a simple Virtual Machine. This will include:
- Design a Service Dialog: a form which will ask the user for the necessary input data
- Create a Service Catalog: this allows administrators to organize Service Catalog Items to make it easy for end users to find what they need
- Publish a Service Catalog Item: this is the object end users can adjust to their needs and order from the Service Catalog
The previous chapter mentions a fourth object, the Provisioning Dialog. We do not have to create one, since there are good defaults shipped with the product.
The following chapters will guide you through the process step-by-step.
Build a VM Provisioning Service Dialog
For this example we will create a Service Dialog which will ask the user for two parameters:
- the name of the new Virtual Machine
- how much memory should be allocated to the new Virtual Machine
Follow these steps to design the Service Dialog:
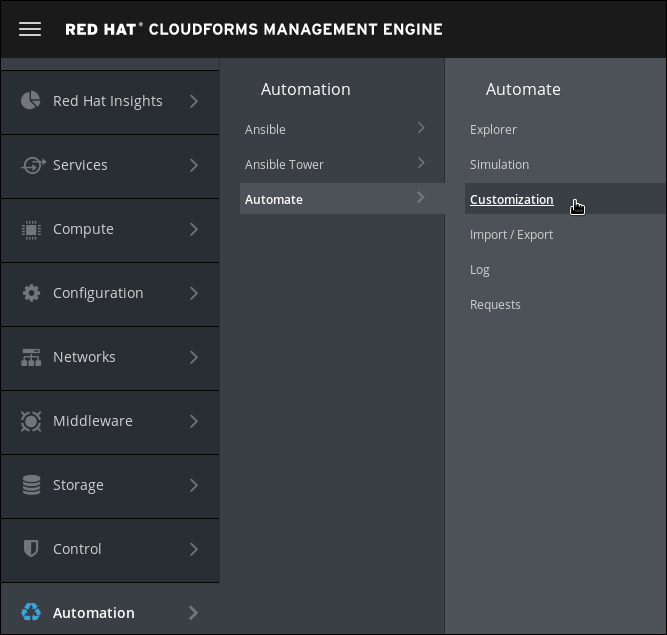
Navigate to Automation -> Automate -> Customization
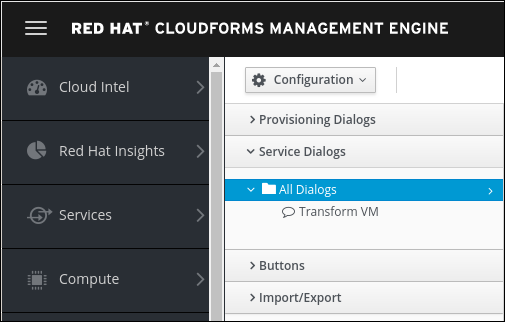
Navigate to Service Dialogs in the accordion on the left.
Click on Configuration -> Add a new Dialog
Chose a label and description:
Dialog’s name: Simple VM
A descriptive name for the Service Dialog:
Dialog’s Description: Simple VM provisioning dialog
Some additional description.
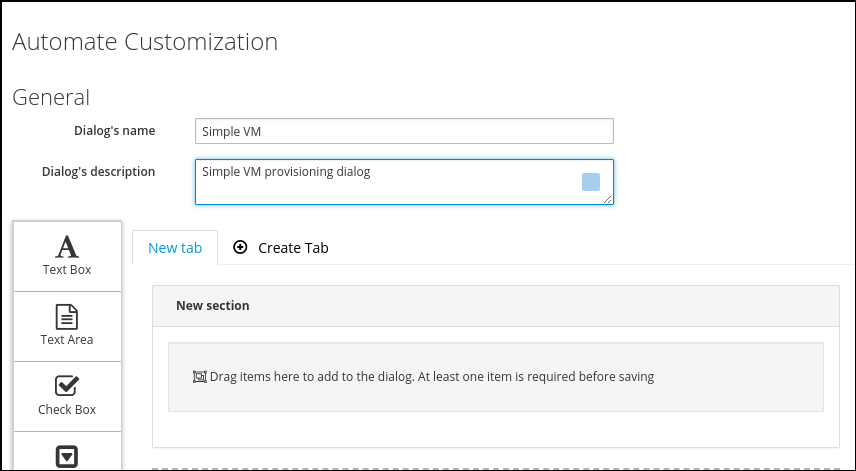
Add a new text box by using drag and drop of the “Text Box” symbol

Click the pen icon to edit the text box

The icon becomes visible when you hover your mouse over the text box.
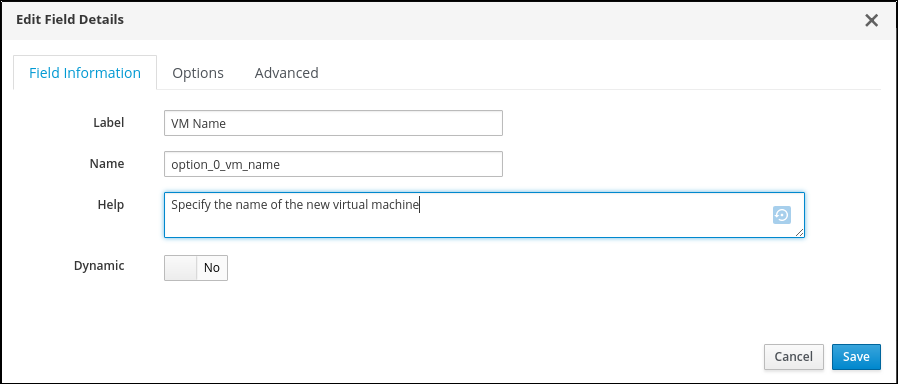
The first element will allow the user to specify a VM name. Modify the following fields:
Label: VM Name
The Label is the name of the element as it will be shown in the UI
Name: option_0_vm_name
The name will be used for the internal variable of the provisioning workflow.
Help: Specify the name of the new Virtual Machine
The help is some text which will be shown if the mouse hovers over the little info icon next to the element. It can be used to provide additional information to the user to fill out this field.
CloudForms allows us to design Service Dialogs comprised of many different types of Elements:
-
Check box: allows to user to check or uncheck the element, often used to ask for additional optional data
-
Date Control: allows the user to select a date from a calender widget. Often used for retirement or other date related options
-
Date/Time Control: same as Date Control, but also allows to specify a time, for example used to specify an automated shutdown or if a change should be scheduled for later
-
Drop Down List: allows the user to select one or multiple options from a list, for example to chose from a list of available networks, applications, cost centers and many more
-
Radio Button: Similar to the check box, but only one of the options can be selected, for example the base OS version (RHEL 6 or RHEL 7, but never more than one)
-
Tag Control: a special element which allows the user to chose from available tags. More about tagging later in this lab
-
Text Area Box: allows the user to enter relatively large amounts of text (multiple lines), could be used for example to provide a description for a Service Item
-
Text Box: allows the user to enter small amounts of text (one line), in this example we use this element to ask the user for a name of the Virtual Machine
The remaining options can be ignored for now.
Click Save to save the Field Details
Add a new Dropdown field by using drag and drop of the “Dropdown” symbol
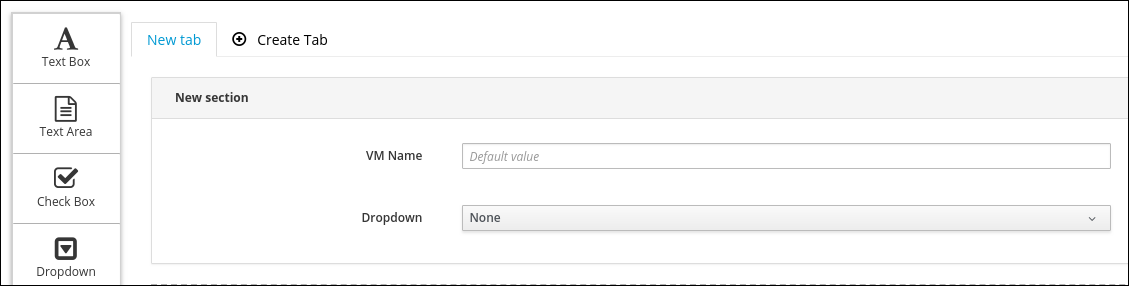
Click the pen icon to edit the dropdown field

Modify the following fields:
Label: Memory size
The label is the user friendly name of the variable and will be presented in the UI.
Name: option_0_vm_memory
The name of the variable used internally to store the user input.
Help: Select how much memory the Virtual Machine should have
Some additional information for the user, which will be shown if the user hovers the mouse over the little “i” icon.
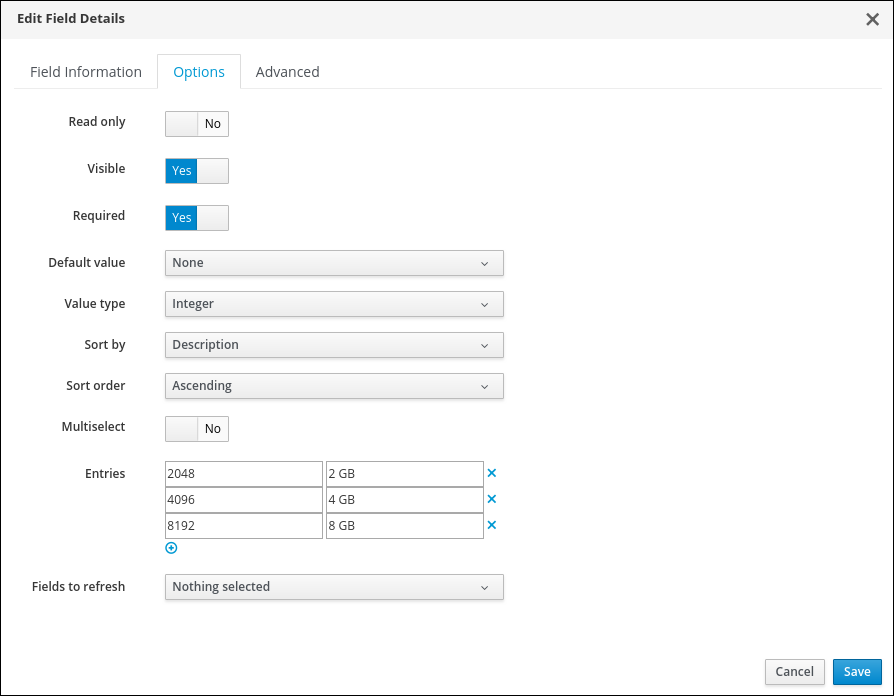
Switch to the Options tab of the dialog and add the following entries.
A element of type “Drop Down List” allows the user to select one of the predefined values. To create the list of selectable values, scroll down to the table “Entries” and add the following lines:
Key: 2048
Value: 2 GB
Key: 4096
Value: 4 GB
Key: 8192
Value: 8 GB
Required: is Yes
Value Type: Integer
To be able to add a line to the table, click on the little plus icon on the bottom of the list
Click Save to save the Field Details
The memory values in the dialog editor will not reflect your changes immediately and will still show the original options One, Two, Three.
We are finally done designing the dialog. Click on Save to save the dialog.
If you’re having trouble creating the Service Dialog, you can download it from GitHub and import it. Follow the instructions on how to import a Service Dialog ONLY if you were unable to create the dialog.
Build a VM Provisioning Service Catalog
The following steps will create a Service Catalog.
The next step is to create a Service Catalog. First we have to navigate to Services -> Catalogs.
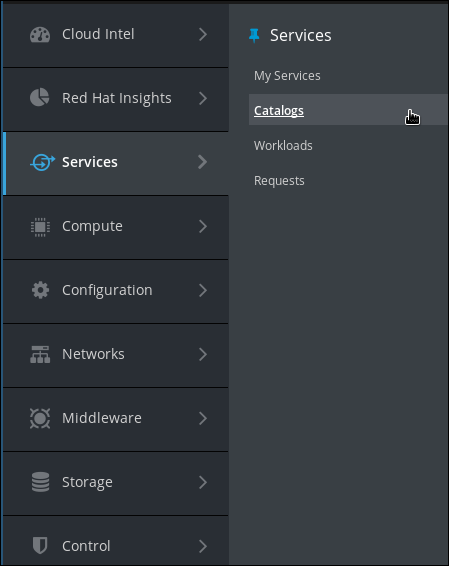
Click on Catalogs in the accordion on the left
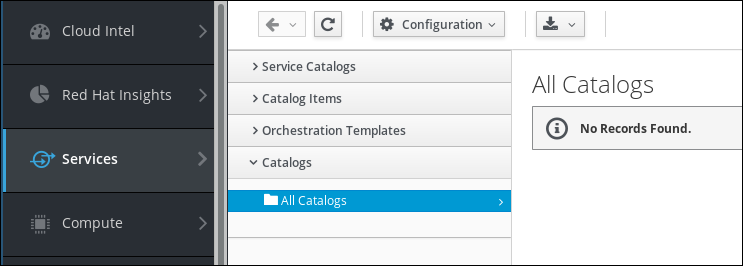
Click on Configuration and Add a New Catalog
Fill out name and description:
Name: Virtual Machines
The name of the Service Catalog should be short but descriptive, so users can easily find the Service Catalog Items they are looking for.
Description: Deploy Virtual Machines from the Catalog
A long description giving users additional information about the Service Catalog.
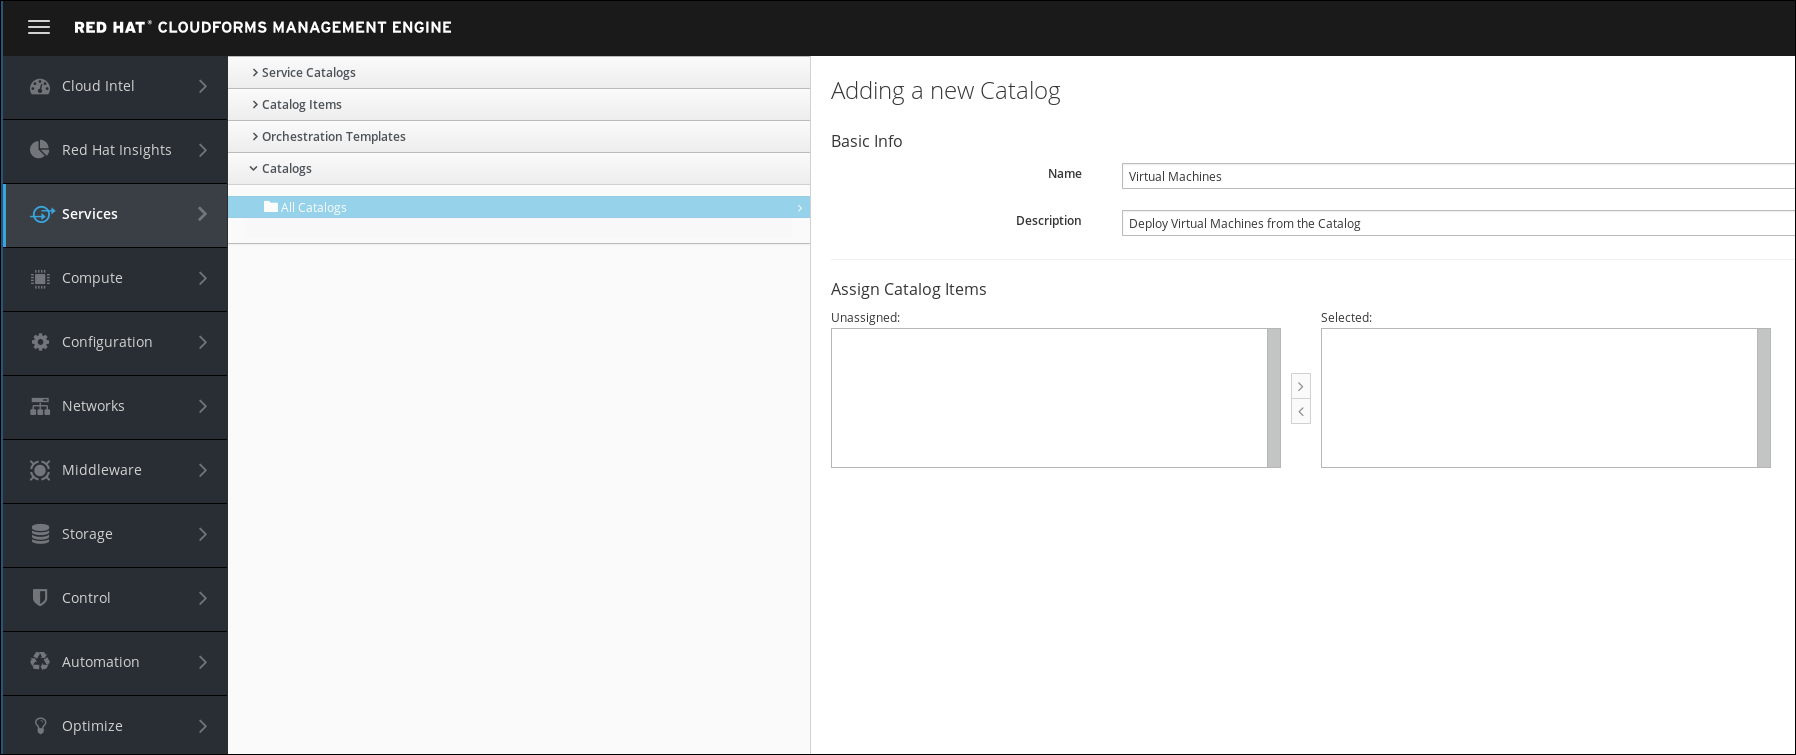
Click Add to save the Service Catalog
Build a Virtual Machine Service Catalog Item
To tie everything together, the last step is to define a Service Catalog Item.
Navigate to Services -> Catalogs
Click on Catalog items in the accordion on the left.
You should already see two Service Catalogs:
Unassigned: Catalog items which are not published yet, will be listed here
Virtual Machines: the Service Catalog we just created in the previous step
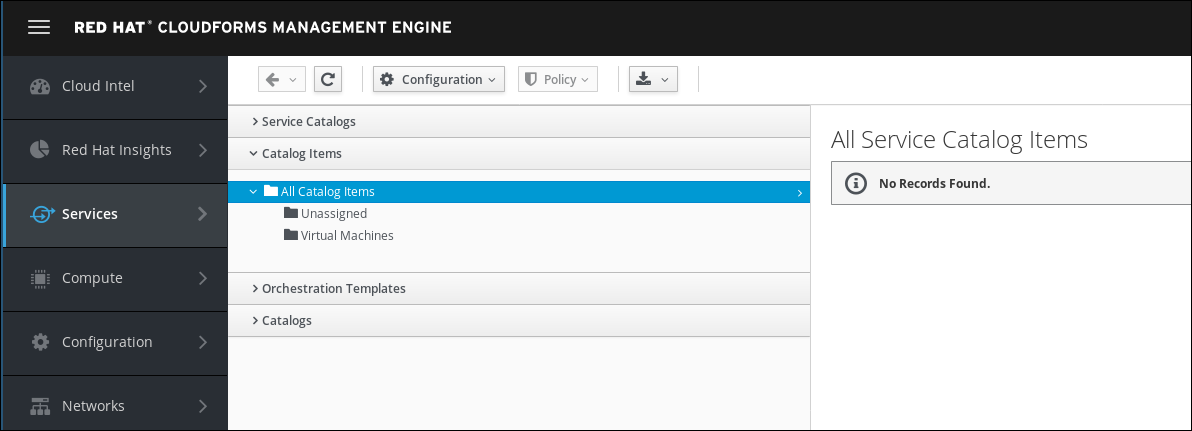
In the Configuration Menu, click on Add a New Catalog Item
Catalog Bundles are used for multi tier applications and consist of many Catalog Items. Since we do not have any existing Catalog Items, we can not create a Bundle.
Chose the Catalog Item Type. For this example we want to use the Red Hat Virtualization Provider, so click on Red Hat Virtualization

It can take a few seconds for the next screen to load.
The next dialog will ask for the details of the new Service Catalog Item:
Name: Simple VM
The name of the Service Catalog Item shown in the UI.
Description: A simple Linux Virtual Machine
A more descriptive text about the Service Catalog Item.
Check the “Display in Catalog” box. If not selected, the Service Catalog Item will not be visible to users. This can be used for Items which are either still in draft mode, or should only be ordered as a part of a bundle:
Display in Catalog: check this box
Select the previously created Service Catalog:
Catalog: Virtual Machines
Select the previously created Service Dialog:
Dialog: Simple VM
All other fields on this tab can remain unchanged.
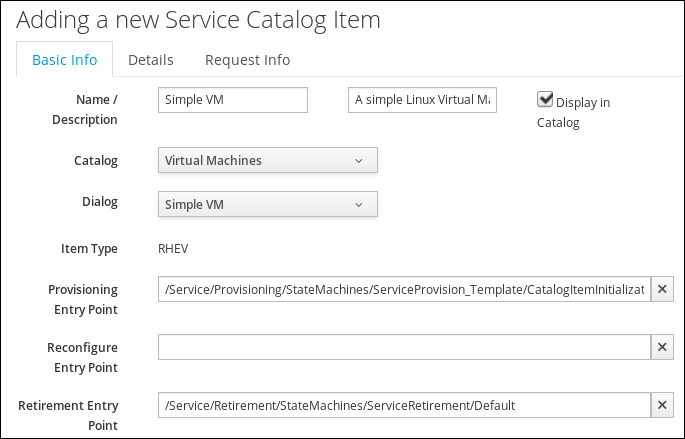
Entry Points are the hooks into CloudForms’ powerful Automation Framework. It allows administrators to define provisioning, reconfiguration and retirement workflows which are different from the out of the box behavior. For example we could add integration into an IP Address Management Tool, a ticketing system or a CMDB Service. For this lab, we want to stick with the out of the box experience and leave those fields unchanged.
Click on the Details tab. You can provide some more descriptive explanation about the service here. We can even use basic HTML formatting in this box.
<h1>Simple VM</h1>
<p>When ordering this item, the user will be provided some simple questions to specify the hostname and memory size of the requested Virtual Machine.</p>

<p>The VM will be deployed with <a href=http://www.redhat.com>Red Hat Enterprise Linux 7</a>.
The Request Info tab of the dialog allows us to provide all the settings we want to use when provisioning a Virtual Machine from this Service Catalog Item.
Select the template used for provisioning:
Selected VM: RHEL7
For automatic naming chose “changeme”:
VM Name: changeme
If the name “changeme” is specified, it will trigger the internal naming logic to automatically assign a name based on “cfme” as a prefix. The name will be expanded with a unique ID starting with 001.
Also make sure the Provision Type is “Native Clone” and do not change this value.
Click on the sub tab Environment
Although it sounds the most convenient option, we can not use “Choose Automatically”. This will require the definition of a provisioning scope, which we haven’t done yet. Instead we we set the appropriate values manually.
Datacenter: Default
The datacenter of our Red Hat Virtualization Provider.
Cluster: Default
The cluster in the Red Hat Virtualization Datacenter.
Host: rhvh1.example.com
The host which will perform the actual tasks and where the VM will initially run on.
Datastore: data
The storage domain to store the VM.
Click on the next sub tab Hardware
For the purpose of the lab, the provided defaults are fine.
Click on the next sub tab Network
The lab environment is very simple, there is only one VLAN available:
Network: ovirtmgmt
Click on the next sub tab Customize
This allows to reconfigure certain settings inside the Virtual Machine. For the purpose of this lab, we keep them all empty
Click on the last sub tab Schedule
This allows us to delay provisioning to a later time, for example during the night or off hours. We can also set a retirement date. After notifying the user and allowing him or her to extend the lifespan of the Virtual Machine, retirement will shutdown and, by default, delete the Virtual Machine.
For the purpose of the lab, we keep these settings unchanged.
Finally click on Add to save the Catalog Item
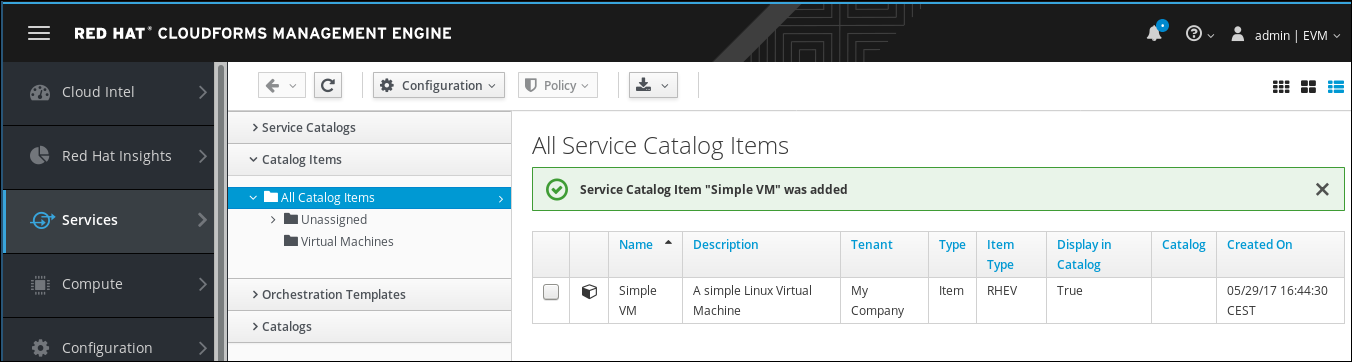
Order the Simple Virtual Machine Service Catalog Item
For sure you want to test the Service Catalog Item you just created!
Navigate to Services -> Catalogs and then click on Service Catalogs in the accordion on the left.
You should see the Service Catalog Item we just created:
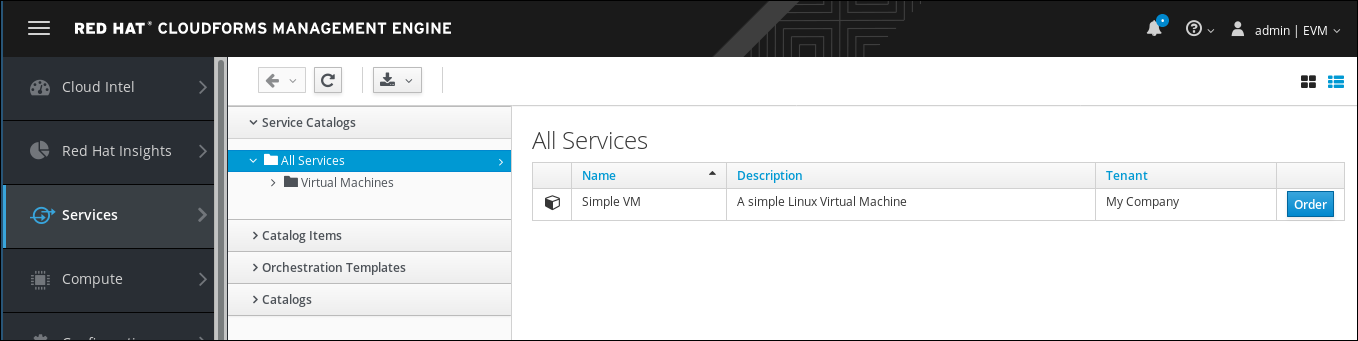
Click on the Item to see more details.
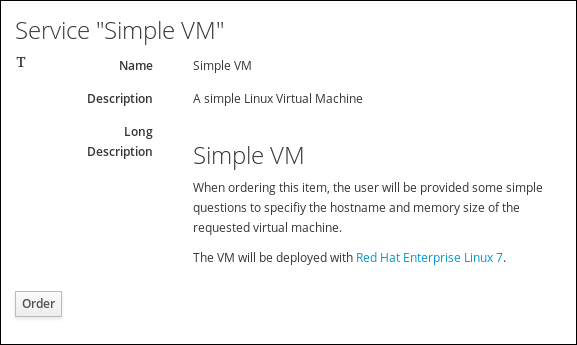
Test that the Link for Red Hat Enterprise Linux in fact opens the Red Hat Homepage.
Click on Order
The Service Dialog we created earlier will be presented and ask for the name of the Virtual Machine and the memory size. As you can see, the name is a free text field, and the memory size is a drop down list.
VM Name: test
Memory Size: 2 GB
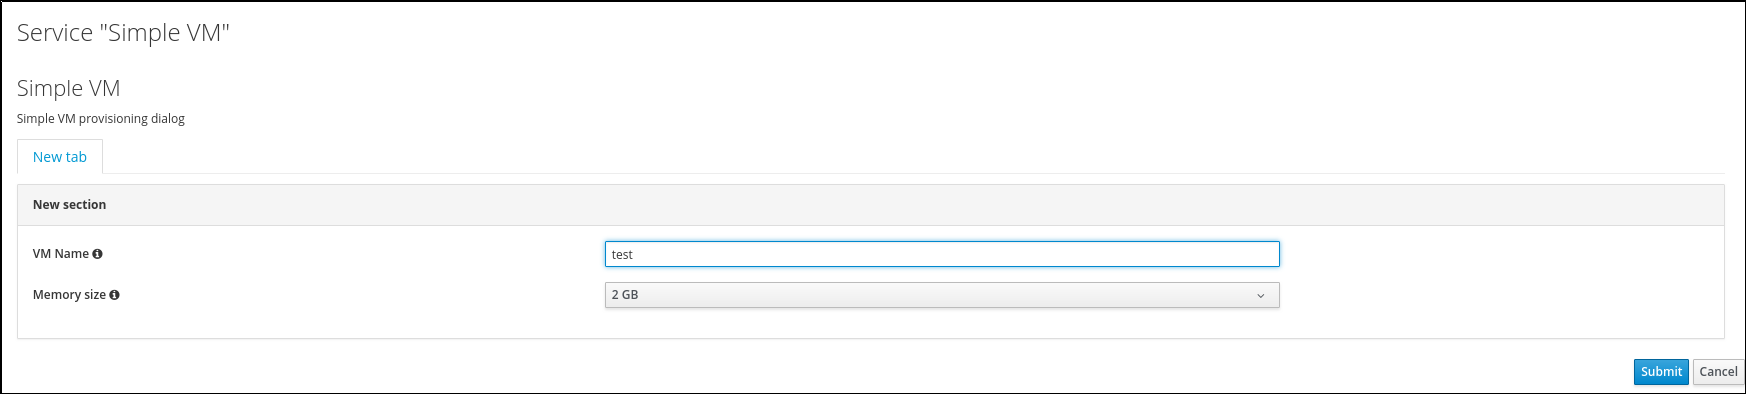
Click Submit to order the Virtual Machine
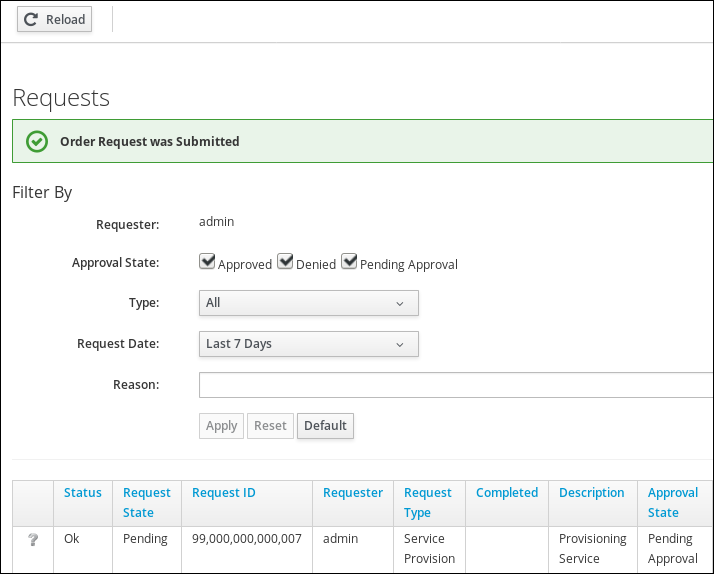
You will be redirected to the request queue where you can see CloudForms working on your request.
Since we are using nested virtualization to run these labs, performance will be slow and it can take several minutes to complete the request (20-30 minutes).
Verify the order
In the requests queue you can click on Reload to see how CloudForms processes the order. If you click the button a few times, you should see the status is progressing.
While the VM is cloned from template, it does not show up in the CloudForms inventory. Watch the request queue and after the VM was cloned, check the result.
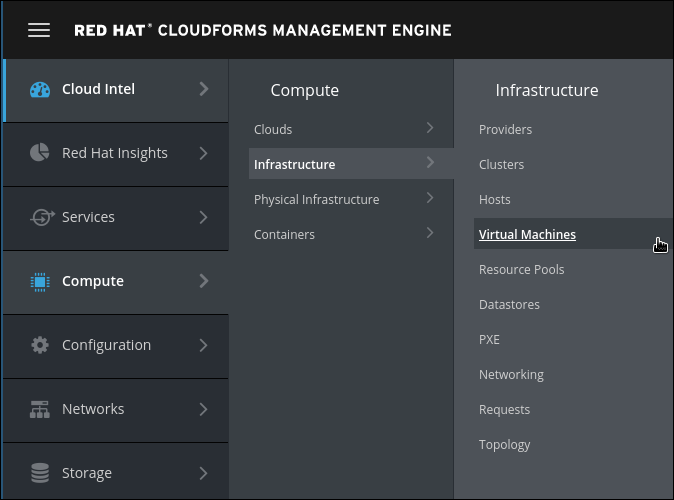
Navigate to Compute -> Infrastructure -> Virtual Machines
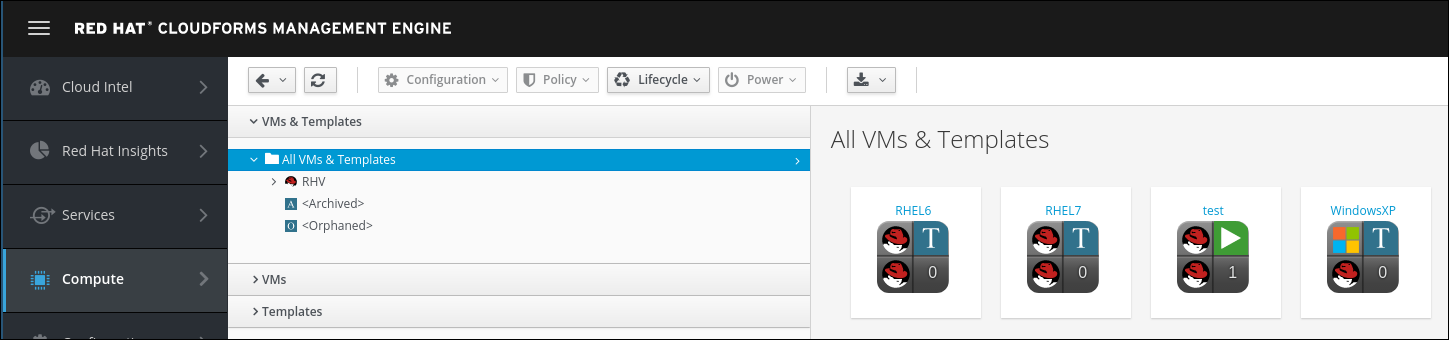
You should see a VM with the name “test” in the overview
If you don’t see the VM yet, it is probably still in creation. Check Services -> Requests to see the current status and reload the VM page periodically. When the Request State is Finished, the VM should be completely provisioned and visible in Compute -> Infrastructure -> Virtual Machines
Click on the new VM “test” to see the VM details
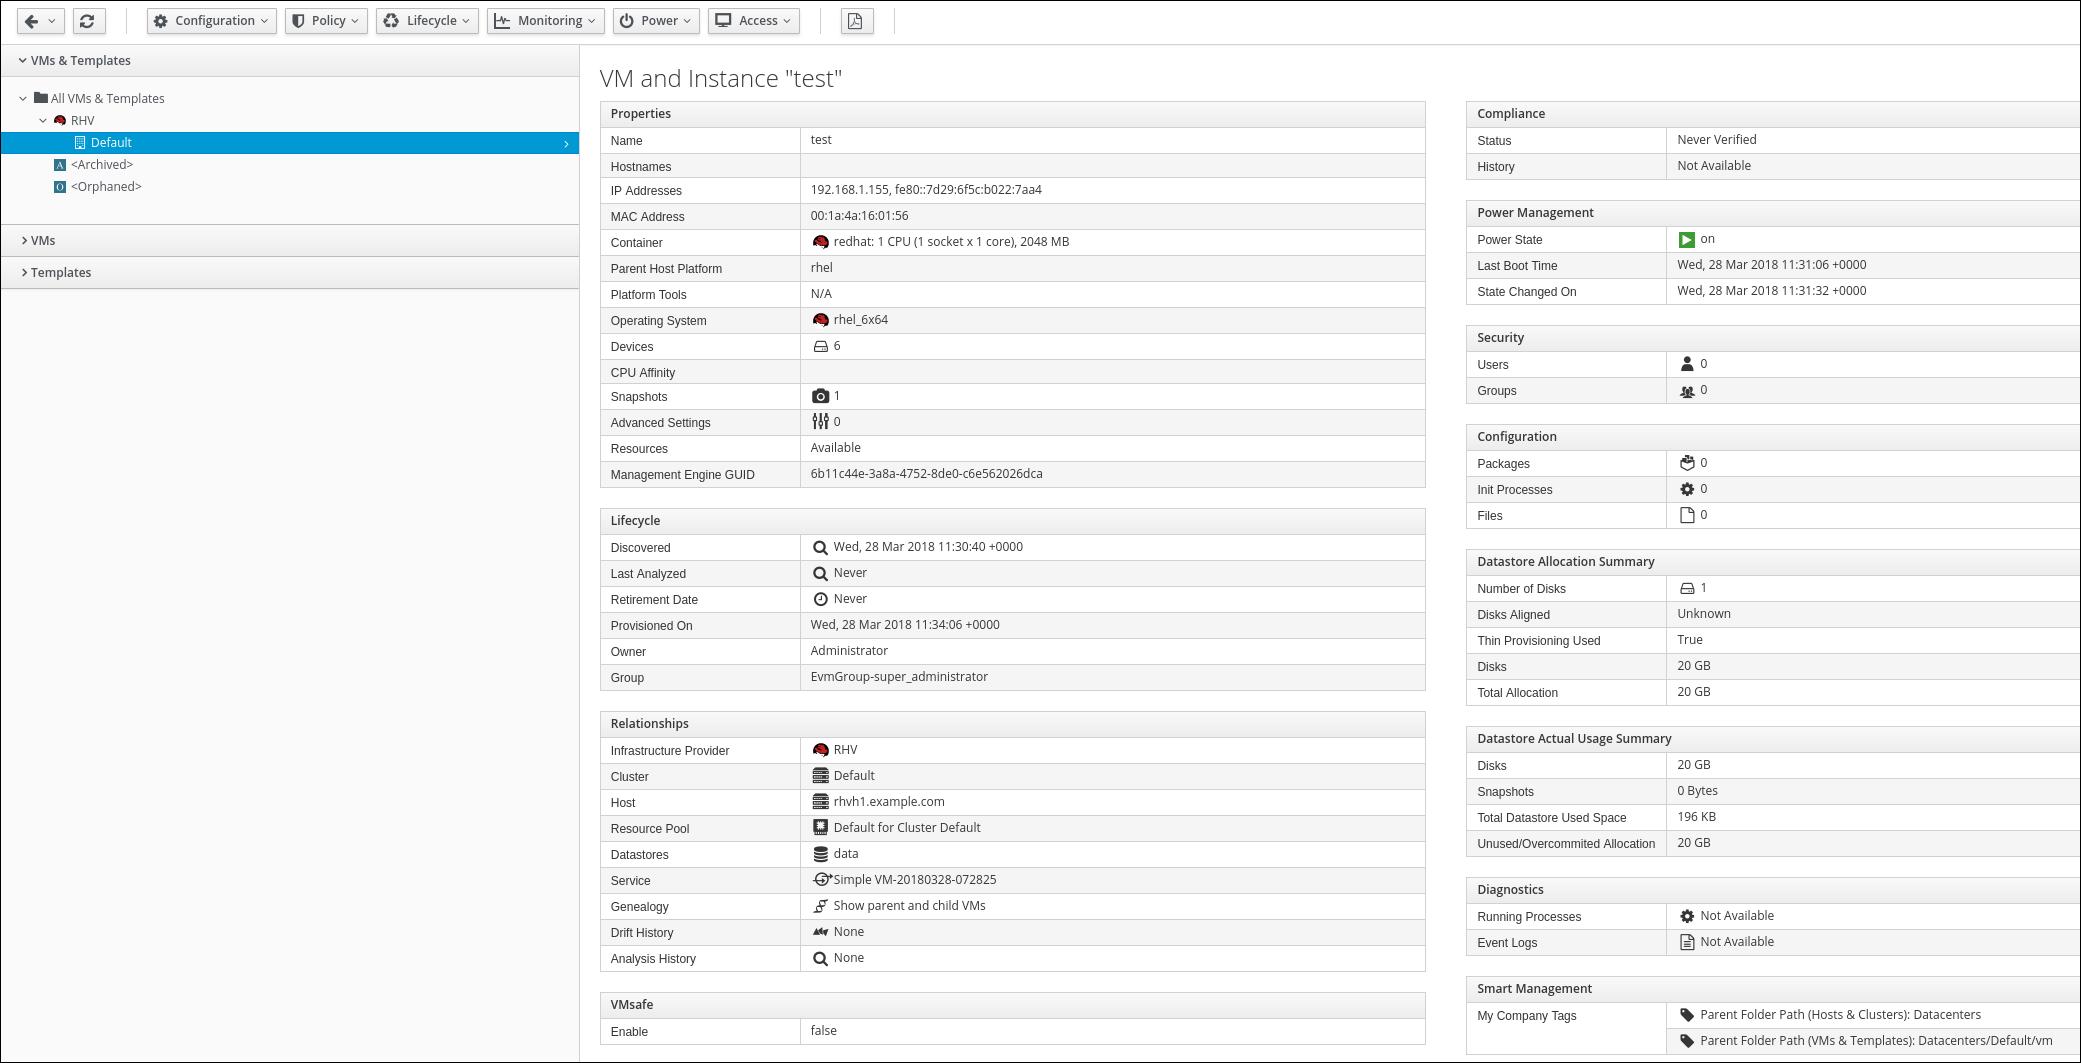
This concludes this part of the lab.