Ansible included
CloudForms 4.5 with Ansible batteries included
This lab will guide you through the process of using the new embedded Ansible features of CloudForms 4.5.
Introduction to Ansible
Today, every business is a digital business. Technology is your innovation engine, and delivering your applications faster helps you win. Historically, that required a lot of manual effort and complicated coordination. But today, there is Ansible - the simple, yet powerful IT automation engine that thousands of companies are using to drive complexity out of their environments and accelerate DevOps initiatives.
Red Hat CloudForms can integrate with IaaS, PaaS, public and private cloud and configuration management providers. Since version 4.2 of CloudForms, it can also integrate with Ansible Tower by Red Hat. The latest version which is 4.5, has a new “embedded Ansible” role which allows it to run Playbooks, manage credentials and retrieve Playbooks from a source control management like git.
This integration allows customers to build service catalogs from Ansible Playbooks to allow end users to easily browse, order and manage resources from Ansible. Ansible Playbooks can be used in Control Policies which can not only detect problems, but also automatically fix them.
Make sure embedded Ansible role is enabled and running
Before we start, we want to make sure the embedded Ansible role is enabled and running.
Log into your CloudForms Appliance
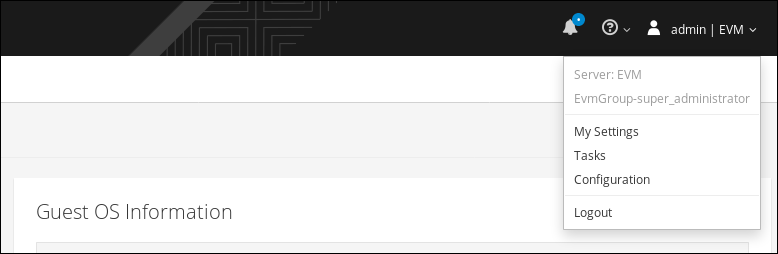
Click on your user name on the top right and click on Configuration
Make sure the “Embedded Ansible” Role is enabled

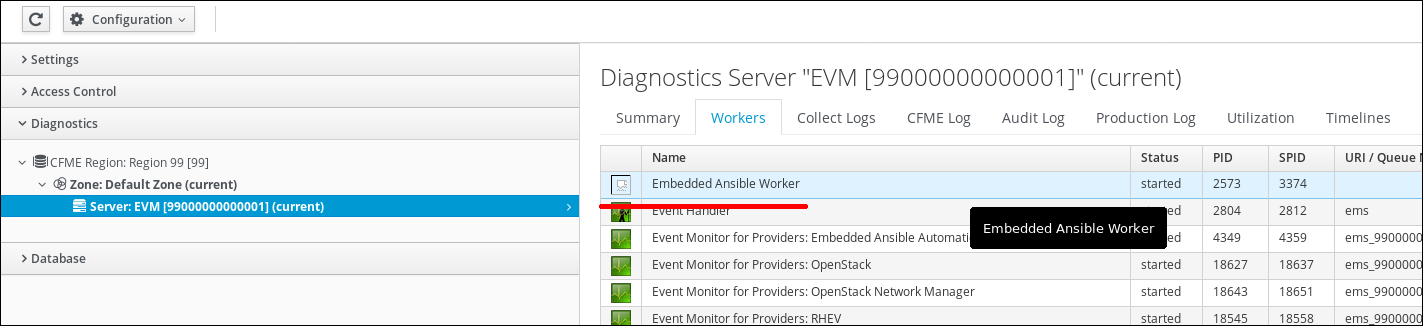
Click on Diagnostics in the accordion on the left and click on the Workers tab
Make sure you can see a line indicating the “Embedded Ansible Worker” is in state “started”
Logoff as demouser and login back as Admin
Add a Git repository of Ansible Playbooks
To be able to run Ansible Playbooks, they have to become available in CloudForms. Custom git repositories can be used as well as Github, Gitlab or others. Other repository types like Subversion or Mercurial are planned for later versions.
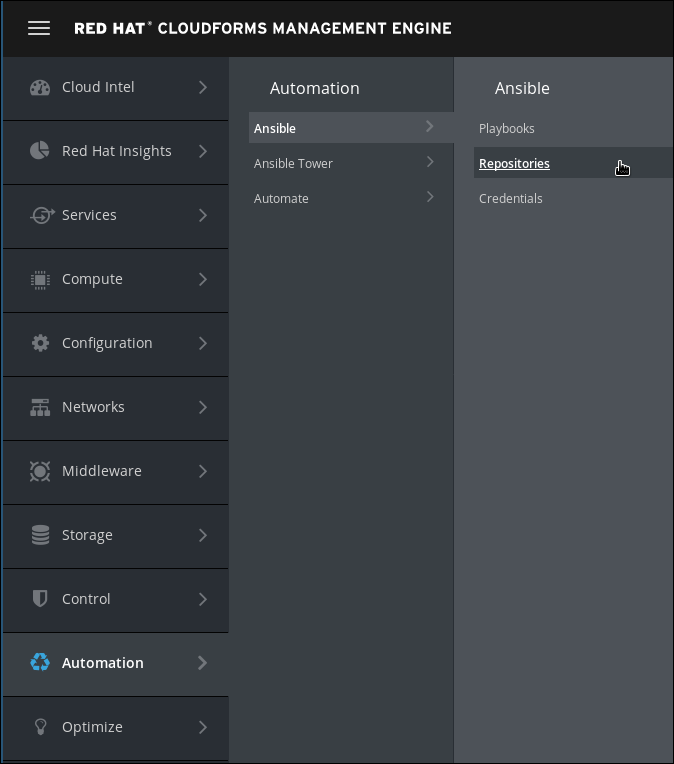
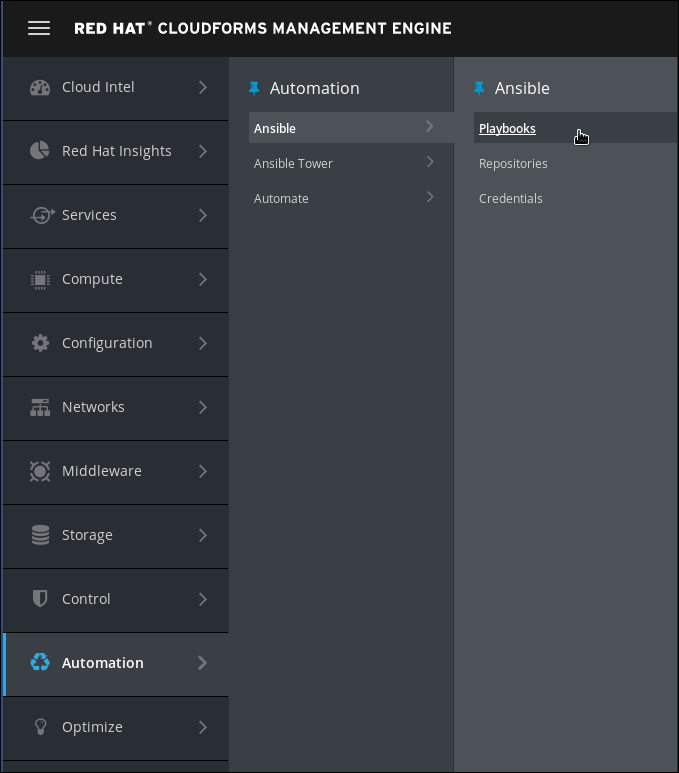
Navigate to Automation, Ansible, Repositories.
Click on Configuration, Add New Repository
Fill in the form.
Name: Github
Description: Example Playbooks
URL: https://github.com/cbolz/rhte-fy18.git
SCM Update Options: check “Update on Launch”
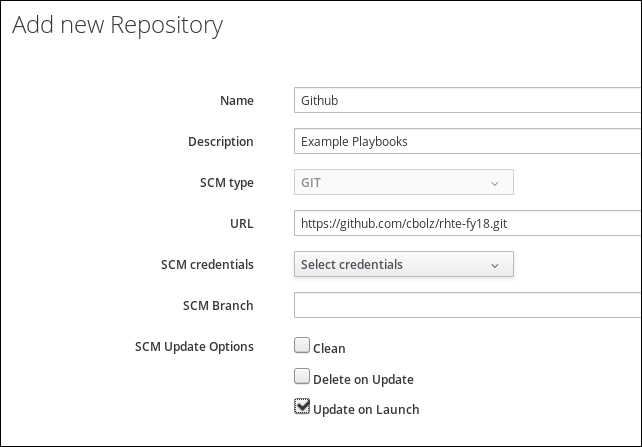
Click on Add to save the settings
It takes a few seconds for the action to complete. A pop up notification will inform you after the task was completed.
Add vCenter credentials
For one of the following labs, the Playbook needs to be able to log into the vCenter provider. For this to work, we need to store the necessary credentials.
Navigate to Automation -> Ansible -> Credentials
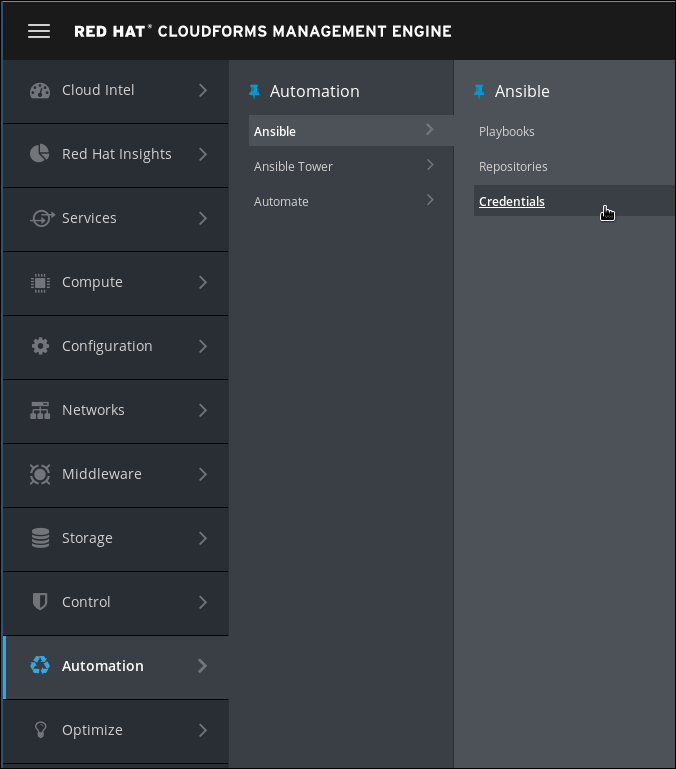
Click on Configuration -> Add New Credentials
Provide the credentials in the form:
Name: vCenter
Credentials Type: VMware
Username: root
Password: r3dh4t1!
vCenter Host: vcenter.example.com
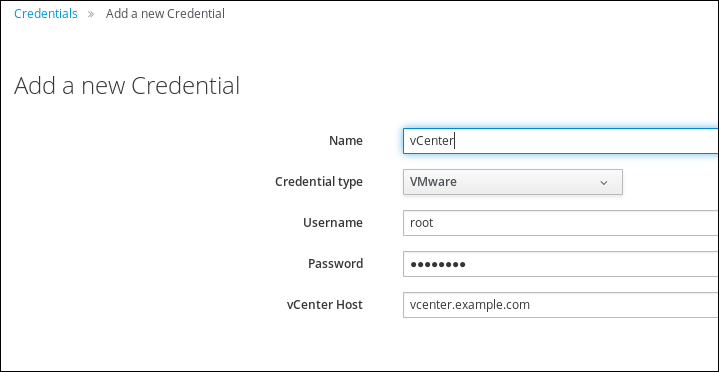
Click Add to save the credentials
It takes a few seconds for the action to complete. A pop up notification will inform you after the task was completed. You can track the progress in the Tasks section.
In the top right corner of the screen navigate to Administrator -> Tasks
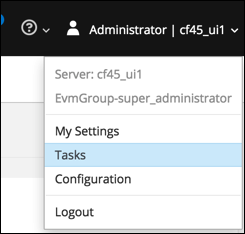
And click in All Other Tasks
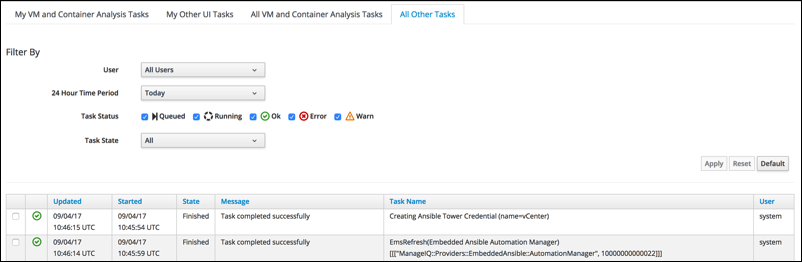
Verify repository sync
In the meantime the repository you created should have completed the initial synchronization. Let’s check all Playbooks have been successfully imported and are available for us to use.
Navigate to Automation -> Ansible -> Playbooks
You should see a list of available Playbooks

If there are no Playbooks listed, check the repository was configured correctly. Click the notification icon on the top right (the little bell icon) and check if there are any errors listed. The initial import can also take a minute or two, did you wait long enough?
Install pysphere
In order to use the Ansible VMware modules you need to install a python library call “pysphere”. You need to ssh to you student workstation and jump to the CloudForms server.
$ sudo easy_install -U pysphere
Build a Service Catalog to create and delete users
In this lab we will use an Ansible Playbook to create a local user in CloudForms. This example will also demonstrate how we can define a retirement process as well. In CloudForms’ understanding of complete life cycle management, every object has a provisioning and a retirement workflow.
Create a Service Catalog for Ansible Playbooks
Navigate to Services -> Catalogs
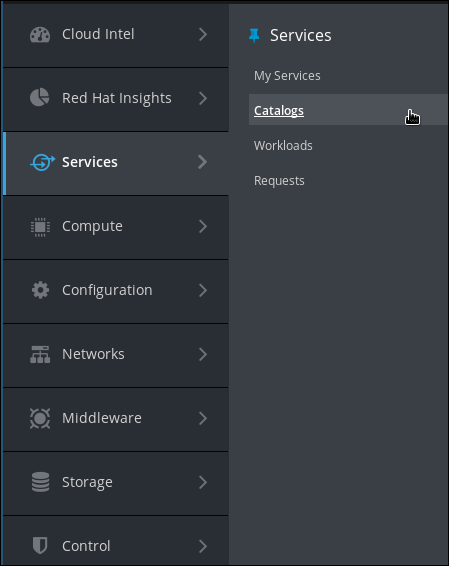
Click on Catalogs in the accordion on the left
Click on Configuration -> Add a New Catalog
Name: Ansible
Description: Ansible Service Catalog Items
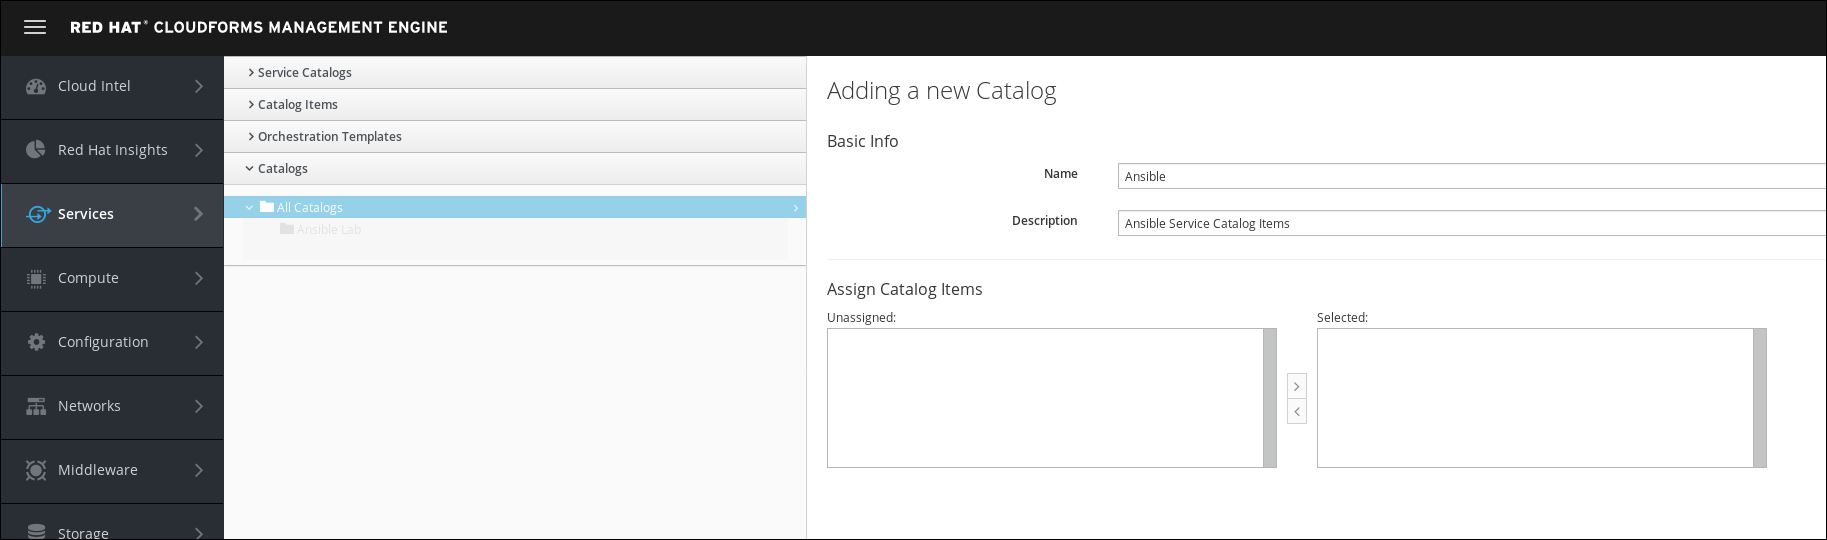
Click Add to save the new catalog
Create a Service Catalog Item for the Playbook
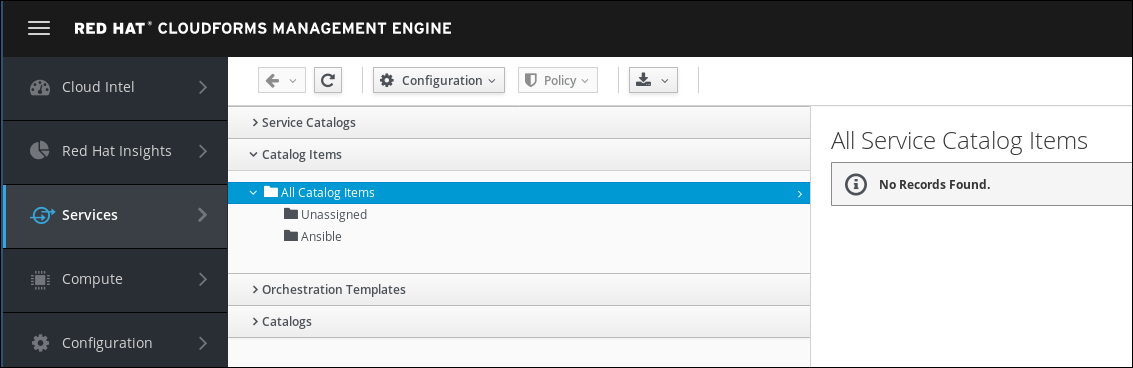
Click on Catalog Items in the accordion on the left
Click on Configuration -> Add a New Catalog Item
Select Ansible Playbook as “Catalog Item Type”
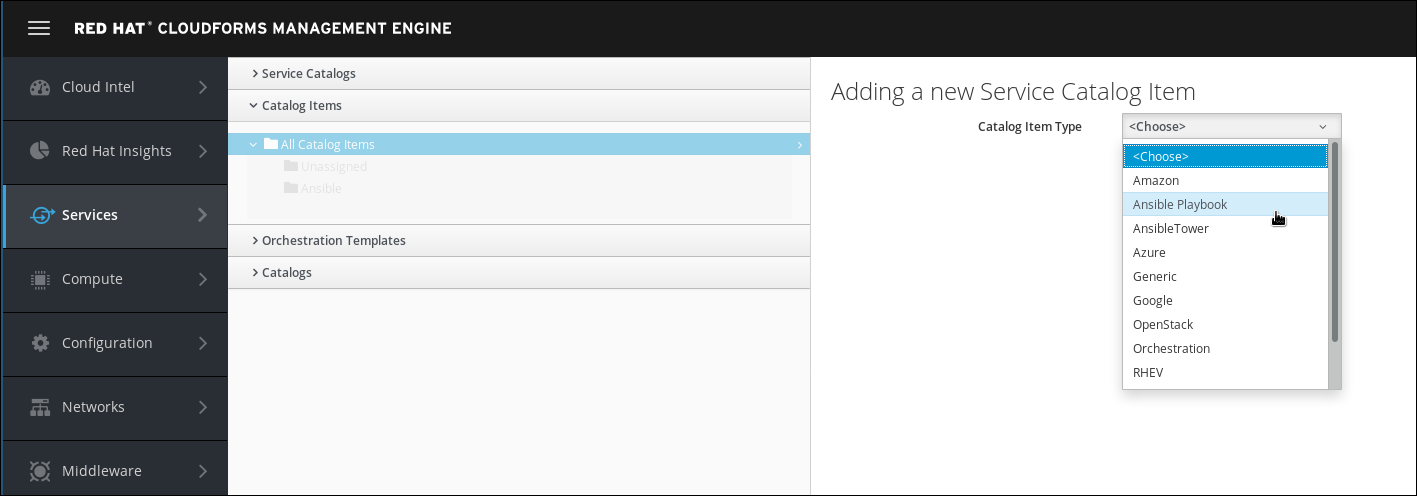
Do not select Ansible Tower! We do not use Ansible Tower in this lab, but the embedded Ansible role of CloudForms.
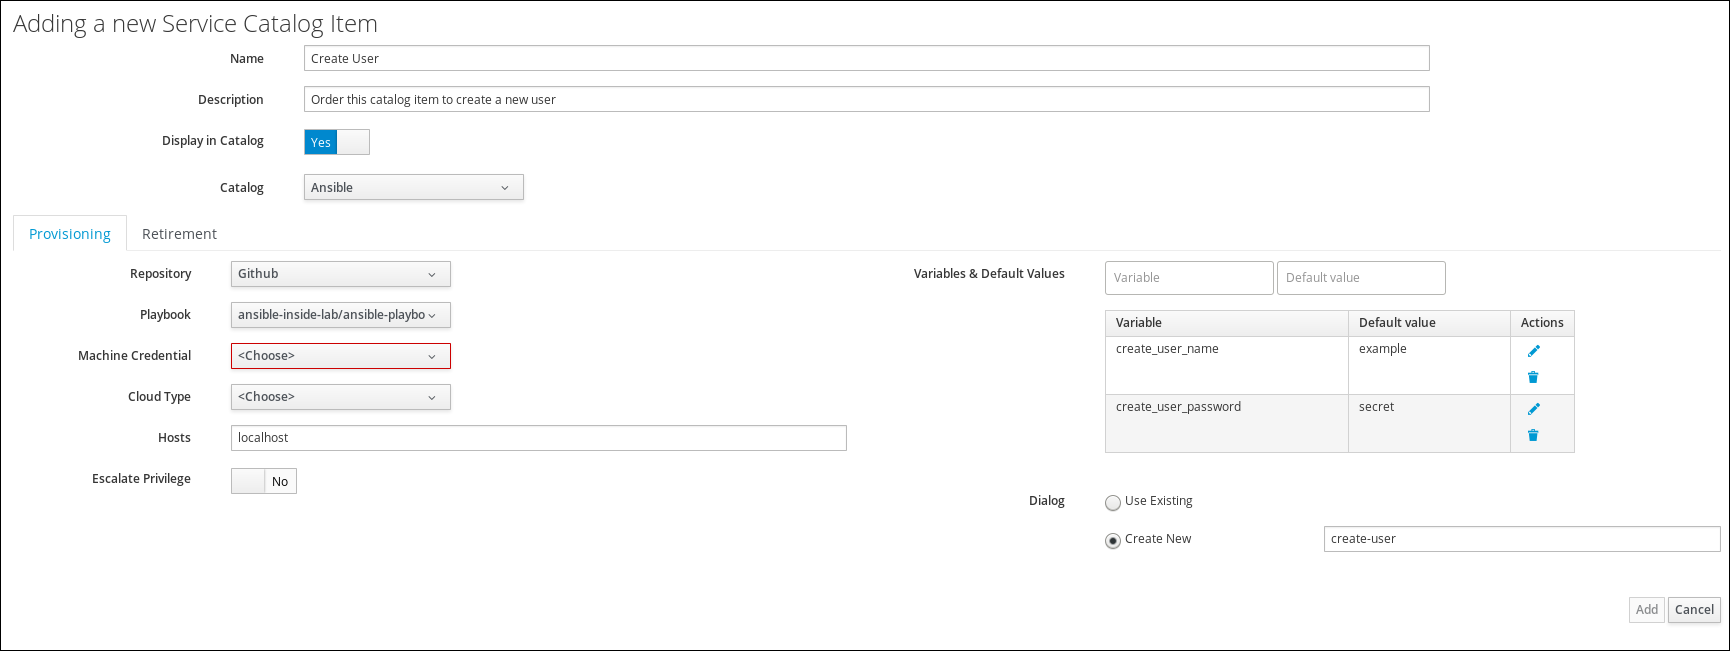
Fill out the form to define the service catalog item:
Name: Create User
Description: Order this catalog item to create a new user
Display in Catalog: Yes (check the box)
Catalog: Ansible
Repository: Github
Playbook: create-user.yml
Machine Credentials: CFME Default Credentials
In the box Variables & Default Values we can enter the variables the Playbook requires:
Variable: create_user_name
Default: example
Click on the little plus icon (+) to save the variable. Repeat the process for the second variable:
Variable: create_user_password
Default: secret
Click on the little plus icon (+) to save the variable.
Dialog: create new
Dialog name: create-user

Click on the tab Retirement to switch to the second page of the form.
Repository: Github
Playbook: delete-user.yml
Machine Credentials: CFME Default Credentials
There are no variables needed for retirement and the Variables & Default Values can be left empty.
Click on Add to save the catalog item
Order the “create user” Service Catalog Item
To make sure everything works as expected, we want to test the Catalog Item we just created.
Navigate to the Service Catalog by clicking on Services -> Catalogs
Click on Service Catalog in the accordion on the left
Click on the Catalog Item you just created:
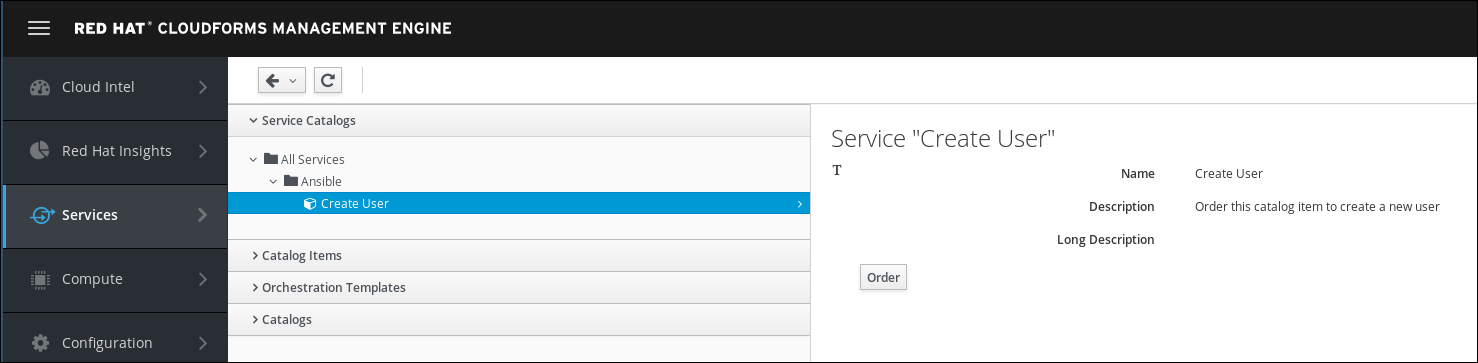
Click Order
The default values in the form can be left alone. Optionally you can specify a different user name and password
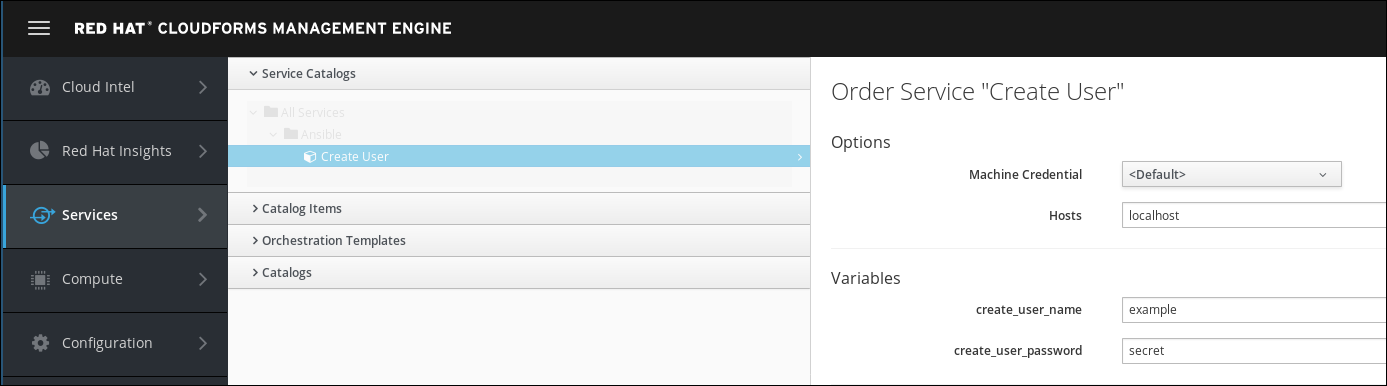
Click Submit
After clicking “Submit” you will be redirected to the Request Queue.
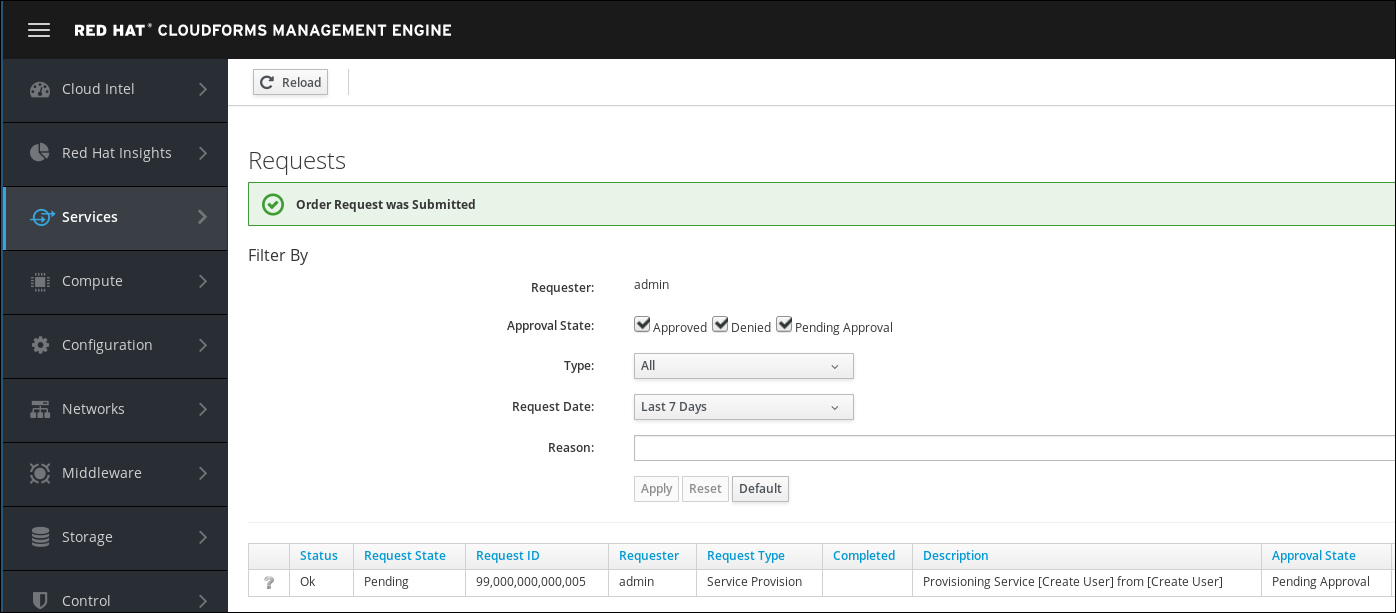
Monitor create user Playbook execution
When executing an Ansible Playbook with the embedded role in CloudForms, a “Service” object is automatically created. This service object gives us more details about the executed Playbook. It provides the output of the Playbook and it allows us to trigger retirement.
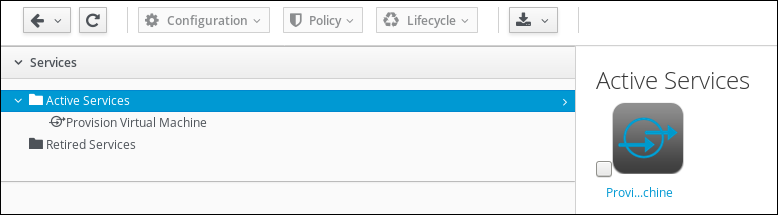
Navigate to Services -> My Services
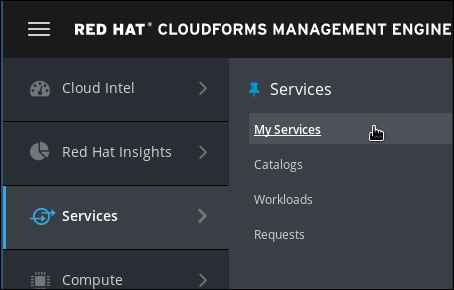
You should see a new tile representing the Ansible Playbook Service you just ordered
If you don’t see the tile yet, wait a minute and try again.
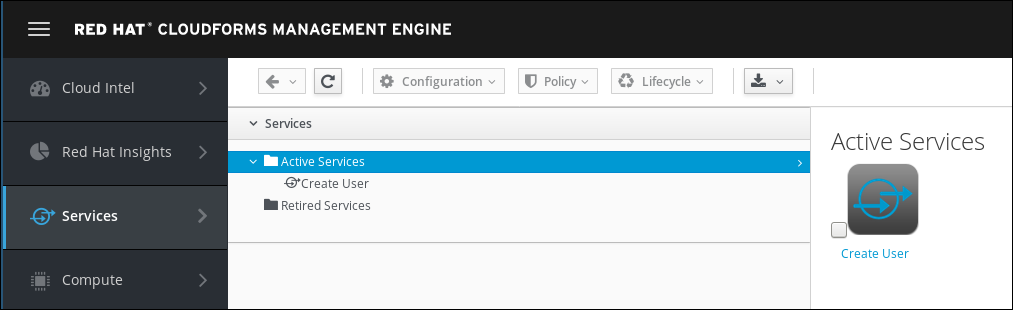
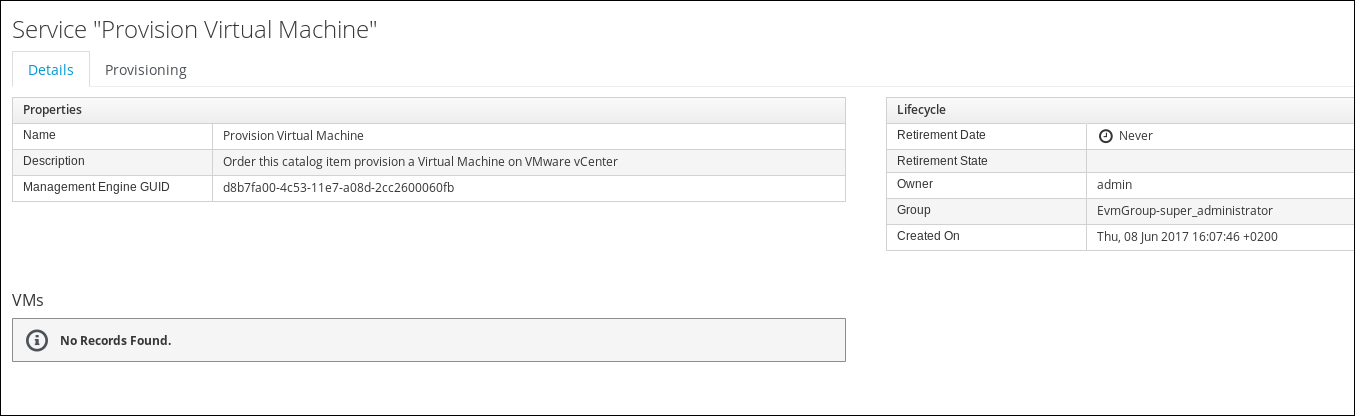
After clicking on the icon, we can see more details about the service which was created
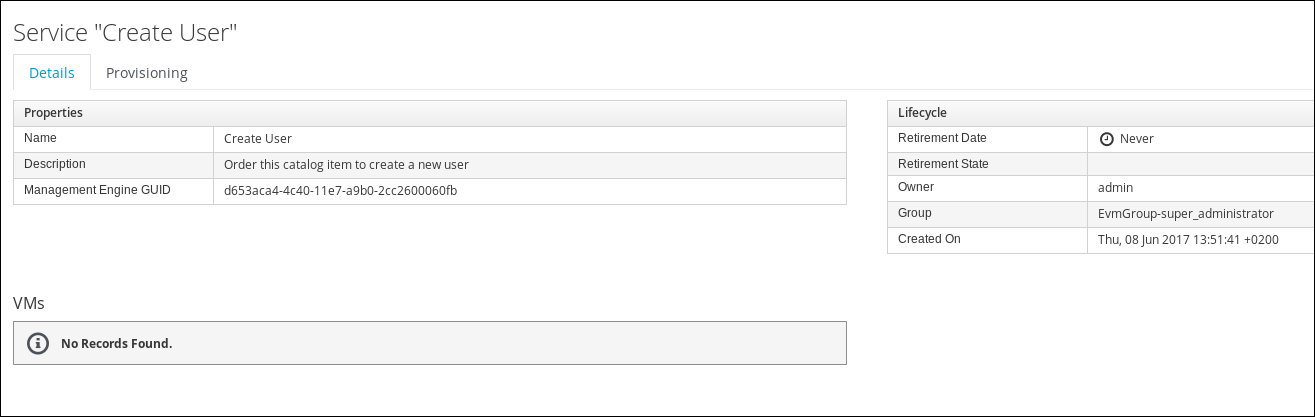
Since this Service does not create a Virtual Machine, the box “VMs” will always say “No Records found”
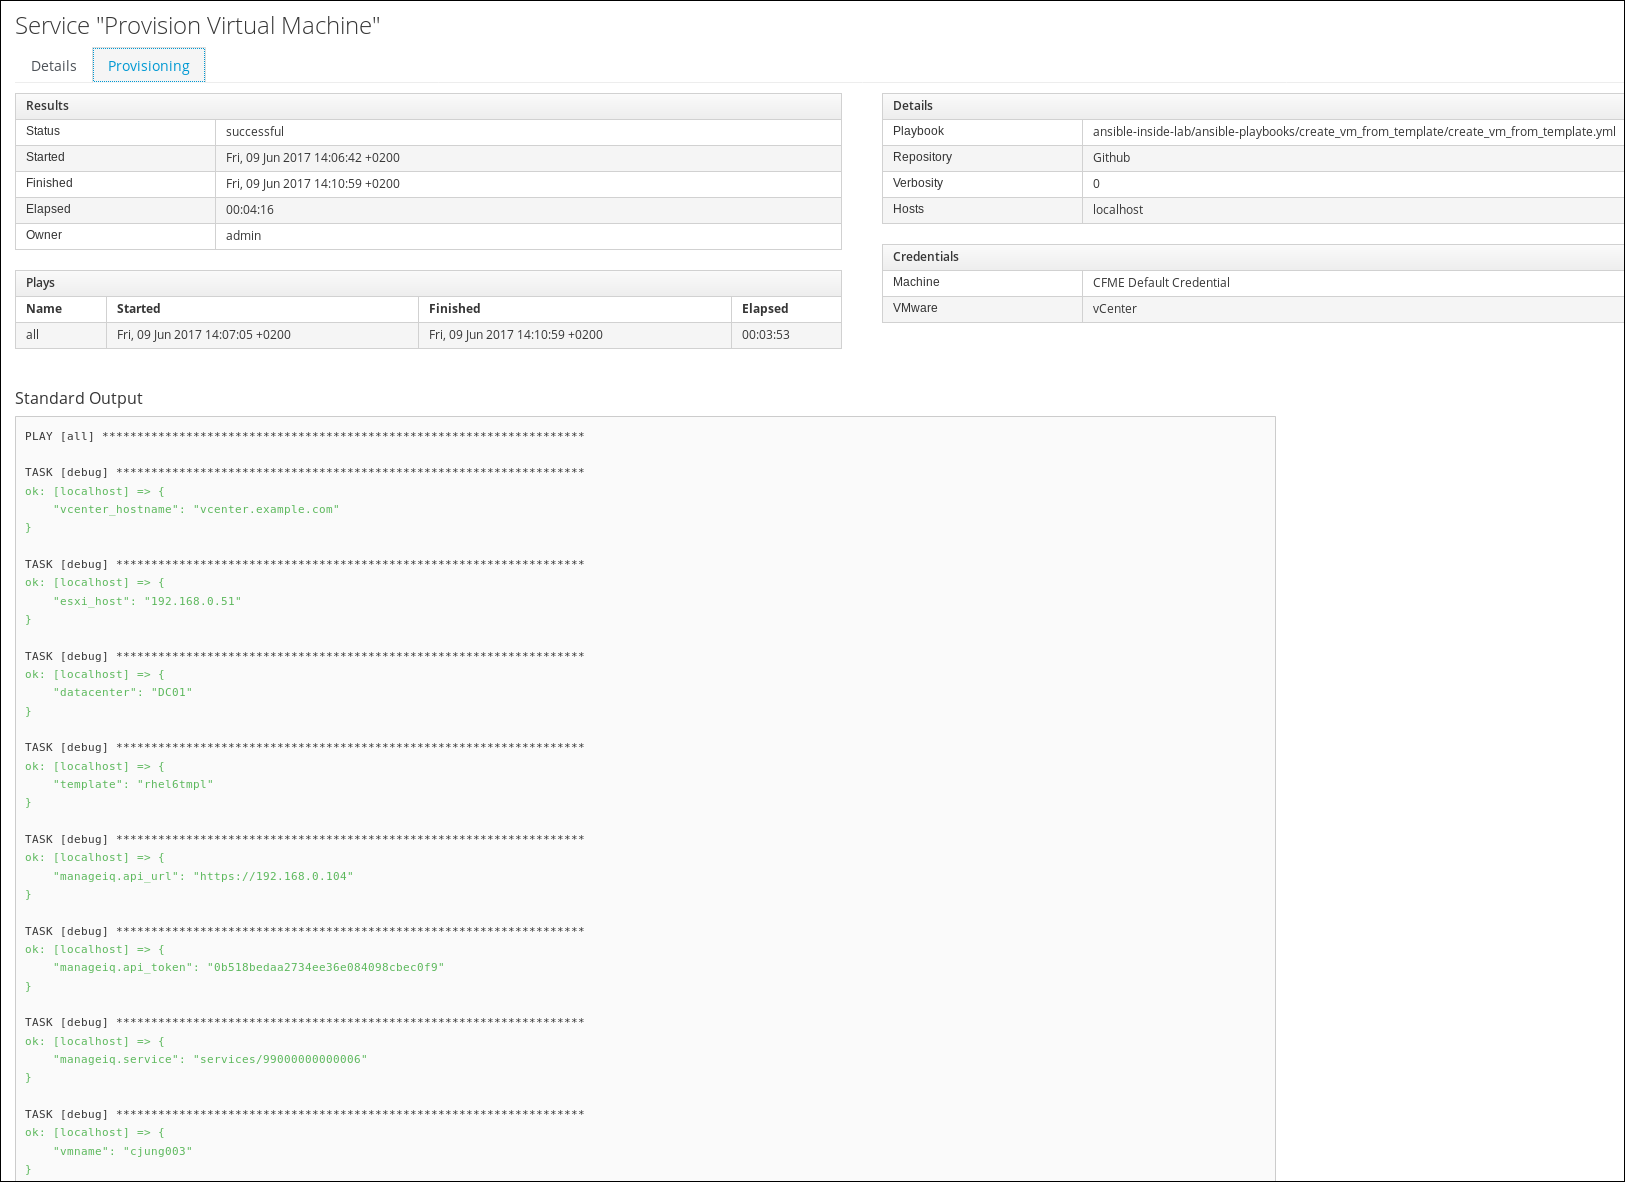
Click on the Provisioning tab to see the output of the Ansible Playbook
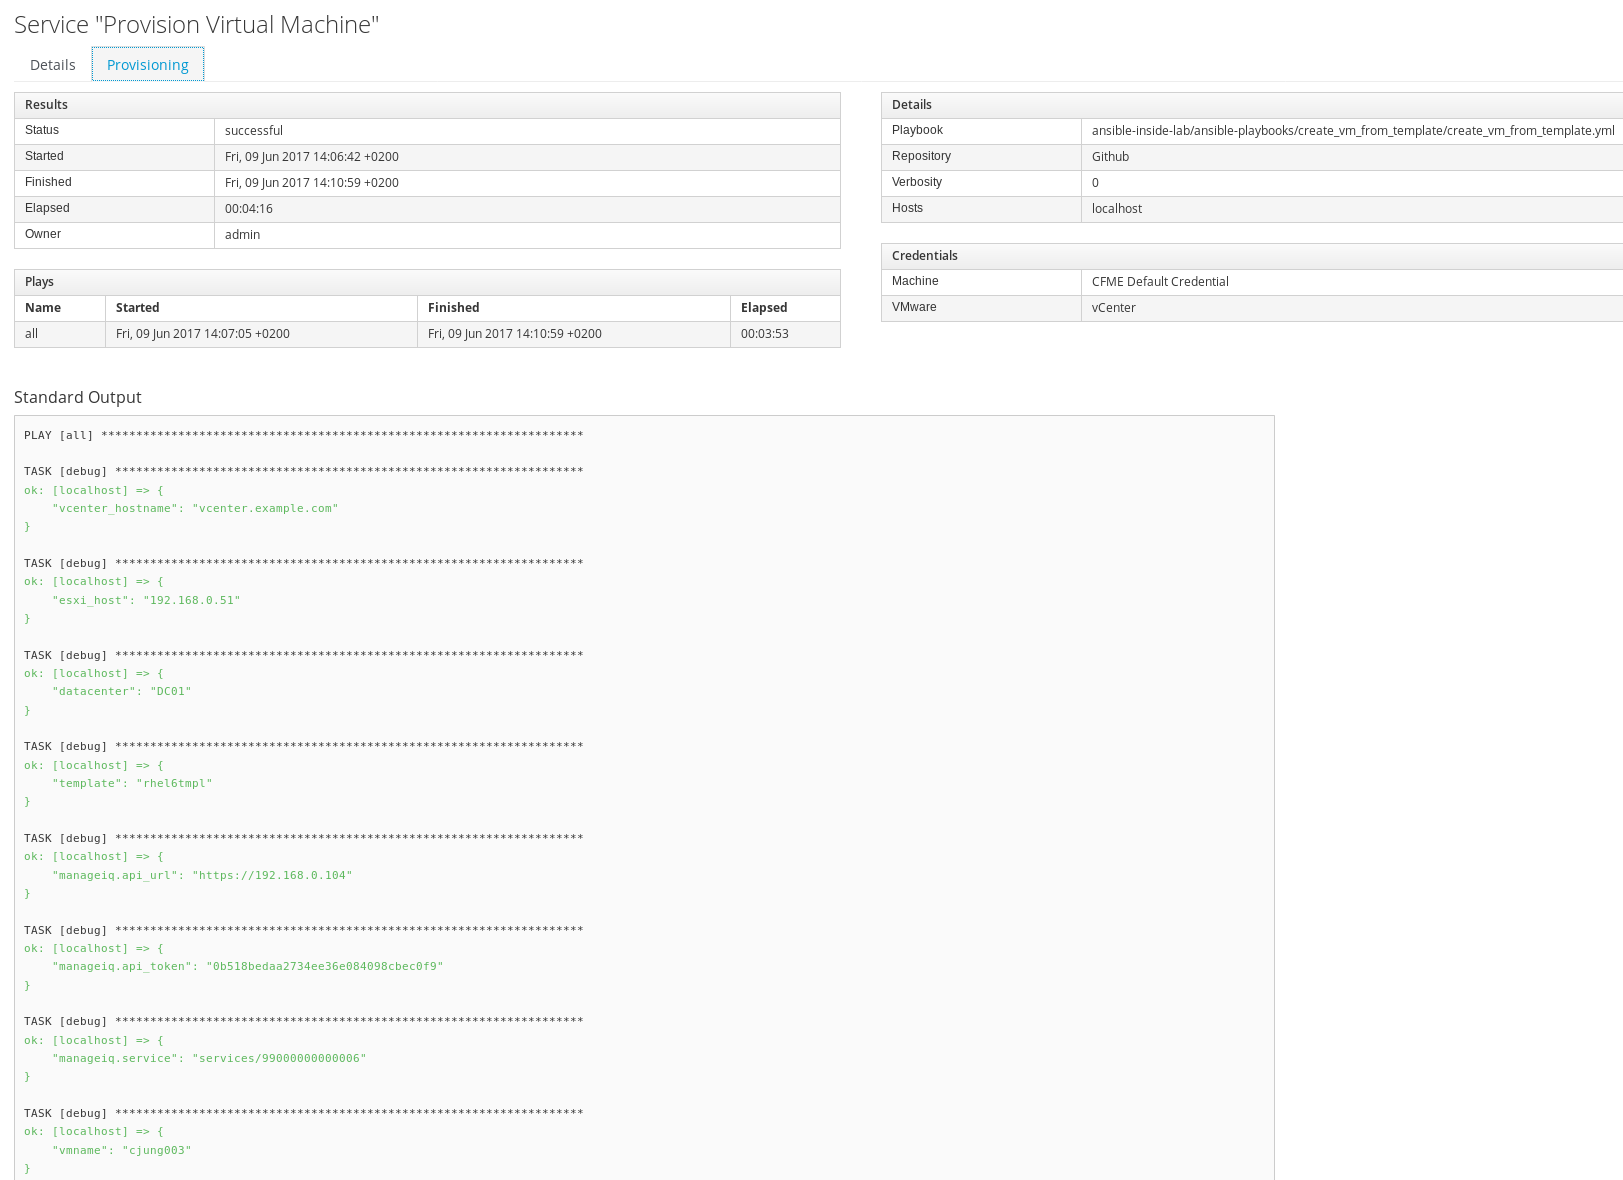
If the Playbook execution has not completed, you can click the reload icon to refresh the information. The Reload icon is represented by a little arrow, left of the Configuration menu.
![]()
If the Playbook execution has not started yet, you might not see any details in the “Provisioning” tab. Wait a minute and reload once more.
Verify Playbook results
To make sure the user was really created, follow these steps.
Click on your username on the top right and click on Configuration
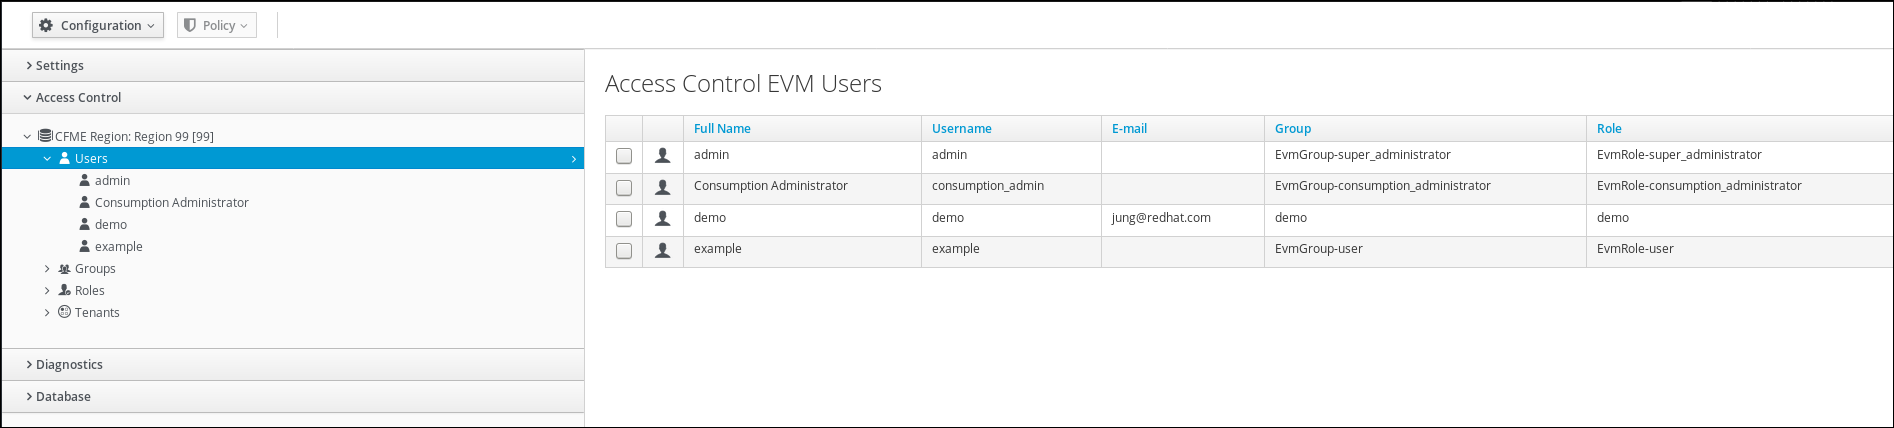
Click on Access Control in the accordion on the left
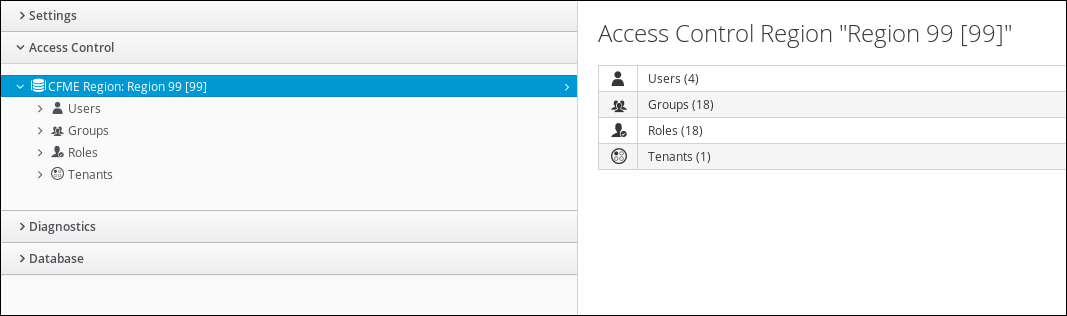
Click on Users and you should see the user you just created (in this screenshot the user is called “example”)
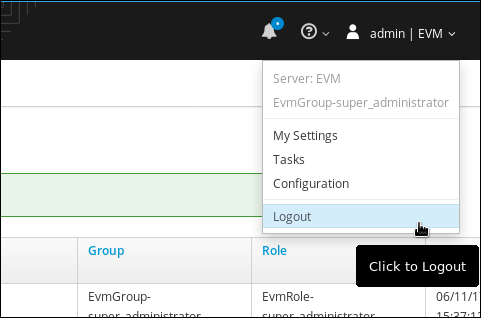
OPTIONALLY: If you want, you can log out of CloudForms and try to log in with the user you just created. Click on your username on the top right and Logout.
Build a Service Catalog to deploy Virtual Machines
In this second part of the lab we want to use an Ansible Playbook to deploy a Virtual Machine in VMware vCenter. The necessary Playbook should already be in your repository.
Click on Catalog Items in the accordion on the left
Click on Configuration -> Add a New Catalog Item
Select Ansible Playbook as “Catalog Item Type”
Do not select Ansible Tower! We do not use Ansible Tower in this lab, but the embedded Ansible role of CloudForms.
Fill out the form to define the Service Catalog Item:
The name of the Service Catalog Item:
Name: Provision Virtual Machine
More description details about the Service Catalog Item
Description: Order this catalog item provision a Virtual Machine on VMware vCenter
Check this box to make the Service Catalog Item visible in the Service Catalog. This remains unselected for Service Catalog Items which are still in draft mode or should only be used as a part of a Service Catalog Bundle:
Display in Catalog: Yes (check the box)
The Service Catalog in which this Service Catalog Item should be listed:
Catalog: Ansible
The Git repository from which we want to run our Playbook:
Repository: Github
The name of the actual Playbook:
Playbook: create_vm_from_template.yml
Credentials used to run the Playbook:
Machine Credentials: CFME Default Credentials
If you want to run your Playbook against a Cloud Provider, you have to select which one:
Cloud Type: VMware
The credentials used to log into the Cloud Provider:
Cloud Credentials: vCenter
In the box Variables & Default Values we can enter the variables the Playbook requires. Those variables are defined in the Ansible Playbook. By specifying them here, CloudForms can populated those variables when somebody order the Service Catalog Item.
If you want to learn more about variables in Ansible Playbooks, have a look at the Ansible Documentation.
Variable: vcenter_hostname
Default: vcenter.example.com
Click on the little plus icon (+) to save the variable. Repeat the process for the second variable:
Variable: esxi_host
Default: 192.168.0.51
Click on the little plus icon (+) to save the variable. Repeat the process for the second variable:
Variable: datacenter
Default: DC01
Click on the little plus icon (+) to save the variable. Repeat the process for the second variable:
Variable: template
Default: rhel6tmpl
Click on the little plus icon (+) to save the variable. Repeat the process for the second variable:
Variable: vmname
Default: changeme
Click on the little plus icon (+) to save the variable.
Dialog: create new
Dialog name: provision-vm-vcenter
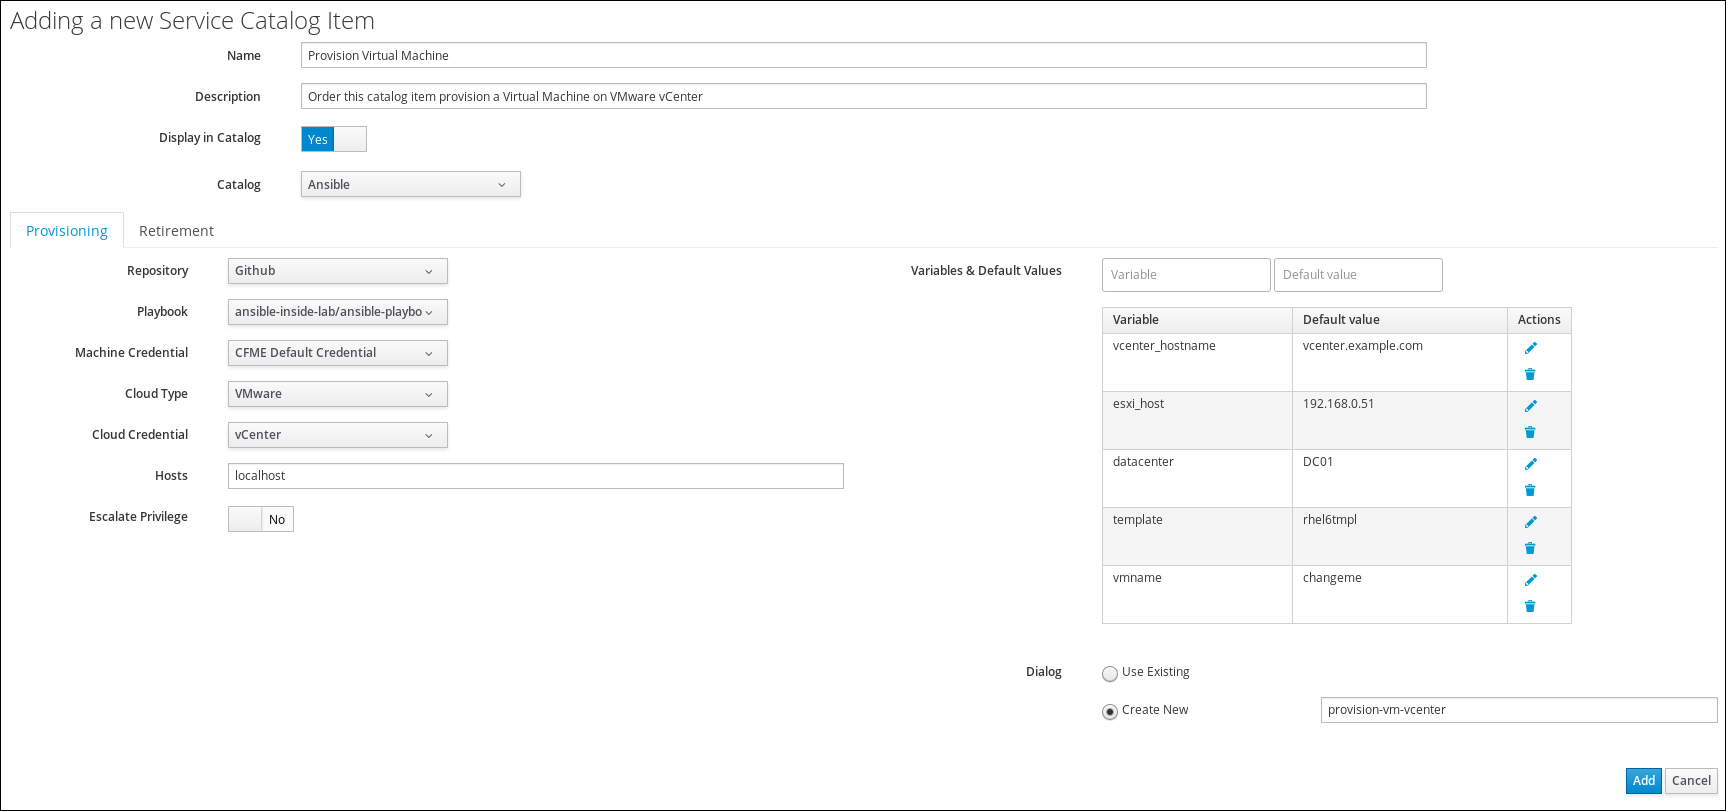
Click on Add to save the Service Catalog Item. It can take a few moments for the changes to be saved.

Order the Virtual Machine Provisioning Service Catalog Item
Once more, we want to test the result and see everything works as expected.
Navigate to Services -> Catalogs
Click on the Service Catalog Item we just created “Provision Virtual Machine”
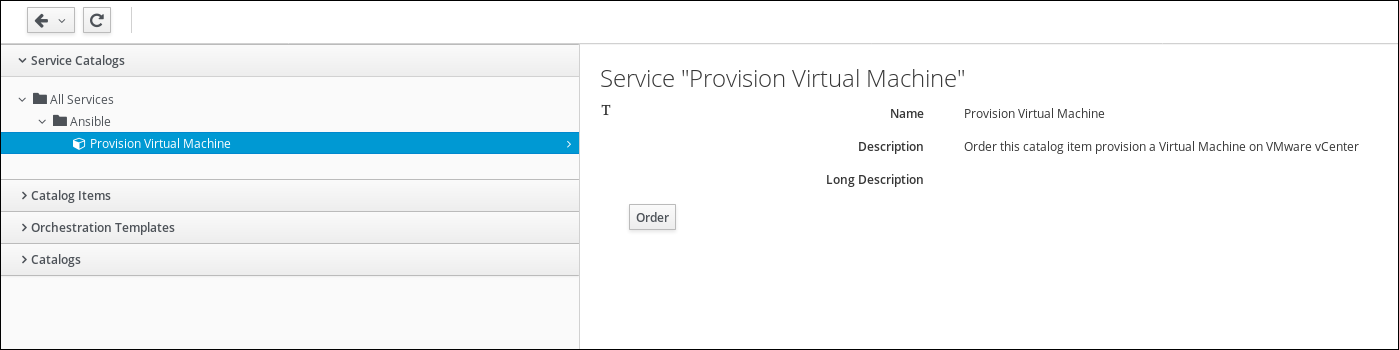
Click Order
If you specified the dialog elements like described before, your form should look like this and all the provided default values can be accepted.
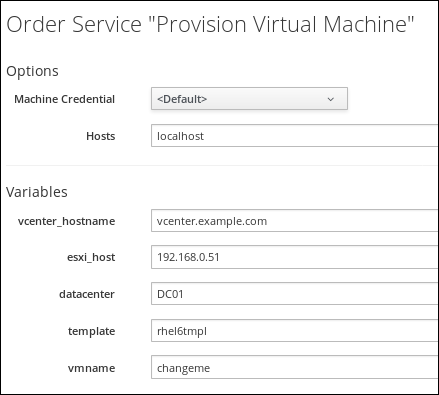
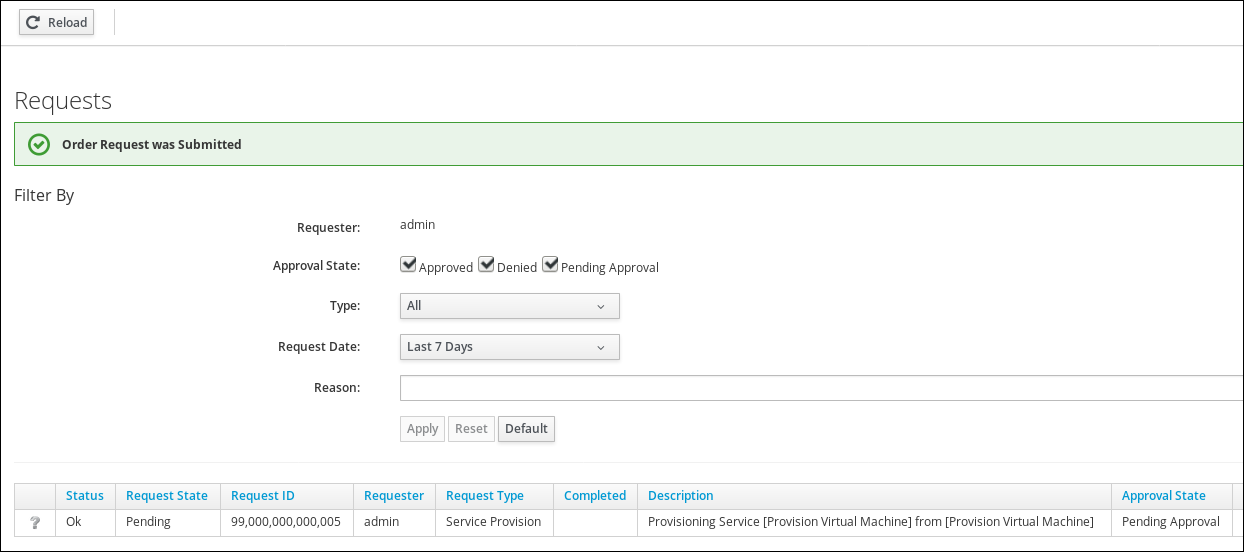
Click on Submit
After you click on “Submit” you will be redirected to the requests queue.
Monitor VM provisioning Playbook execution
When executing an Ansible Playbook with the embedded role in CloudForms, a “Service” object is automatically created. This service object gives us more details about the executed Playbook. It provides the output of the Playbook and it allows us to trigger retirement.
Navigate to Services -> My Services
You should see a new tile representing the Ansible Playbook Service you just ordered
If you don’t see the tile yet, wait a minute and try again.
After clicking on the icon, we can see more details about the service which was created
Since this Service does not create a Virtual Machine, the box “VMs” will always say “No Records found”
Click on the Provisioning tab to see the output of the Ansible Playbook
If the Playbook execution has not completed, you can click the reload icon to refresh the information. The Reload icon is represented by a little arrow, left of the Configuration menu.
![]()
Extend CloudForms builtin Capabilities
In this lab you have so far learned how to use Ansible Playbooks to orchestrate and execute configuration actions. CloudForms is internally using a powerful and extensible framework that defines what happens “under the hood”. This feature is called “Automate”. “Automate” allows us to understand how things are done and even more interestingly, it allows us to add features which are not coming out of the box.
“Automate” code can either be developed directly in the User Interface, or it can be imported from a Git repository. For this lab we want to keep things simple. We will add a Git repository with a simple method to make the Service Dialog easier to use.
Add a Git repository for Automate
“Automate” code can either be developed and written directly in the CloudForms Web UI, or it can be imported from a Git repository. We will do the latter:
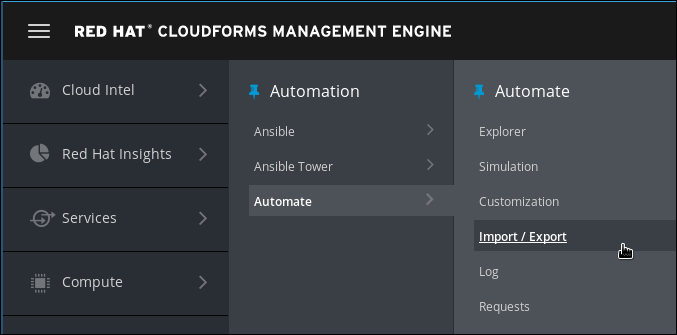
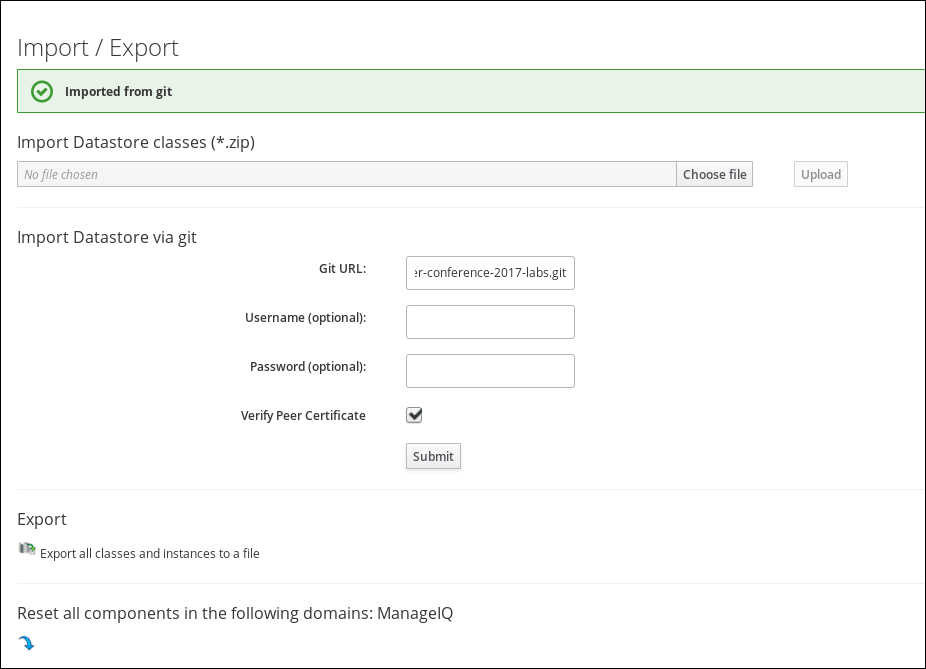
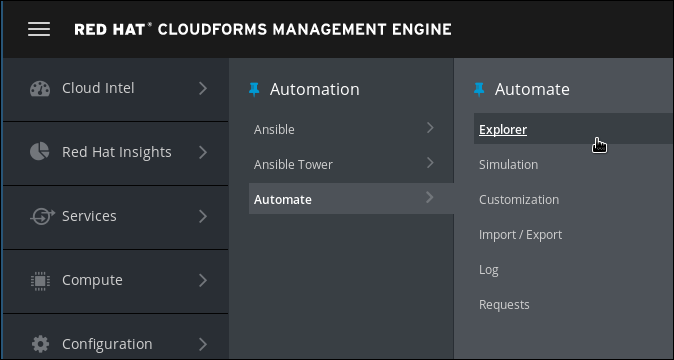
Navigate to Automation -> Automate -> Import/Export
Use the following URL to access the Git repository:
https://github.com/cbolz/partner-conference-2017-labs.git

Click Submit. It will take a few moments to check the Git repository.
The “Branch/Tag” and “Branch” fields allow us to import different tags or branches, for example “Development”, “Testing”, “QA”, etc.
For this lab, we stick with the defaults and click on Submit
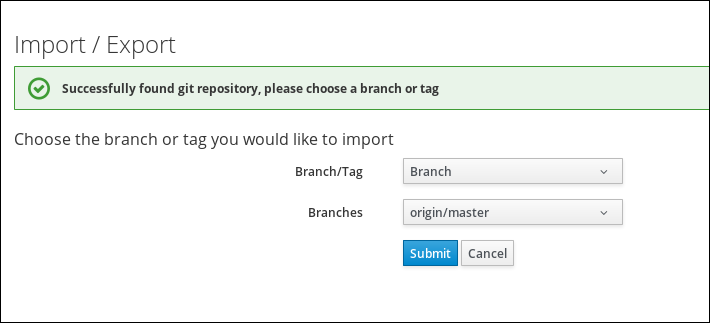
The first import can take a few moments. After that you should see the following confirmation:
Verify Automate import
We want to make sure the Automate Code was properly imported.
Navigate to Automation -> Automate -> Explorer
“Automate” code is organized in “Datastores”. Two Datastores are shipped with CloudForms:
-
ManageIQ: These methods are a verbatim copy of the Open Source Community version
-
RedHat: These methods are only shipped with Red Hat CloudForms and are supported by Red Hat
You can now see an additional third Datastore called “PConf17”, which is the one you just imported. Users can create as many additional datastores as they want, but they can not modify or delete the two datastores shipped with the product. Datastores are stacked and prioritized which allows separation of out of the box functionality from custom code.
The screenshot was created after expanding all folders (which are actually called “Namespaces” and “Classes”:
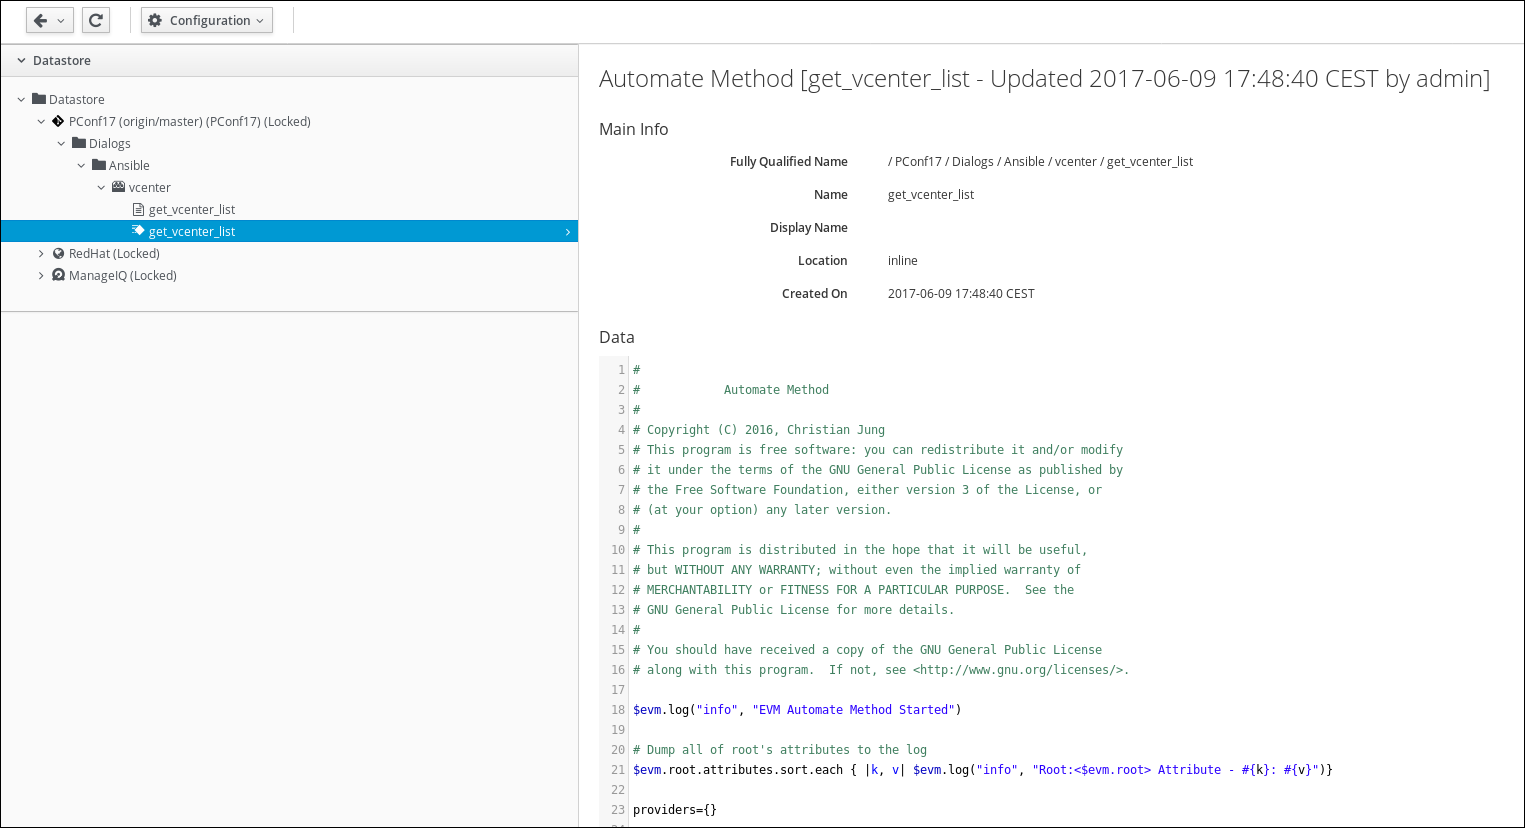
This concludes the preparation for the next part of the lab.
Optimize the Dialog
The Service Dialog we created so far, is not ideal for most use cases. We want users to focus on getting their service as quickly and easily as possible. An ideal Service Dialog only asks the absolutely necessary questions. With this in mind, we can optimize the automatically created Service Dialog created in the previous part of the lab.
Navigate to Automation -> Automate -> Customization

Click on Service Dialog in the accordion on the left

Click on the Dialog which was created in the previous step “provision-vm-vcenter”
Click on Configuration -> Copy this Dialog. We want to keep the original version of the Dialog, which will allow us to have a backup.
Edit the Label and Description to something a bit more meaningful
Label: provision-vm-vcenter-v2
Description: Optimized version of the Service Dialog
Do not click on Add yet, we want to do some more changes!
We want to do several changes on this Dialog.
Change the Label to something more meaningful:
Label: provision-vm-vcenter-v2
The elements in the “Options” box will always be left to the default values for our Service Catalog Item to work. Since our users are never going to change any of the field in the “Options” box, we can simply delete the entire box.
Click on the Box “Options” and then on the little trash bin icon to delete it and all its child elements.
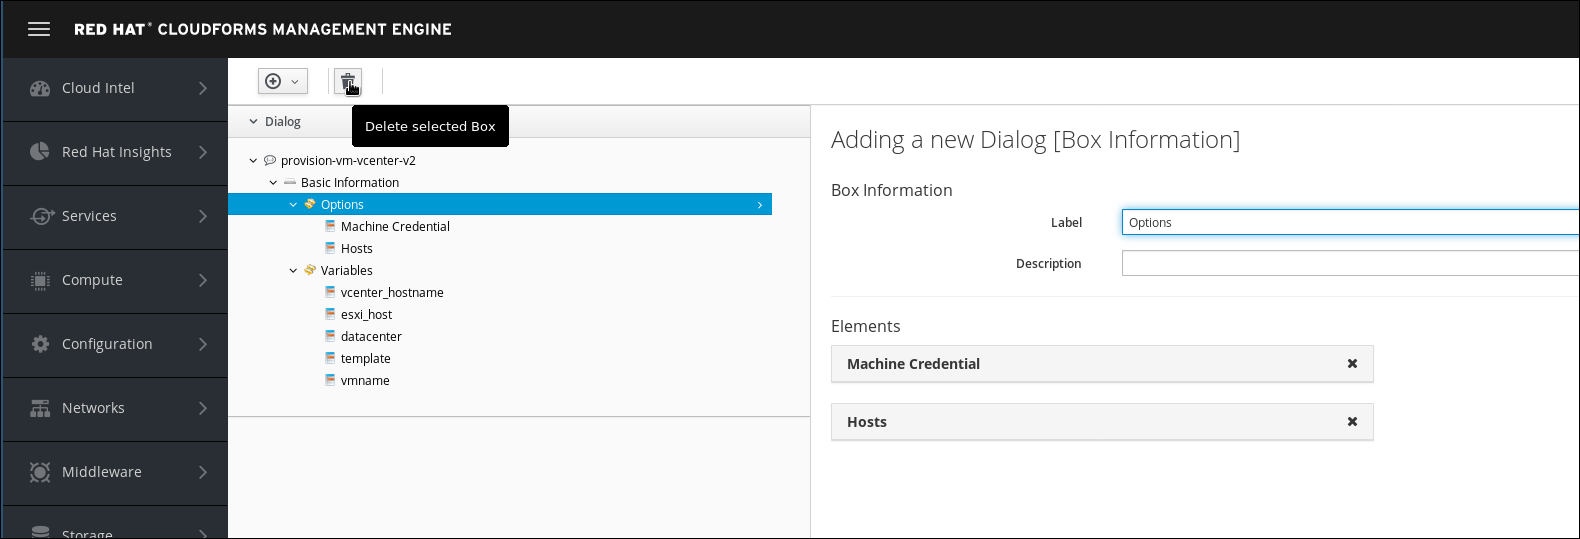
Make sure you have highlighted the correct element! If you deleted the wrong element by accident, you can click on Cancel and start over.
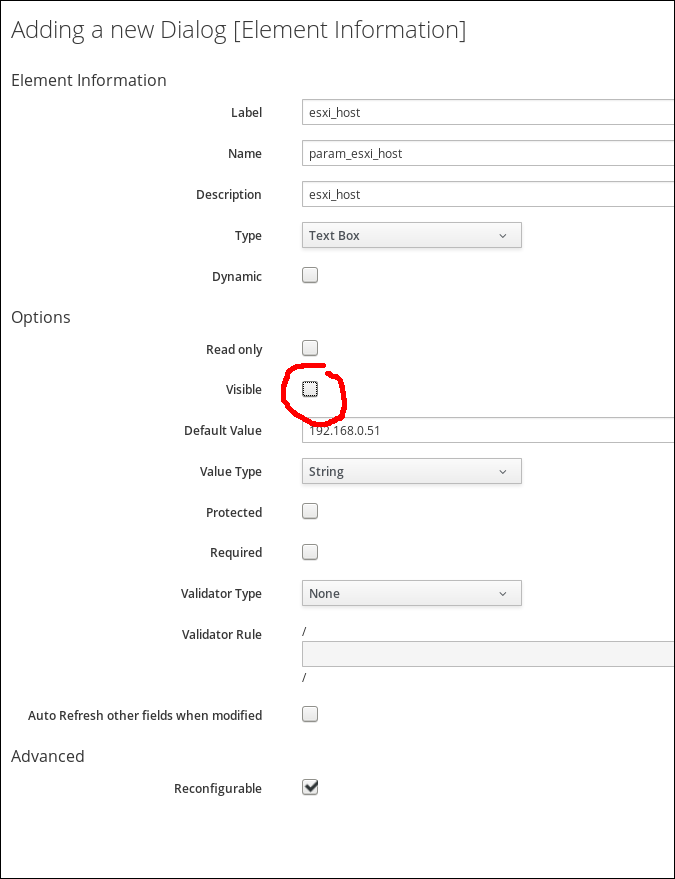
The ESXi host which will actually create the virtual machine, is always the same in this lab. We can hide the element to simplify the Dialog further.
Click on the Element “esxi_host” and unselect the “visible” box
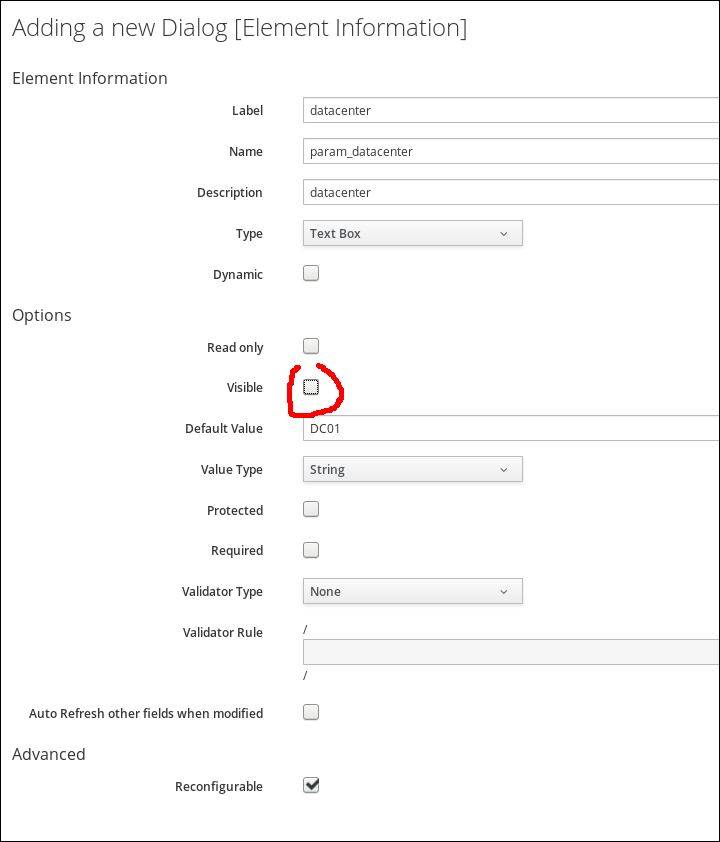
The same applies for the “Datacenter”. In this lab, there is only one.
To finish the our optimizations, we want to make the vCenter a dynamic drop down. Instead of providing possible values as a hard coded list, or asking the user for manual input, we can use program code to create a list of applicable options.
In this example, we want the list of available vCenters dynamically populated (Although there is still only one vCenter and the value is questionable at best. But it’s a good example of CloudForms’ capabilities nonetheless)
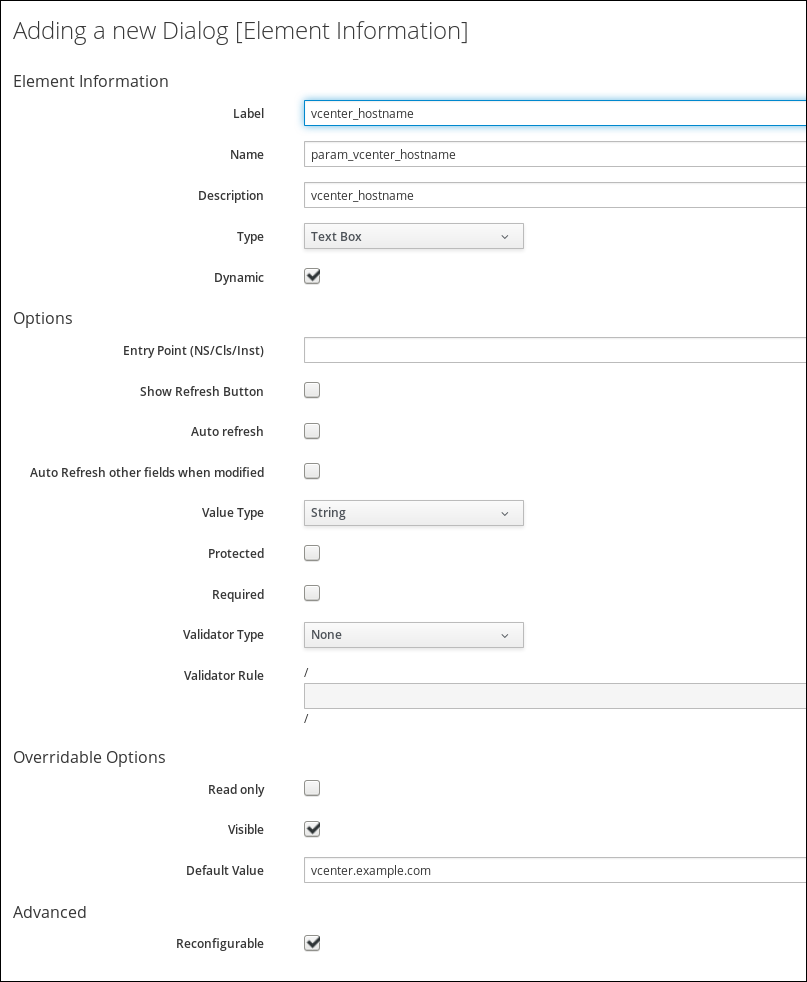
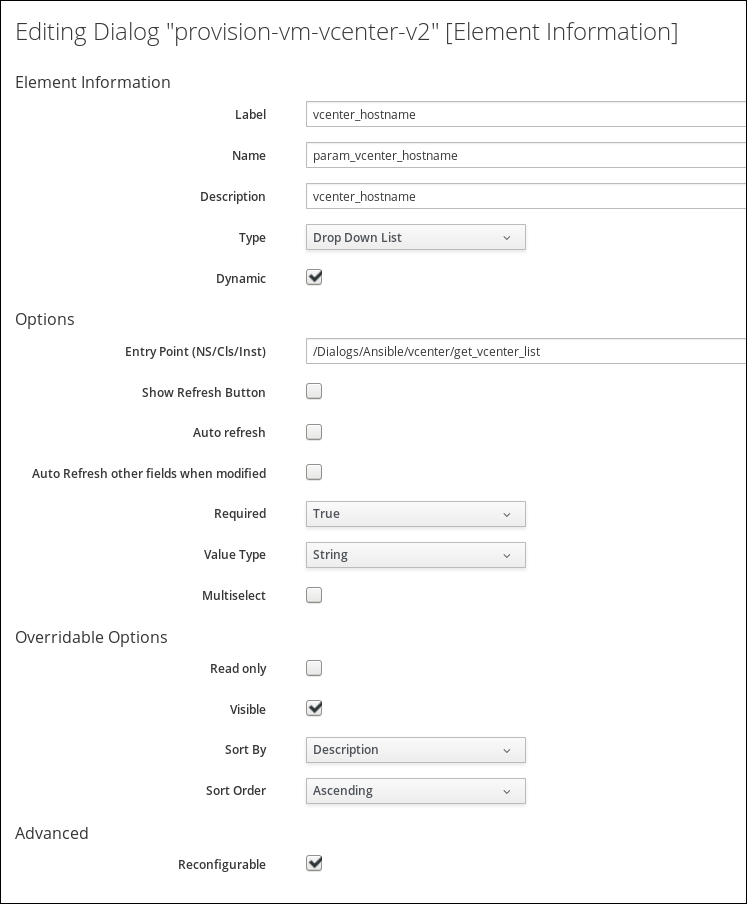
Click on the Element “vcenter_hostname” and change the type to “Drop down list”. Then click the check box “Dynamic”. This will change the form and show us new fields:
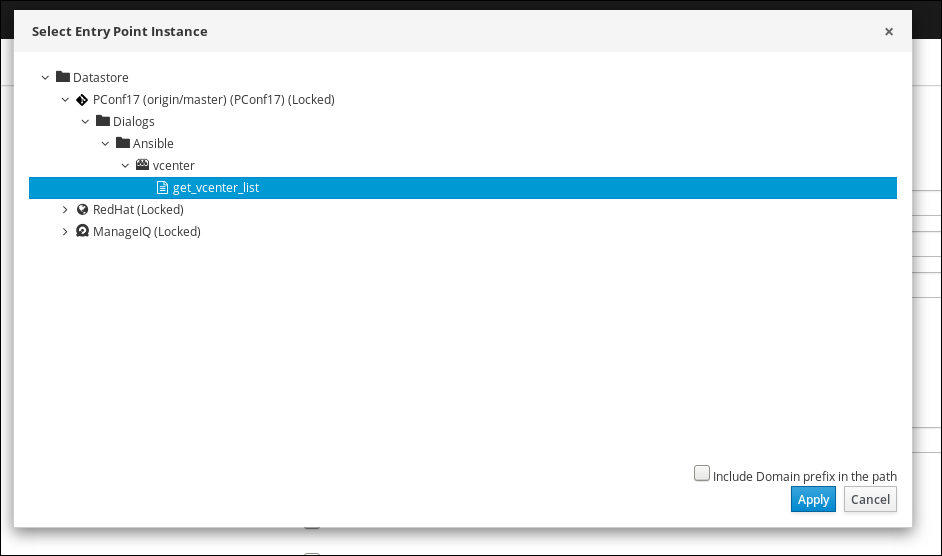
Click on “Entry Point”. A window will pop up which allows us to specify which method instance should be called to populate this Element.
Select the Instance called “get_vcenter_list” and click Apply.
The resulting Service Dialog Element should look like this:
Click on *Add to save all changes
Update the Service Catalog Item
We have to change the Service Catalog Item to use the Service Dialog we just created.
Navigate to Services -> Catalogs
Navigate to Catalog Items in the accordion on the left and click on the “Provision Virtual Machine” Service Catalog Item
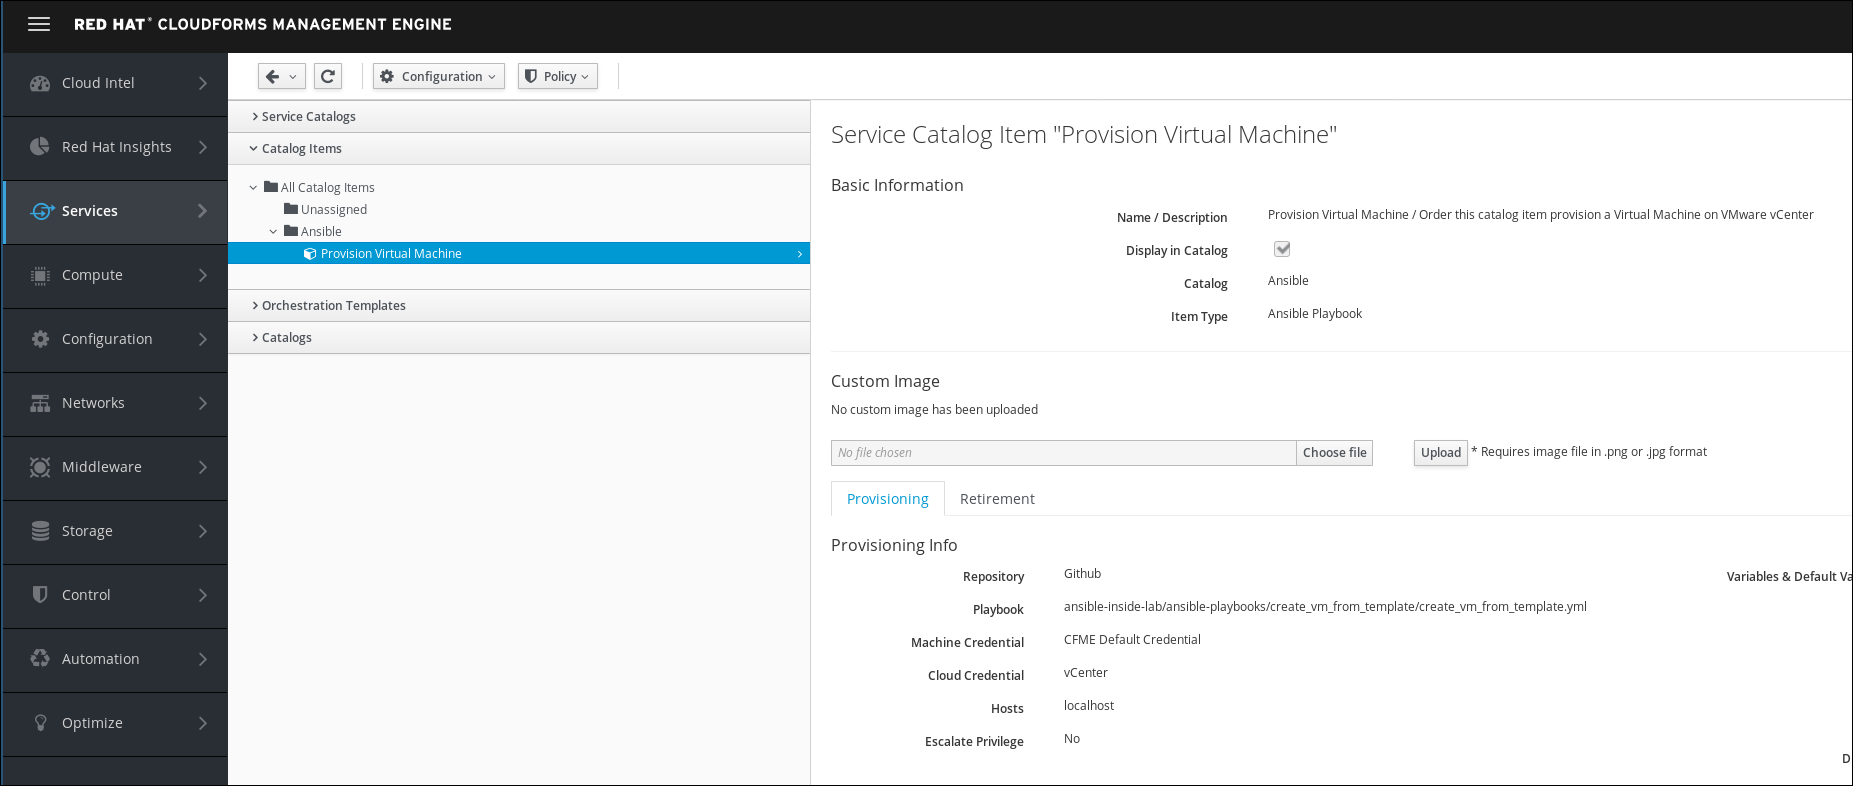
Click on Configuration -> Edit this Item
In the Dialog Section of the UI, change the value from “provision-vm-vcenter” to “provision-vm-vcenter-v2”
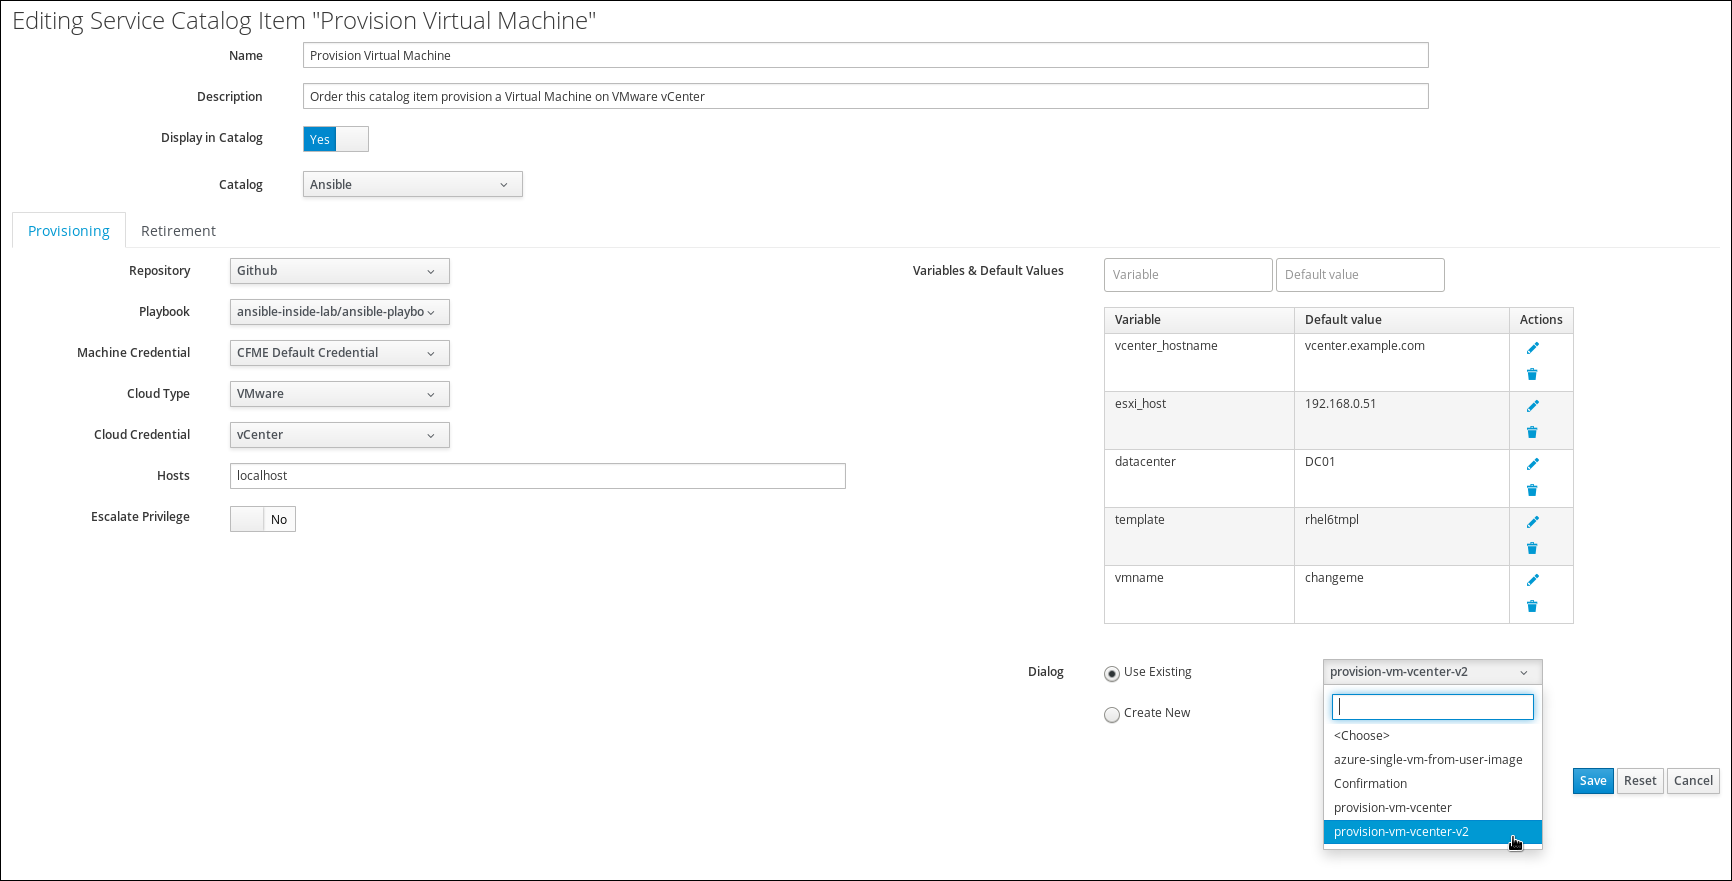
Click Save to commit the changes
Test the new Service Dialog
We want to see how the resulting Service Catalog Item looks like.
Navigate to Services -> Catalogs
Make sure you are on the “Service Catalogs” tab in the accordion on the left
Order the “Provision Virtual Machine” Service Catalog Item
Note the Service Dialog has changed compared to before. You should notice a few fields are gone and the vCenter is now a drop down list. “vCenter” should already be selected for you.

If you want, you can go ahead and submit the order