Run Ansible during provisioning
Run an Ansible Playbook during VM provisioning
With the integration of Ansible into CloudForms, we want to make it easier for customers and partners to modify out of the box behavior and make it easy to integrate with third party solutions.
In this part of the lab, we want to run an Ansible Playbook during VM provisioning to show how to modify the State Machine and how we can use Ansible Playbooks.
Create a new Automate Domain
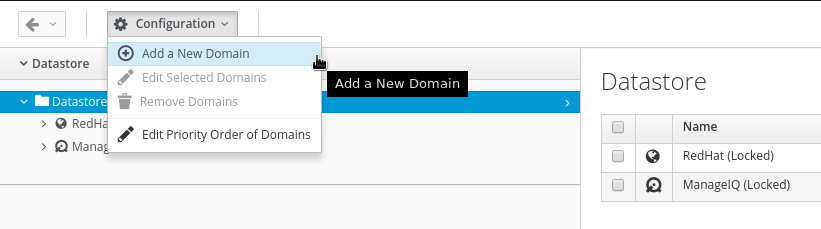
Since the Automate Domains shipped with CloudForms are read only, we have to create our own Domain first.
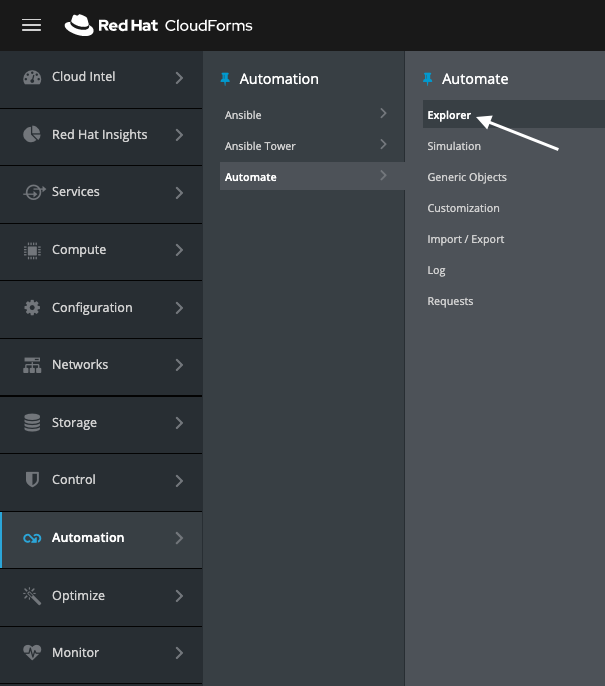
Navigate to Automation -> Automate
Click on Configuration -> Add a new Domain
Enter the following details:
Name: Lab
Description: Lab Domain
Enabled: Check
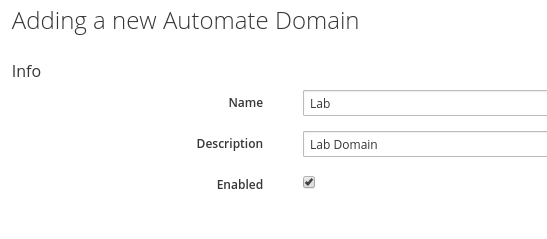
Click Add
Copy VM Provisioning State Machine
To be able to make changes to the State Machine, we have to copy it to our writeable Domain first.
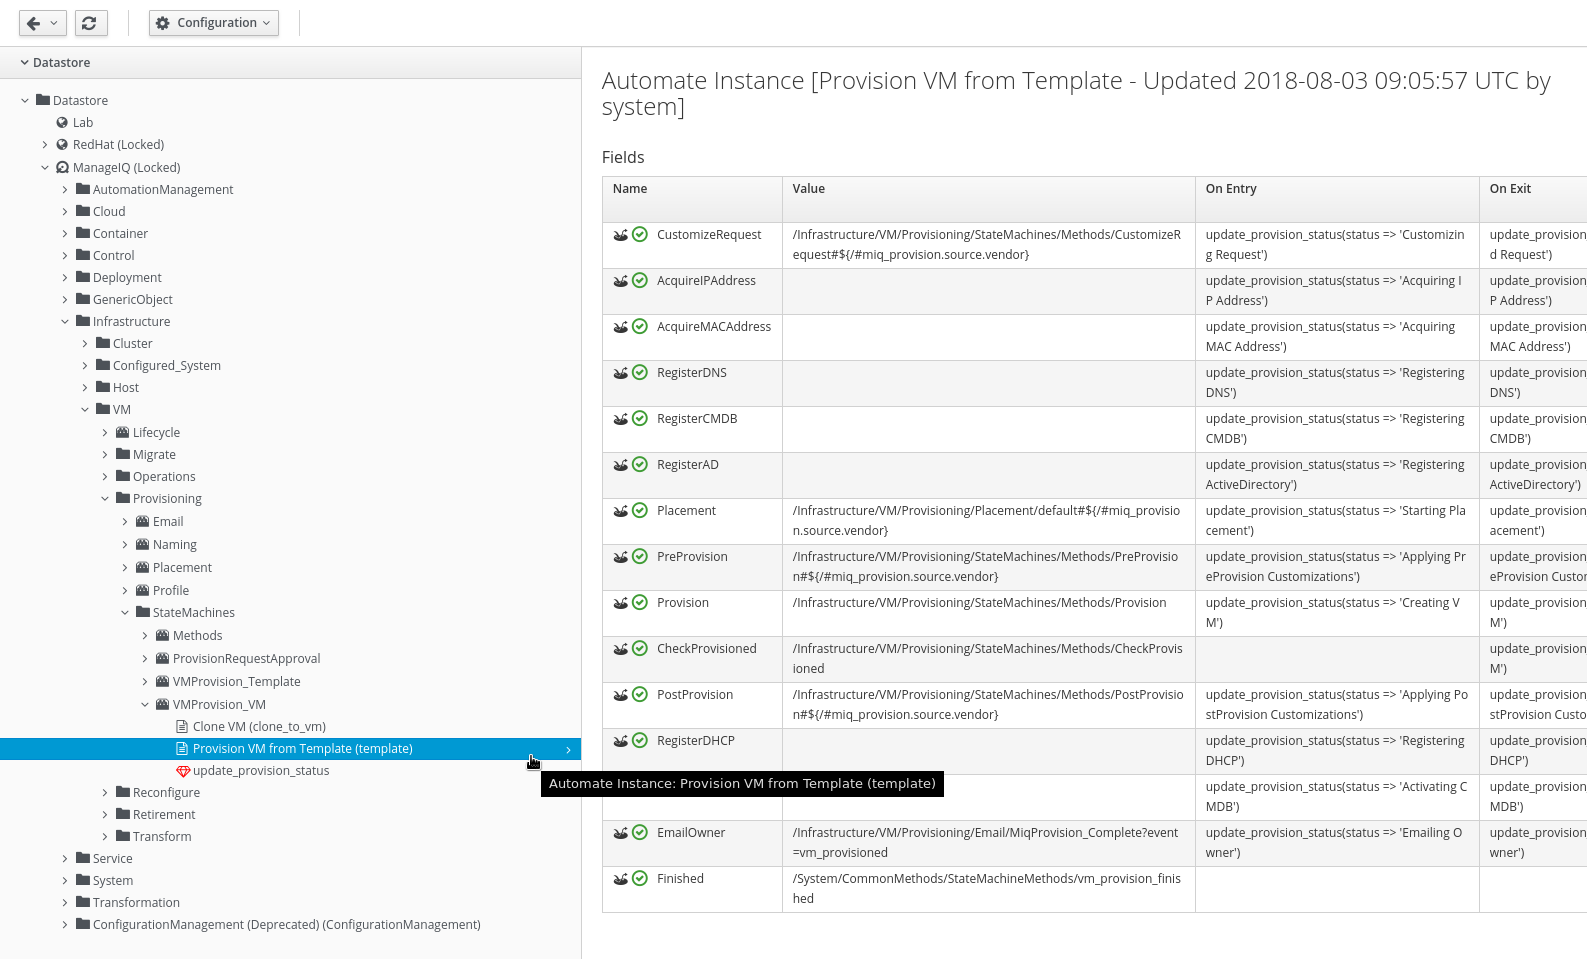
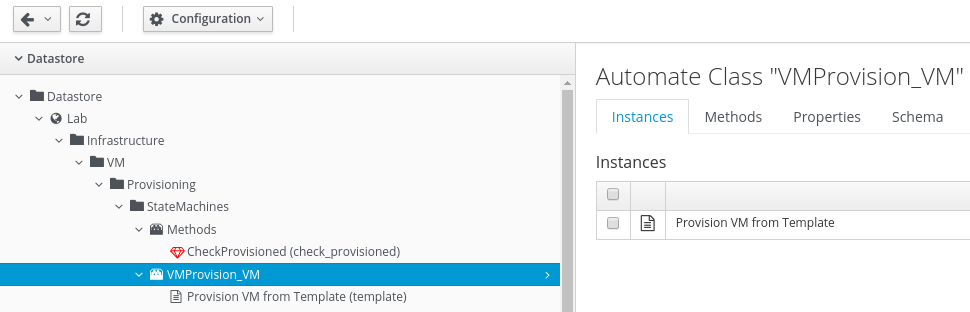
Navigate to the VM Provisioning State Machine:
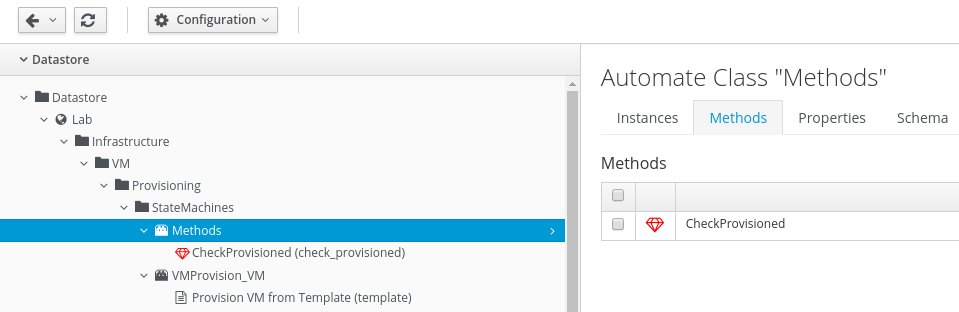
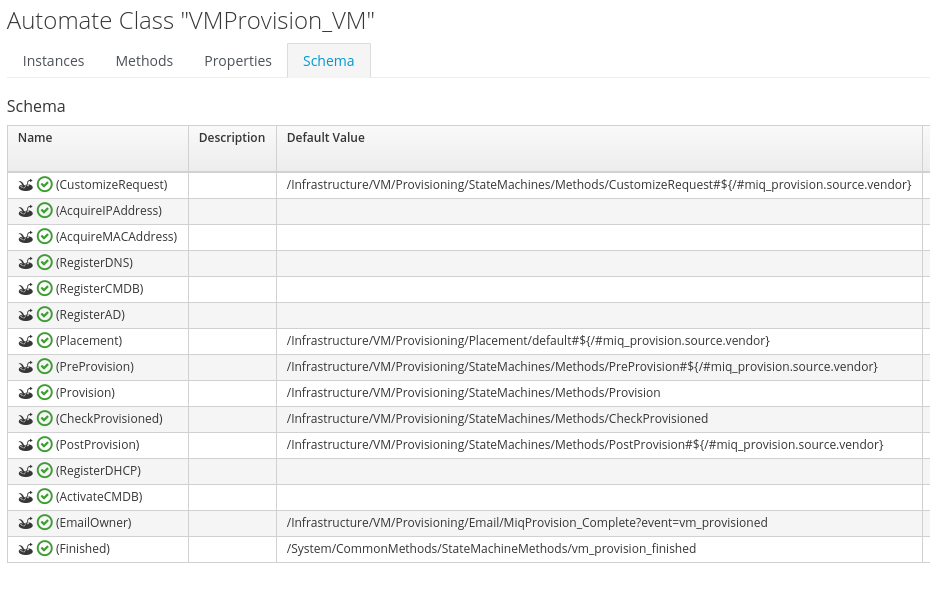
ManageIQ -> Infrastructure -> VM -> Provisioning -> StateMachines -> VMProvision_VM -> Provision VM from Template (template)
Click on Configuration -> Copy this Instance
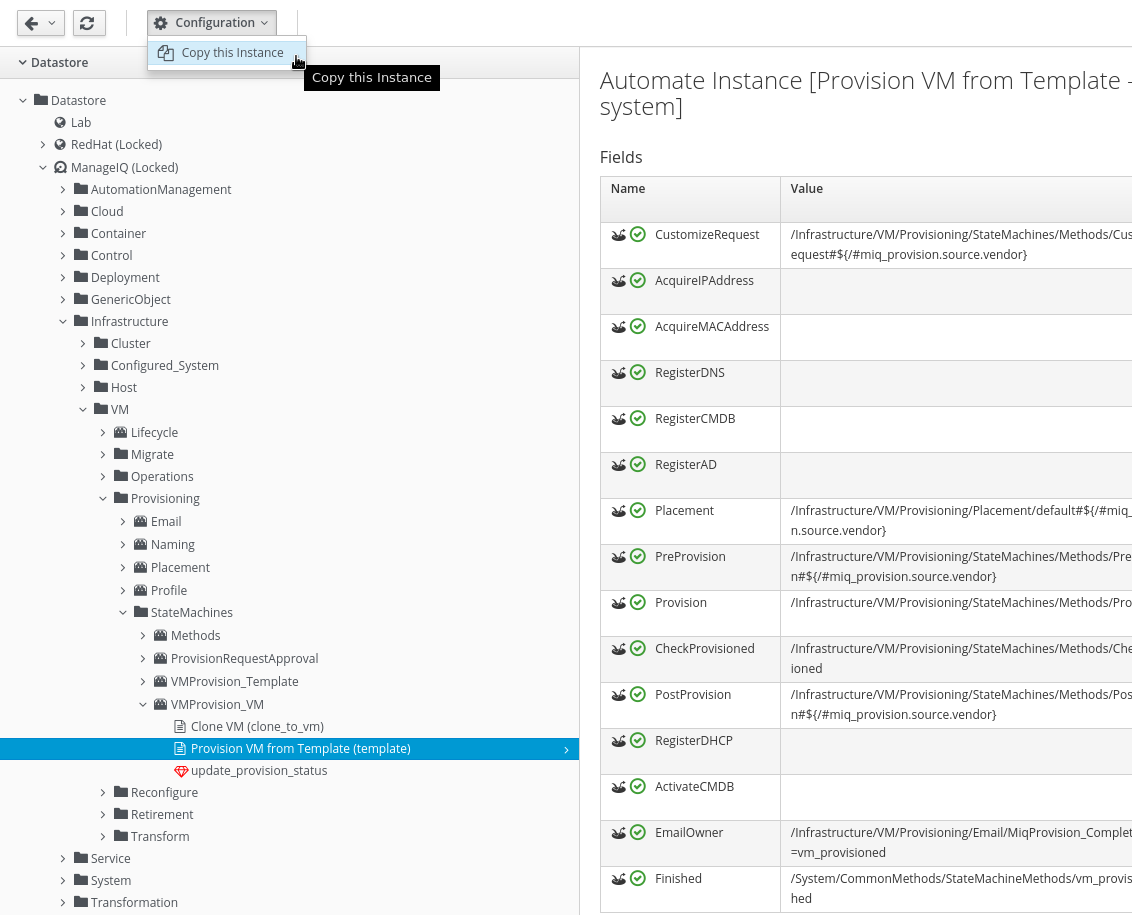
Make sure you highlight the “Provision VM from Template (template)” instance when initiating the copy!
Accept the defaults when confirming the copy
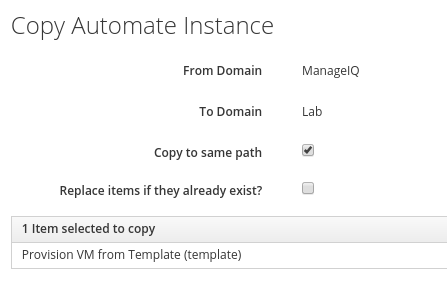
Click Copy to confirm
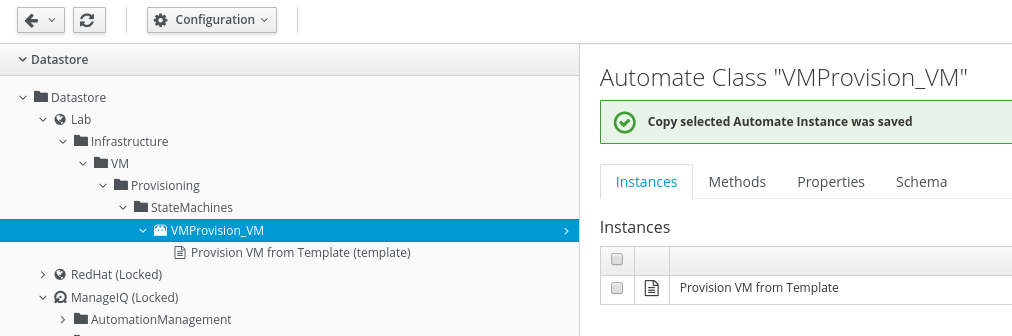
After the copy was completed, you should see a confirmation page
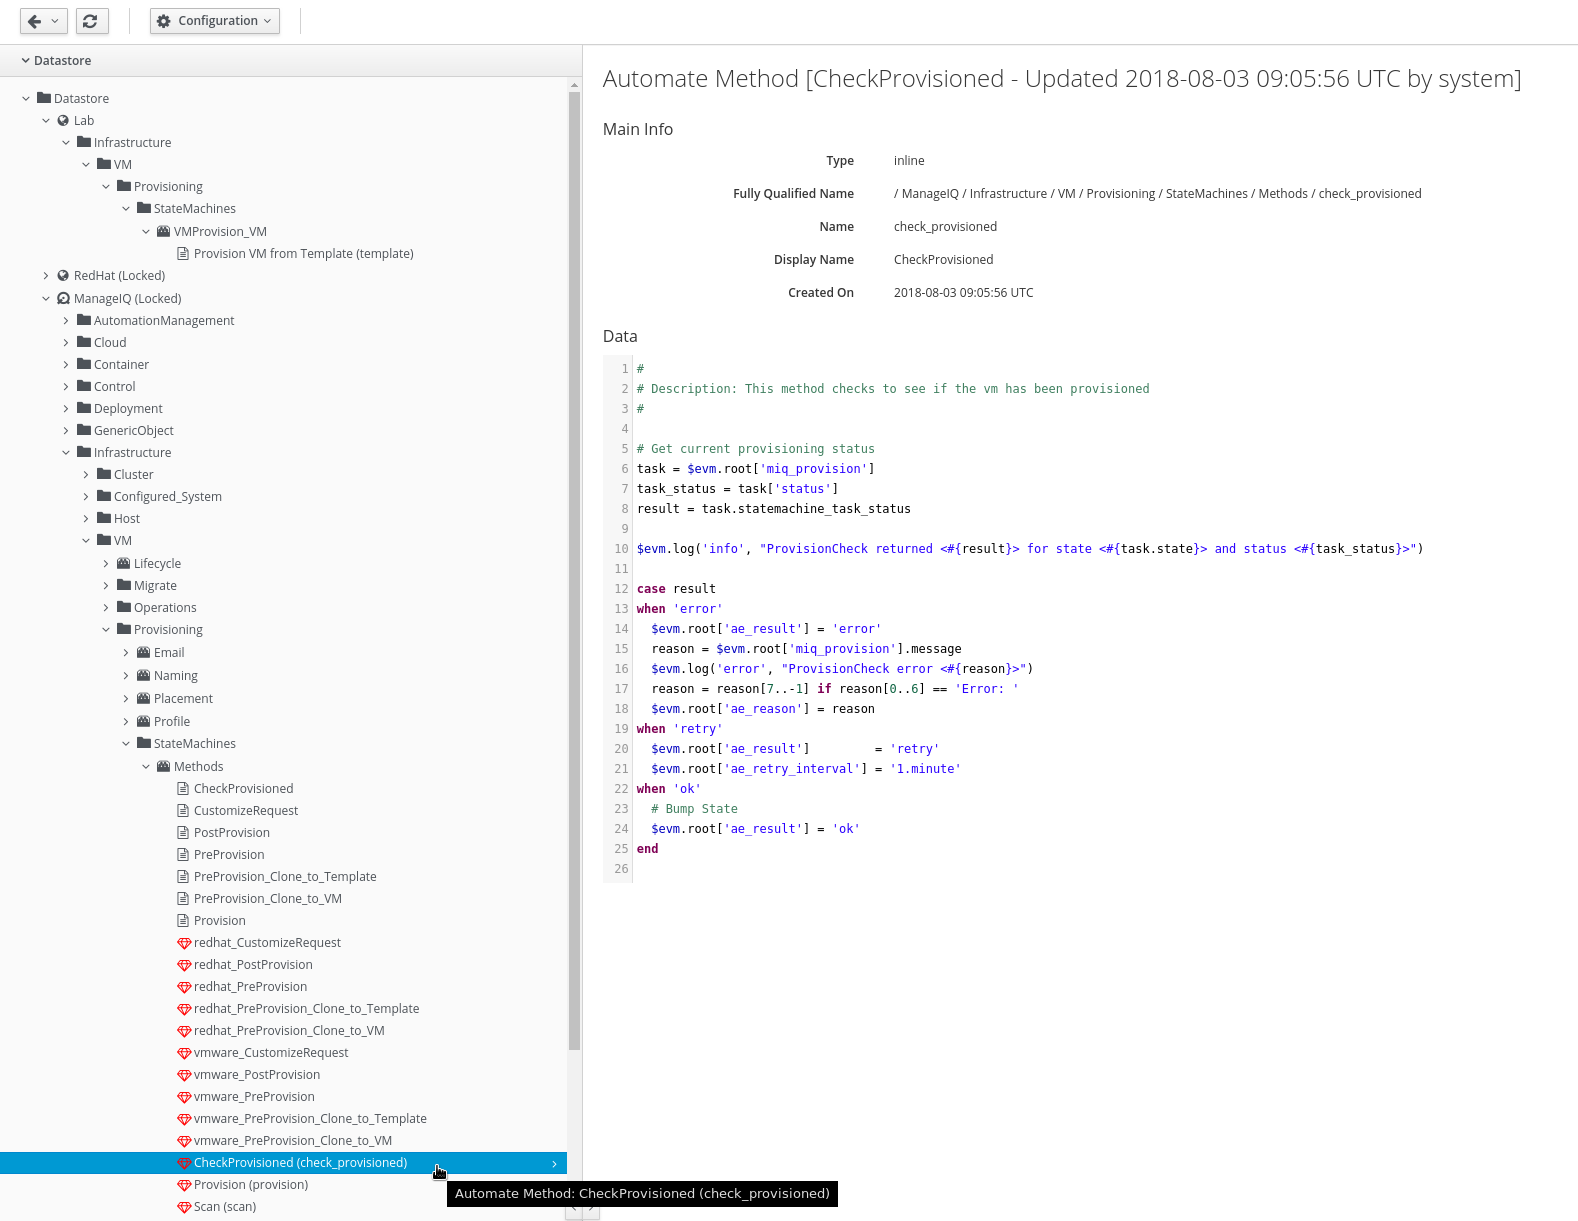
Copy CheckProvisioned Method
The out of the box code of CloudForms will assume a VM was properly created, when it was successfully copied. Since we want to run an Ansible Playbook inside the deployed Virtual Machine, we have to add an additional check. The State Machine should only continue if the VM has an IP address assigned.
We also need a copy of the CheckProvisioned method, to do that, navigate to ManageIQ -> Infrastructure -> VM -> Provisioning -> StateMachines -> Methods -> CheckProvisioned (check_provisioned)
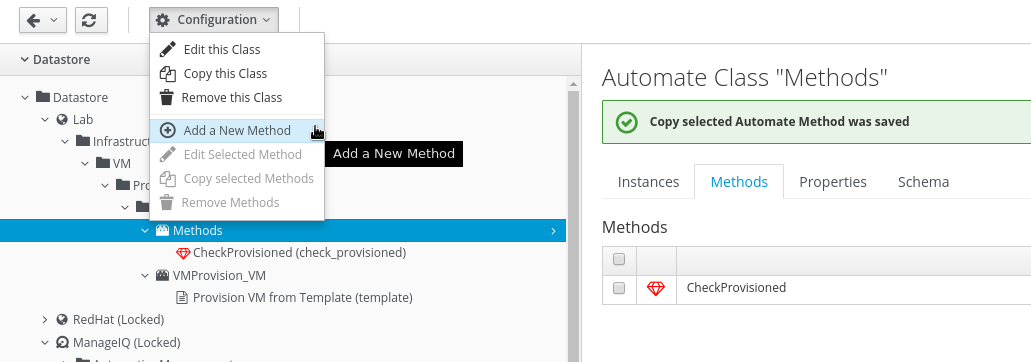
Click on Configuration -> Copy this Method
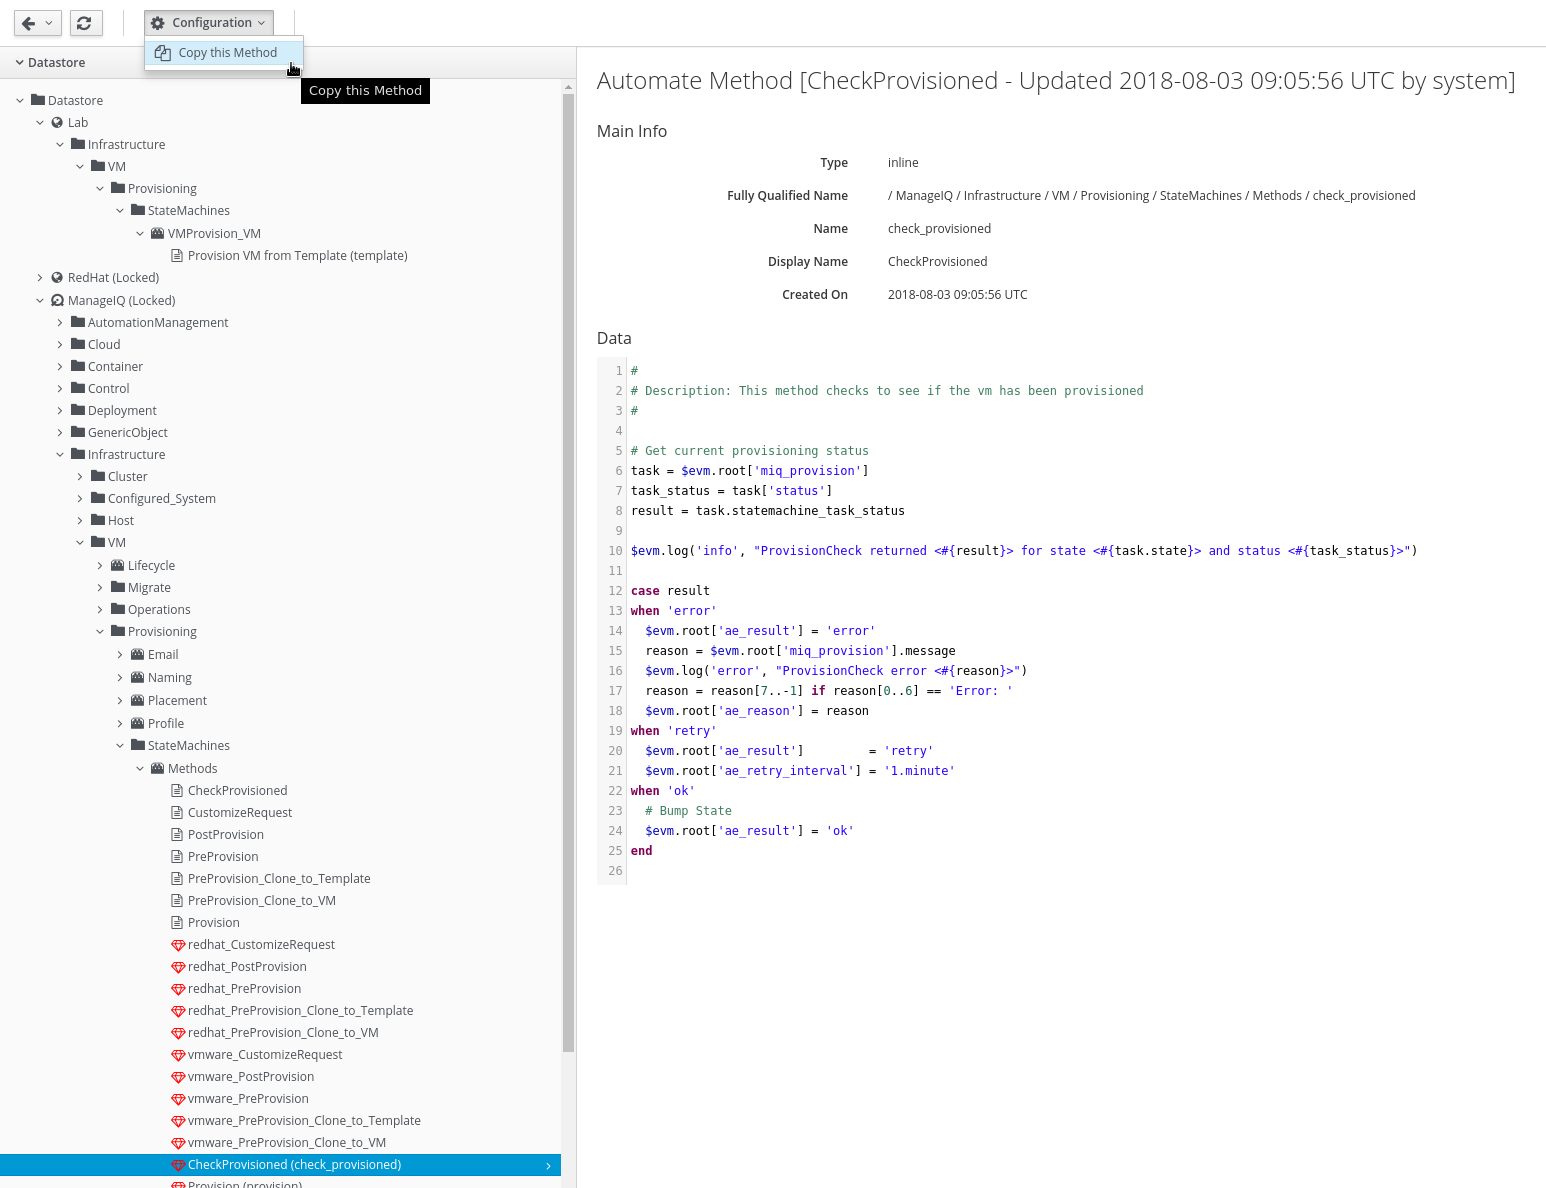
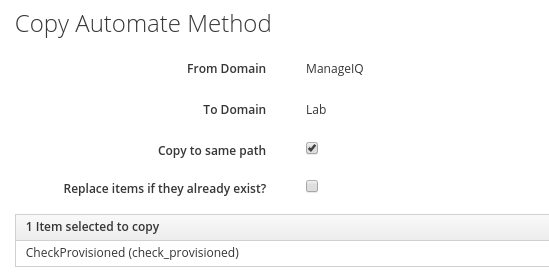
Keep the settings unmodified and click on Copy
After the copy was created, you should see a confirmation message
Click on Configuration -> Edit this Method

Add the end of the code, add the following snippet:
    vm = task.vm
    $evm.log("info","Current IP Addresses: #{vm.ipaddresses}") unless vm.nil?
    $evm.log("info", "VM is still nil") if vm.nil?

    if not vm.nil?
      if task.destination.ipaddresses.empty?
        $evm.root['ae_result']         = 'retry'
        $evm.root['ae_retry_interval'] = '1.minute'
      end
    end
This code will go into an additional retry, if the Virtual Machine does not have an IP address (yet).
The method should look like this now.
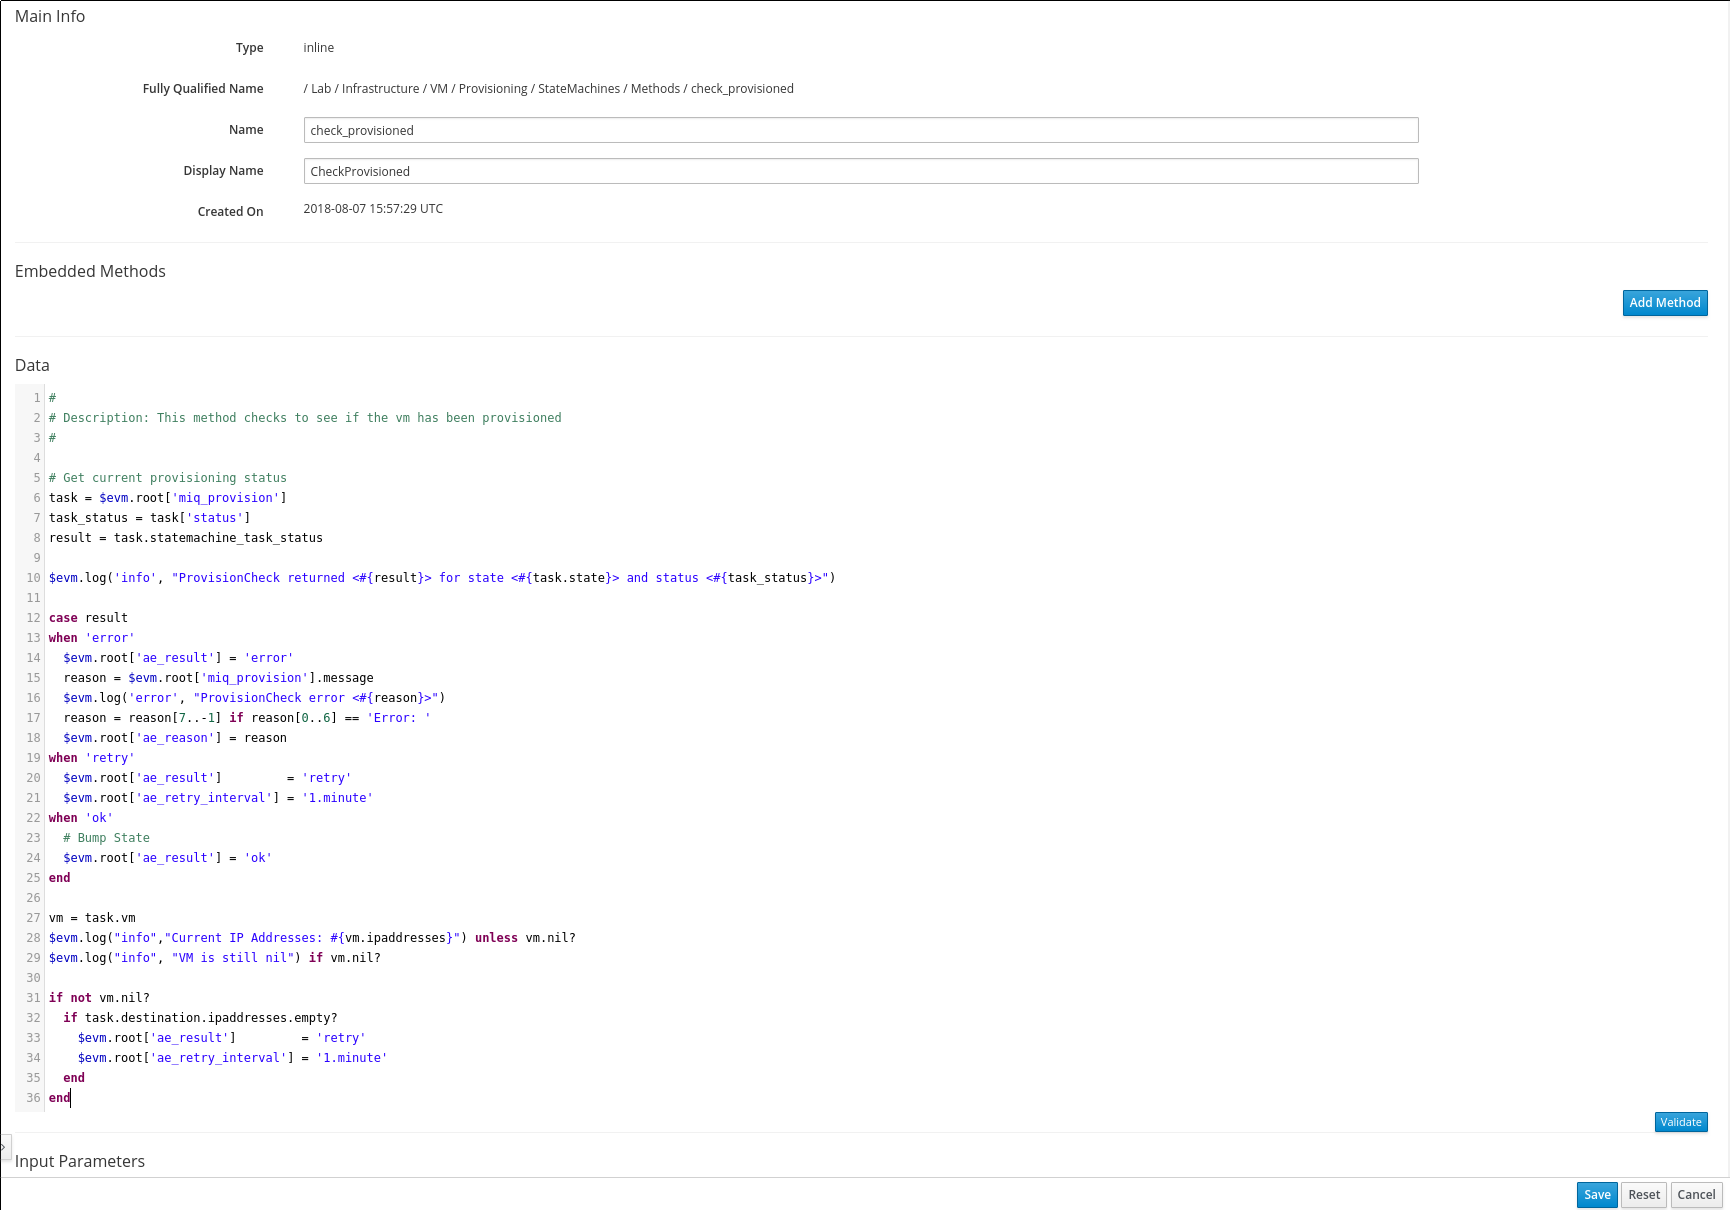
Click on Validate to perform a basic syntax check and Save if no errors were found.
Create the Ansible Playbook Method
Starting with CloudForms 4.6 we can create Methods of type “Playbook” which, instead of running Ruby code, execute an Ansible Playbook.
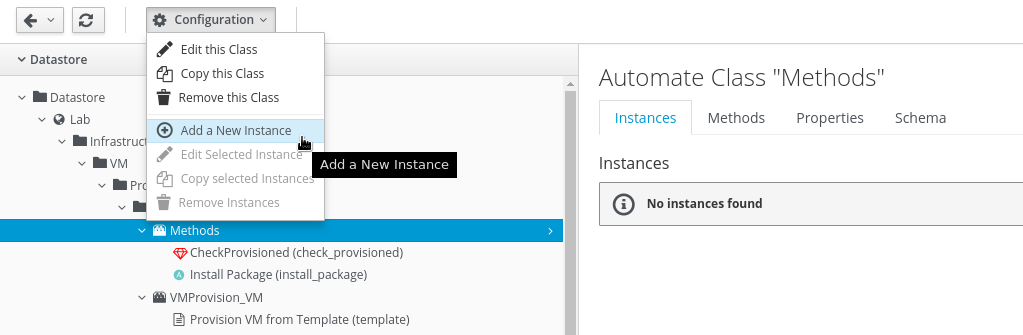
Click on the Methods Class and then the Methods tab in the right part of the window
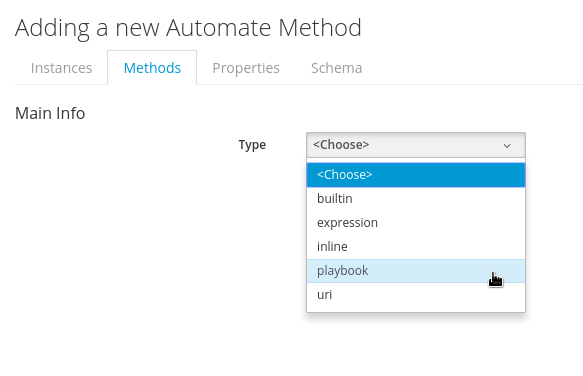
Create a new Method to run an Ansible Playbook. Click on Configuration -> Add a new Method
Switch the Method Type to “Playbook”
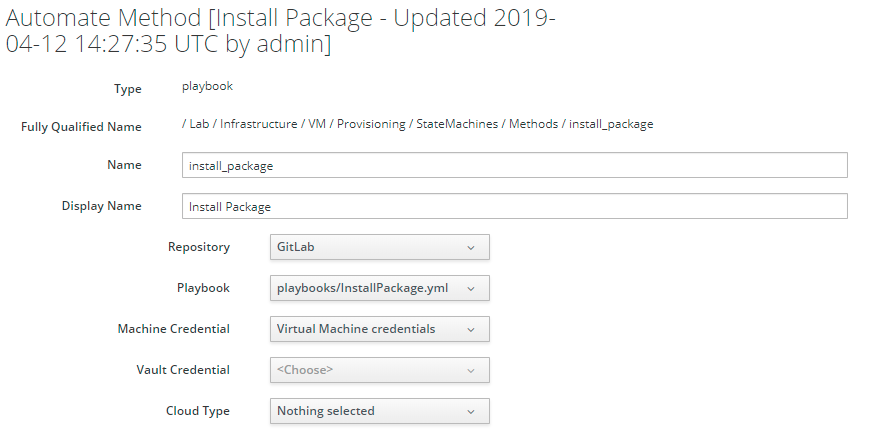
Use the following details to fill out the form.
Name: install_package
Display Name: Install Package
Repository: GitLab
Playbook: playbooks/InstallPackage.yml
Machine Credentials: Virtual Machine Credentials
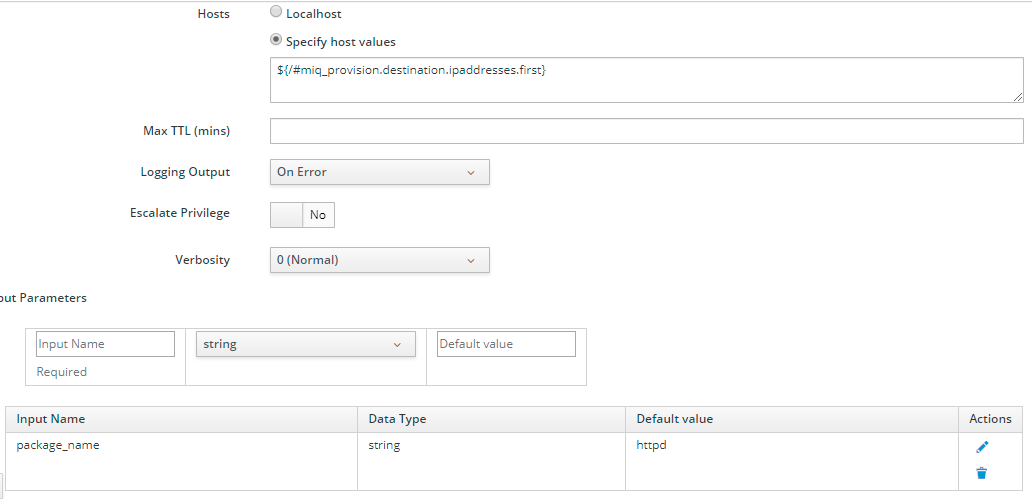
Hosts: Specify host values and enter the following string into the text field:
${/#miq_provision.destination.ipaddresses.first}
Pay attention to the special characters or the Playbook will not be executed on the correct Virtual Machine! The expression will configure CloudForms to use the first IP addresses of the provisioned Virtual Machine as the limit parameter when executing the Playbook.
Max TTL (mins): 30
Enter the following Input Parameters:
Input Name: package_name
Default Value: httpd
Don’t forget to click on the blue plus (+) icon to save the Input Parameter
Click Add to create the Ansible Playbook Method
To be able to call the Method from a StateMachine, we need an associated Instance. Click on the Instances tab and Configuration -> Add a new Instance
Enter the following details into the Dialog:
Name: install_package
Display Name: Install Package
Fields: In the table search the row “execute” and put “install_package” into the “value” field
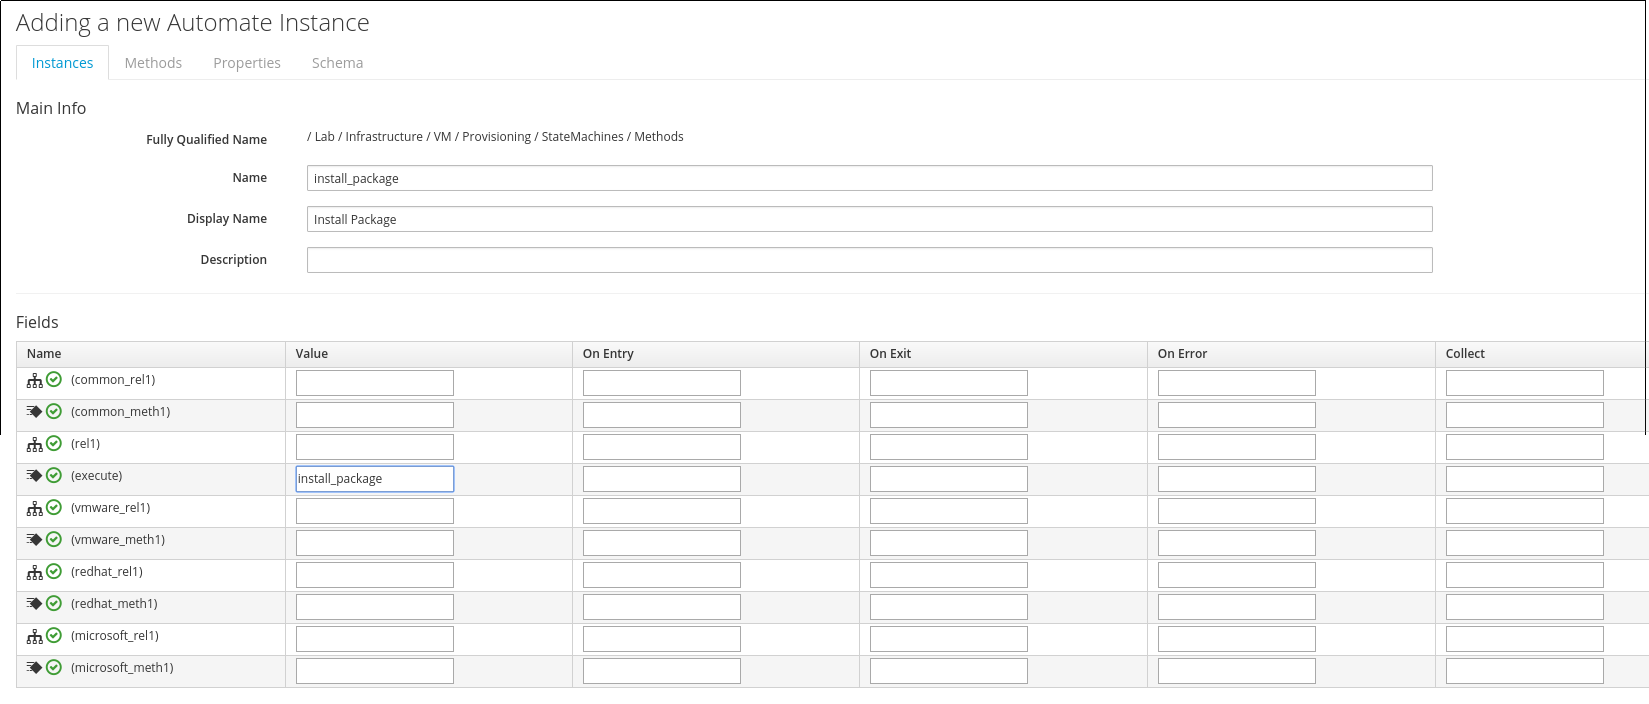
Click Add to save the Instance
Modify the Schema
To run the Ansible Playbook during Virtual Machine Provisioning, we have to add an additional state to the State Machine.
Click on the VMProvision_VM class
Switch to the Schema tab of the page
Click on Configuration -> Edit selected Schema
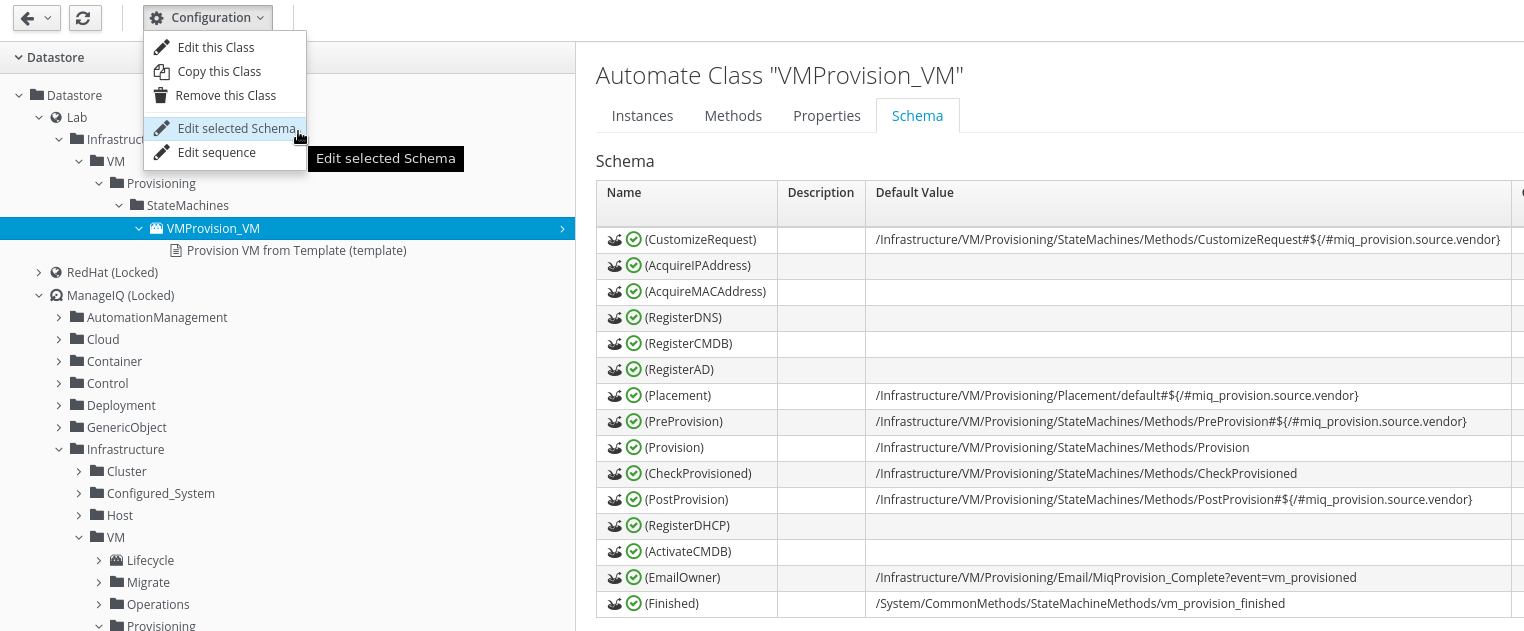
Add a new row with the following details:
Name: InstallPackage
Type: State
Data Type: String
Default Value: /Infrastructure/VM/Provisioning/StateMachines/Methods/install_package
Click the little plus symbol at the beginning of the row to apply the change
Click Save to save the new Schema
After the change was applied, the updated Schema should look like this:
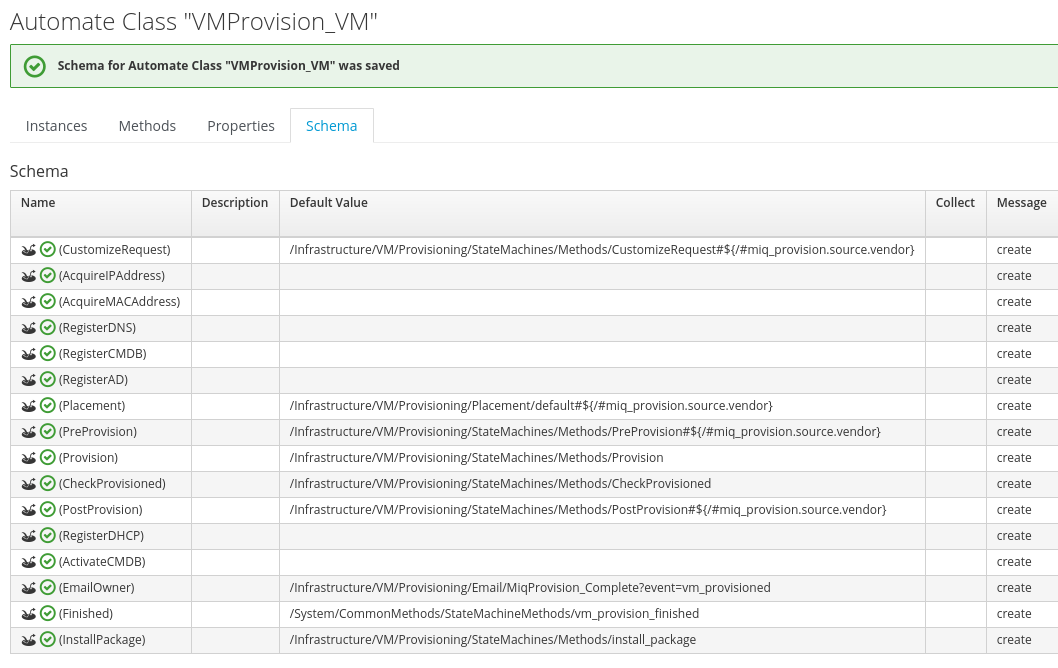
There is a new line “InstallPackage” at the bottom of the table
Do not try to continue with the next step, if you do not see the new “InstallPackage” line.
Change Schema Sequence
To execute this new state after the Virtual Machine was created, we have to change the sequence.
Click on Configuration -> Edit Sequence

Use the arrow buttons to move the line “InstallPackage” between “CheckProvisioned” and “PostProvision”.
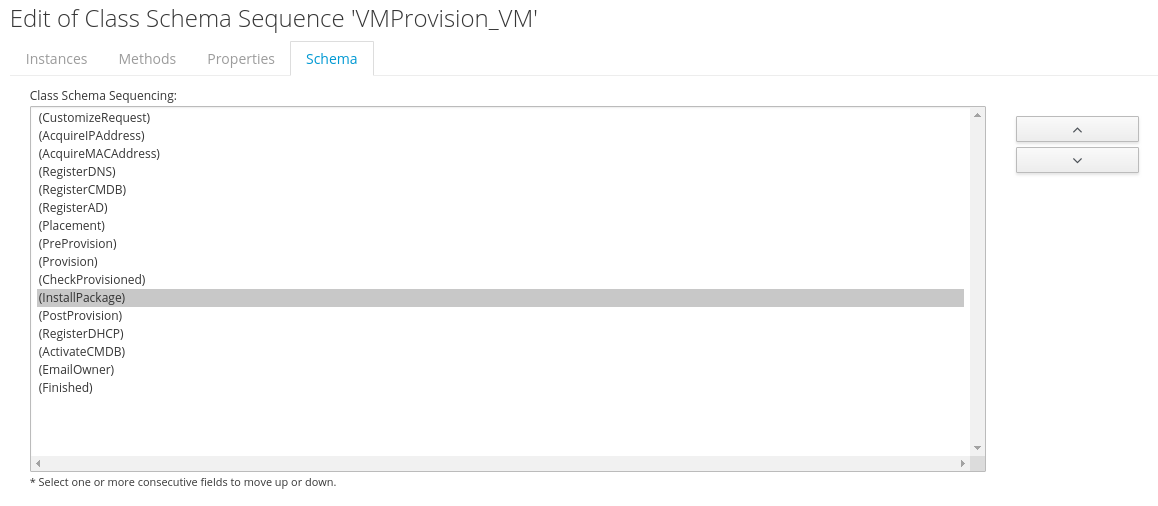
Click Save to apply the Schema sequence change
Test the updated Virtual Machine Provisioning State Machine
We want to verify the applied changed by deploying a Virtual Machine and check if httpd was actually installed properly.
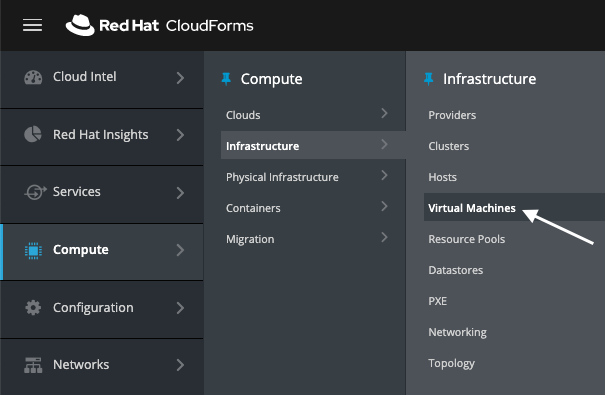
Navigate to Compute -> Infrastructure -> Virtual Machines
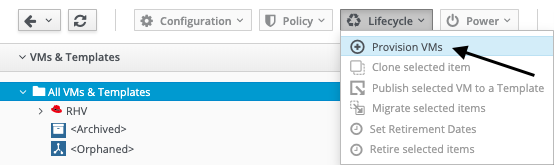
Click on Lifecycle -> Provision VMs
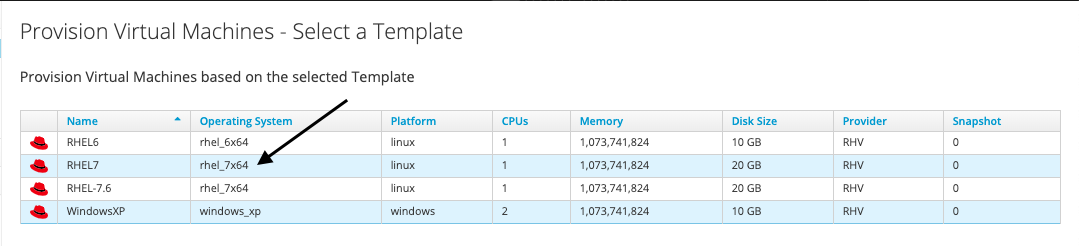
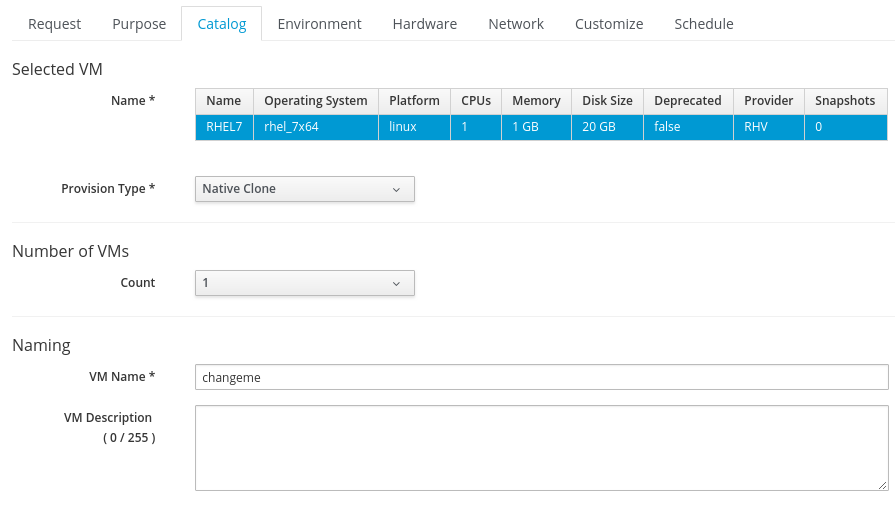
Select the “RHEL7” template
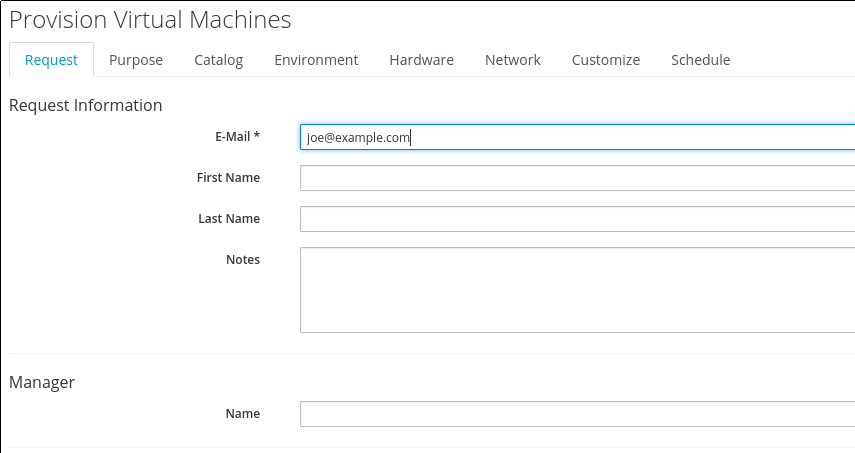
On the Requests tab the email address is the only required field. Enter your email address and optionally enter some data into the other fields as well
Switch to the Catalog tab and specify a VM name
Make sure to not use an existing name or provisioning will fail. You can use “changeme” and CloudForms will automatically assign a name to the Virtual Machine.
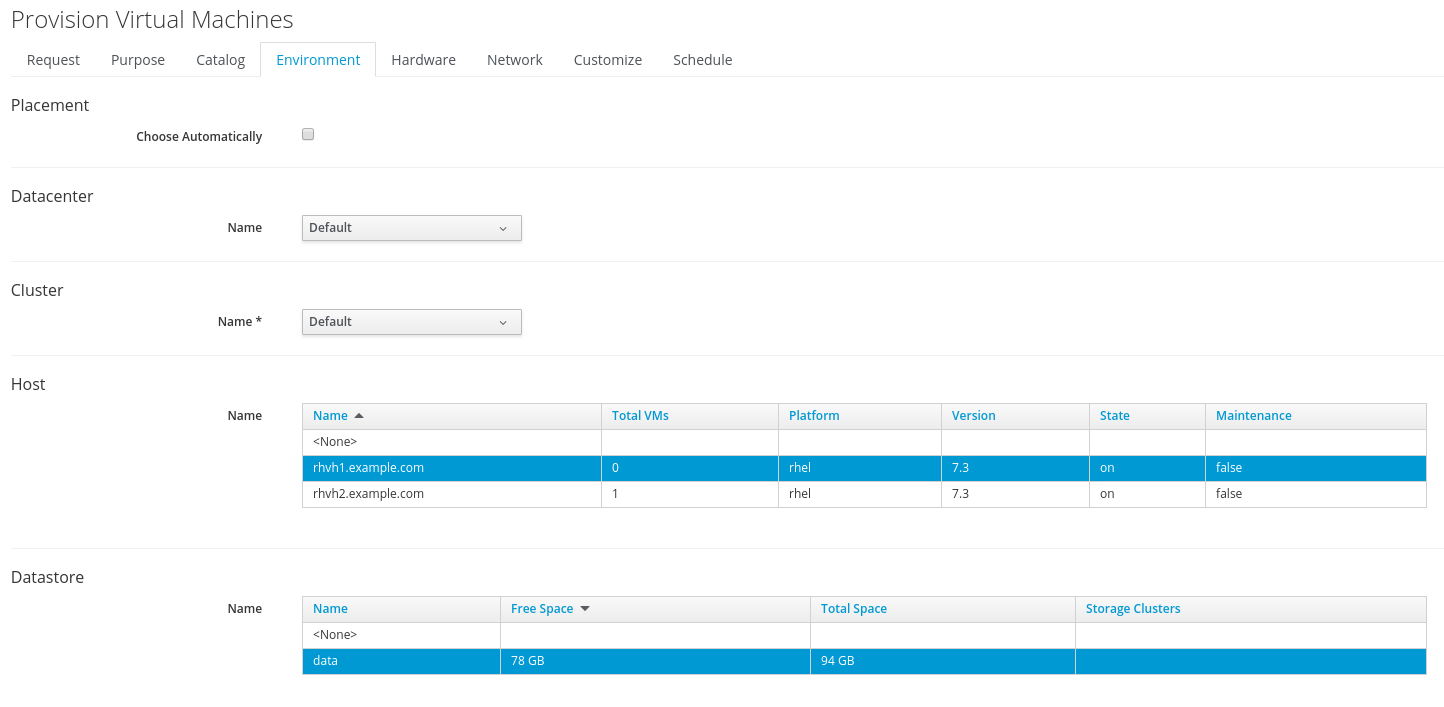
Switch to the Environment tab and check the following fields:
Choose Automatically: not selected
Datacenter: Default
Cluster: Default
Host: rhvh1
Datastore: data
Click Submit to place your request
You will be redirected to the Requests page. You can use the Refresh button on the top of the page, since it does not automatically reload, to watch your request progressing.
In this lab environment, the Virtual Machine is not accessible directly from the internet. Choose one or more of the following options to verify the Playbook did execute
Open a remote Console: Navigate to the Virtual Machine you just ordered and click on Access -> VM Access
If you do this the first time, your Web Browser might block the Popup Window!
Perform Smart State Analysis: Navigate to the Virtual Machine you just ordered and click on Configuration -> Perform SmartState Analysis. The action can take a few minutes to complete. After it finished, you should see the list of installed packages and can verify httpd is on the list
Check the log files: First you will have to SSH into the workstation and from there you can log into CloudForms. You should find the hostnames in the RHPDS details. The Ansible logs can be found in /var/lib/awx/job_status.