Custom Button Visibility
Button visibility and enablement
Starting with CloudForms 4.6, we can make custom buttons visible if certain requirements are met. We can also make the button active or inactive as needed. Both features significantly improve the user experience by simplifying the interface and making it more dynamic.
Button enablement
The Enablement expression is validated to enable or disable the button based on the specified condition. This allows you to enable the button only if some specific requirements are met. In the example below, we want to run an Ansible Playbook inside the VM. The expression validates the VM Power State and the button will be disabled if the VM is not powered on. An explanation text will inform the user why the button is disabled, when the mouse pointer hovers over it. The text can also provide guidance on how to solve the issue.
Button visibility
The Visibility allows you to define an expression which is validated to decide if the button should be shown at all. For example, if the guest Operating System is not Linux, the Ansible Playbook provided in this example will not work. If CloudForms detects a non-Linux VM, the menu will not be shown at all.
Role based access control
Note that the Role Access settings on the bottom of the dialog are the same as in previous CloudForms releases. This option allows us to make the button only available for certain user roles, for example administrators, operators or normal users.
Configure Enablement
Let’s configure an regular expression which verifies the Virtual Machine is powered on.
Navigate to Automation -> Automate -> Customization
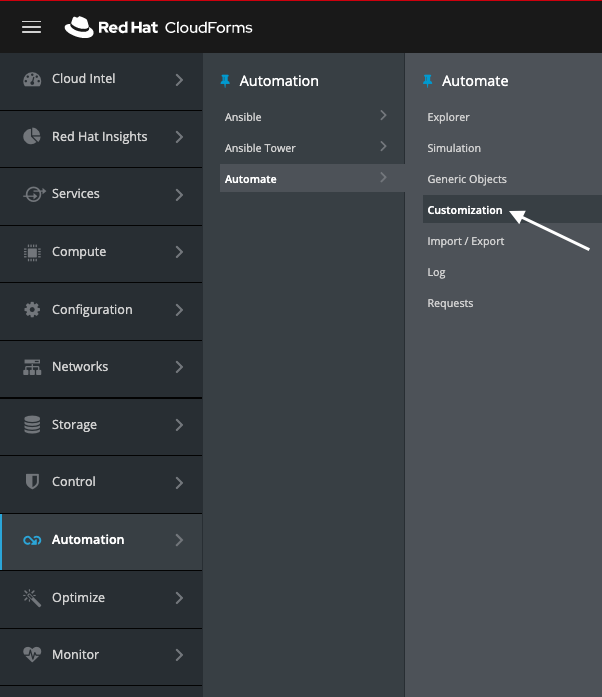
You should already be in this menu if you followed the previous steps
Click on the “Install Package” Button you created in the previous lab
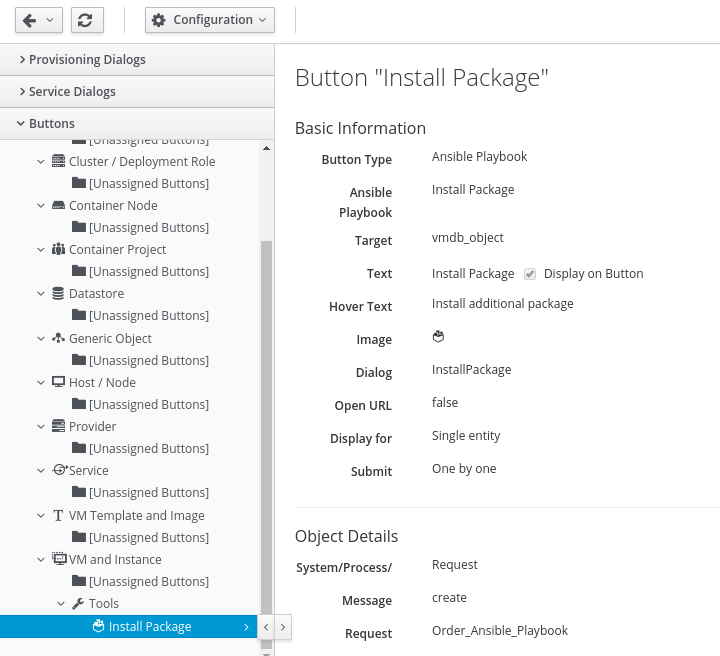
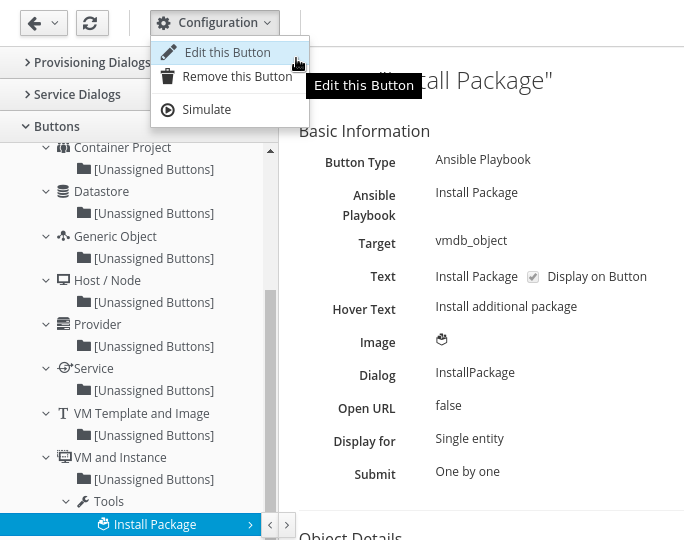
Click on Configuration -> Edit this Button
Click on the Advanced tab
Click on Define Expression
Build the following Expression:
Field: VM and Instance - Power State = on
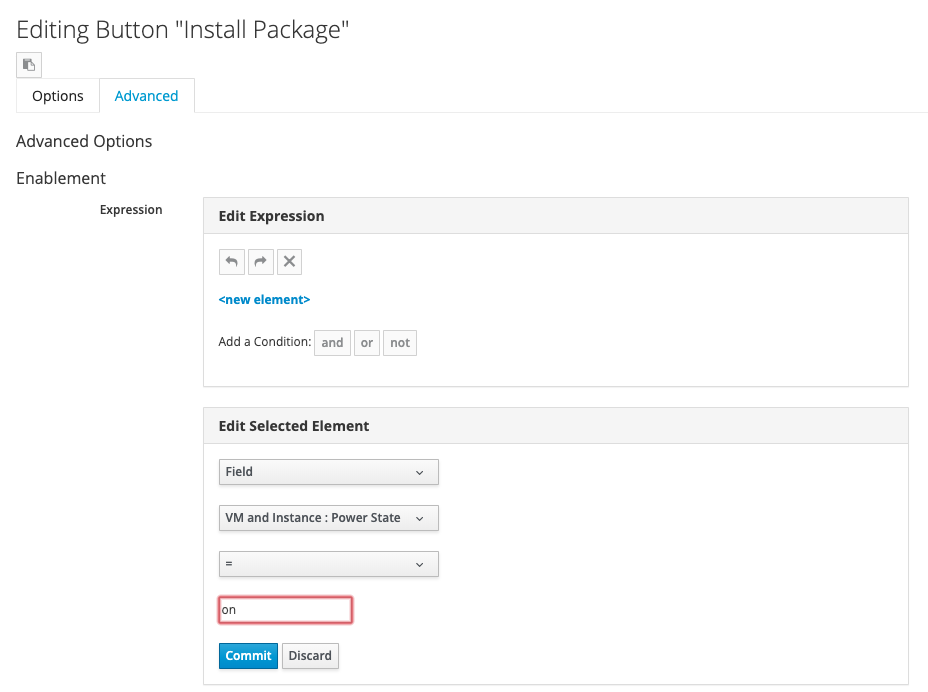
Don’t forget to click on the check mark to save the expression!
Add Disabled Button Text: VM must be powered on to run Ansible Playbook
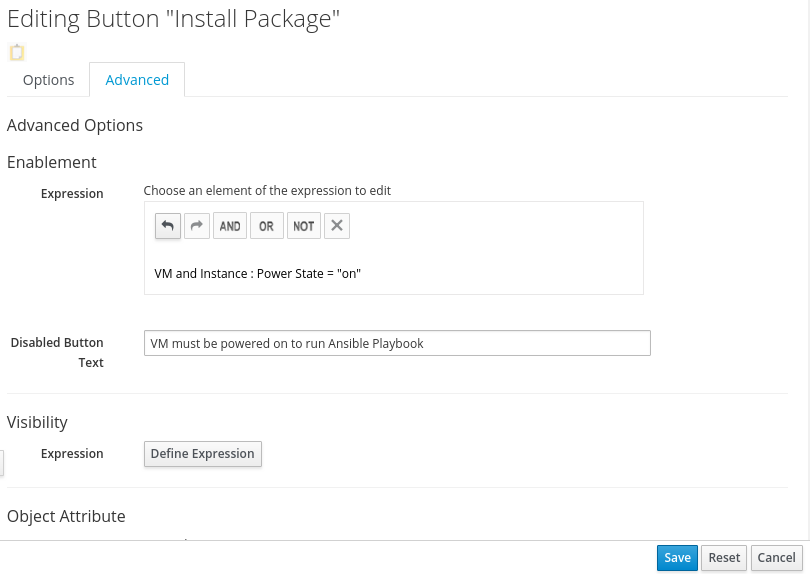
Click Save
Configure Visibility
The install package Playbook will only work on RHEL 7 Virtual Machines. It will fail on RHEL 6 Virtual Machines, because only RHEL 7 repos has been configured for this VM. It is a good idea to not show the button if the guest Operating System of the selected Virtual Machine does not meet the requirements. With the new “Visibility” expression filter, this is easy to implement.
Navigate to Automation -> Automate -> Customization

You should already be in this menu if you followed the previous steps
Click on the “Tools” Button Group you created in the previous lab
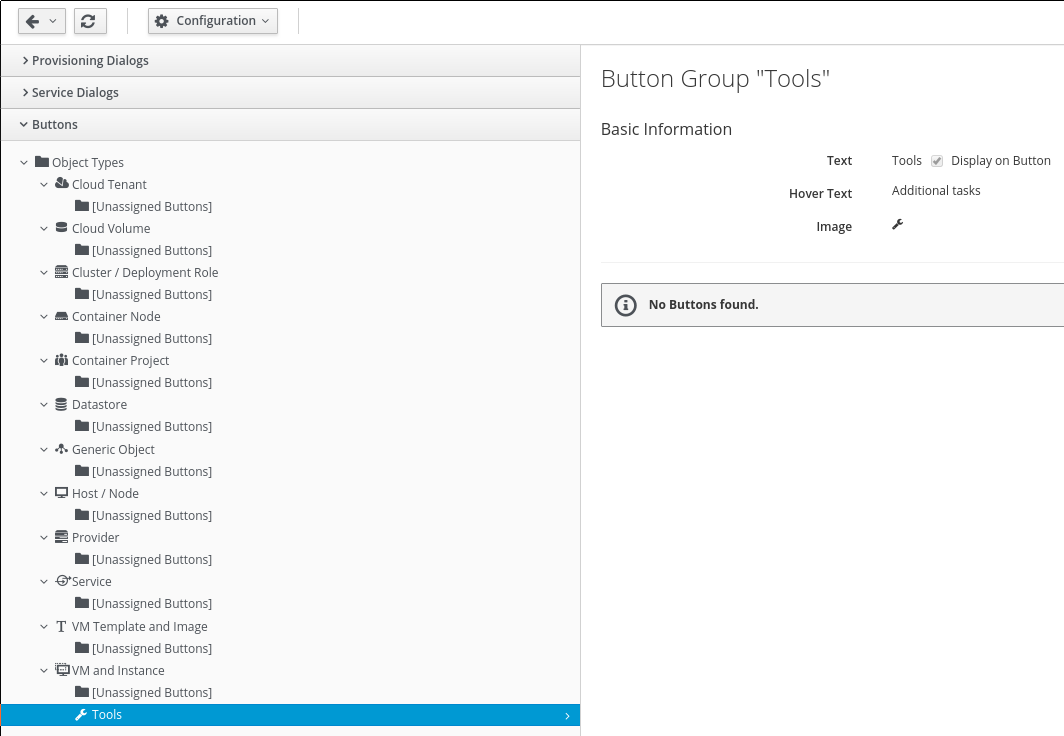
Click on Configuration -> Edit this Button

Click on the Advanced tab
In the Visibility section of the dialog, create the following expression: VM and Instance.OS: Product Name - STARTS WITH “rhel_7” . We will guide you through the expression creation process.
In the first dropdown, select “Field” as a value. In the next dropdown select “VM and Instance.OS: Product Name” and in the last dropdown select “STARTS WITH”. Last but not least, fill the text box with “rhel_7”.
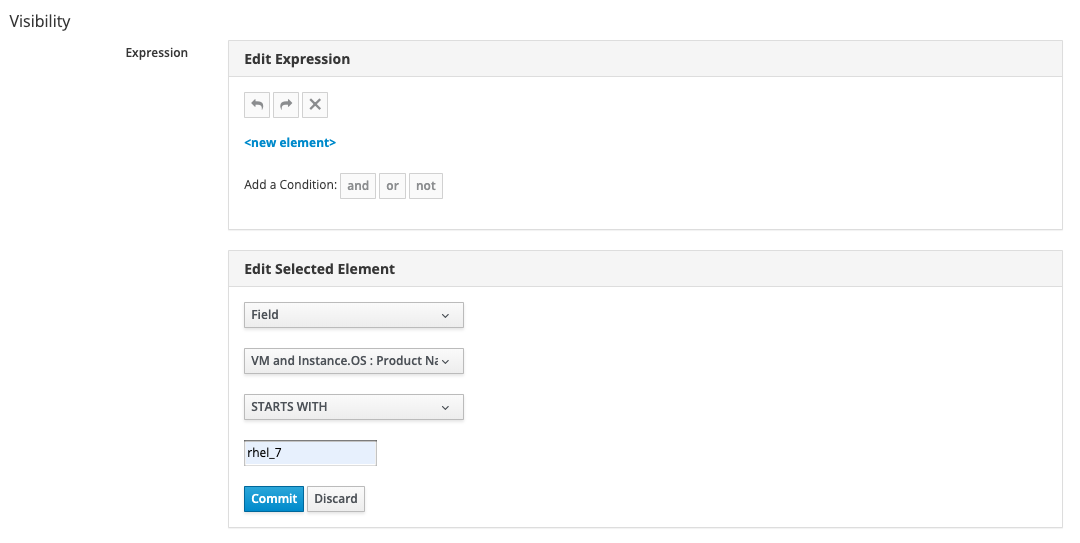
Don’t forget to click commit to save the expression!
Once completed the expression you should see this:

Now the expression of your button looks like this:
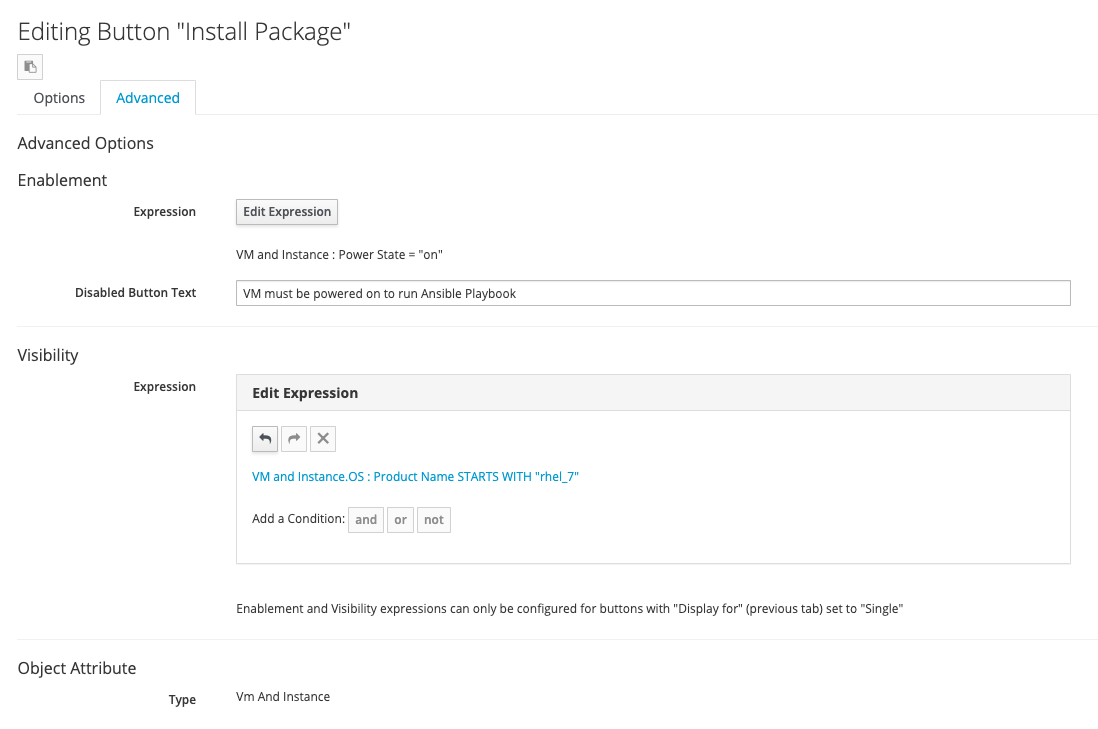
Click Save and continue with the lab.